How to Use a Breadboard for Circuits
Are you new to the world of electronics and looking to learn how to use a breadboard for circuits? A breadboard is a fundamental tool that allows you to quickly and easily prototype electronic circuits without the need for soldering. In this guide, we will walk you through the basics of breadboard usage and help you get started on your journey to creating electronic projects.
What is a Breadboard?
A breadboard is a rectangular plastic board with a series of holes arranged in a grid pattern. These holes are used to insert electronic components and connect them together to form a circuit. The holes are typically connected in rows and columns, allowing you to easily create circuits without the need for soldering.
Setting Up Your Breadboard
Before you start building circuits on a breadboard, it’s essential to understand how it is laid out. Most breadboards have two sets of rows – one for connecting components horizontally, and one for connecting components vertically. The rows on each side of the breadboard are typically connected internally, so components plugged into the same row are electrically connected.
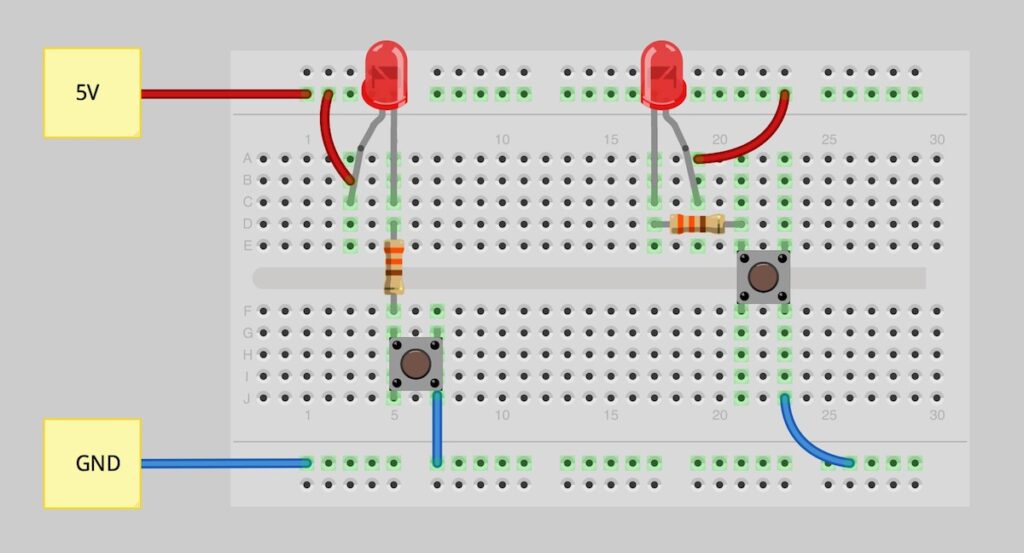
To set up your breadboard, start by connecting a power source such as a battery or a power supply to the breadboard. You can do this by connecting the positive terminal of the power source to the red rail on one side of the breadboard and the negative terminal to the blue rail on the other side. This will provide power to the components you connect to the breadboard.
Building a Circuit on a Breadboard
Once you have set up your breadboard, you can start building circuits by inserting components into the holes on the board. Components with two or more leads, such as resistors, LEDs, and integrated circuits, can be easily inserted into the breadboard. Make sure to place the components so that their leads are connected to the appropriate rows on the breadboard.
To connect components together, you can use jumper wires to create connections between different rows on the breadboard. Jumper wires are insulated wires with pins on either end that can be easily inserted into the breadboard. By connecting the pins of different components with jumper wires, you can create a complete circuit on the breadboard.
Testing Your Circuit
Once you have finished building your circuit on the breadboard, it’s essential to test it to ensure that it functions as intended. You can do this by connecting the power source to the breadboard and observing the behavior of the components. If the circuit is not working correctly, double-check the connections and component placements on the breadboard.
By following these steps, you can learn how to use a breadboard for circuits and start creating your electronic projects. Breadboards are versatile tools that allow you to experiment with different circuit configurations and test ideas quickly. With practice, you can become proficient at using breadboards to prototype circuits and bring your electronic projects to life.
Now that you have a better understanding of how to use a breadboard for circuits, why not try building a simple LED circuit or experimenting with different resistor values? The possibilities are endless when it comes to electronic prototyping, so don’t be afraid to dive in and start creating!


