How to Set Up a DIY Home Automation System with ESP32
Are you interested in setting up a home automation system but don’t want to break the bank? With the ESP32 microcontroller, you can create your own DIY smart home system that is both affordable and customizable. In this article, we will guide you through the process of setting up a home automation system with ESP32. Let’s get started!
What You Will Need
- ESP32 Development Board
- Relay Modules
- Sensors (Motion, Temperature, Humidity, etc.)
- LEDs
- Jumper Wires
- Breadboard
- Micro USB Cable
- Power Supply
These are the basic components you will need to set up a simple home automation system with ESP32. You can always add more sensors and modules based on your specific needs and preferences.
Setting Up the Hardware
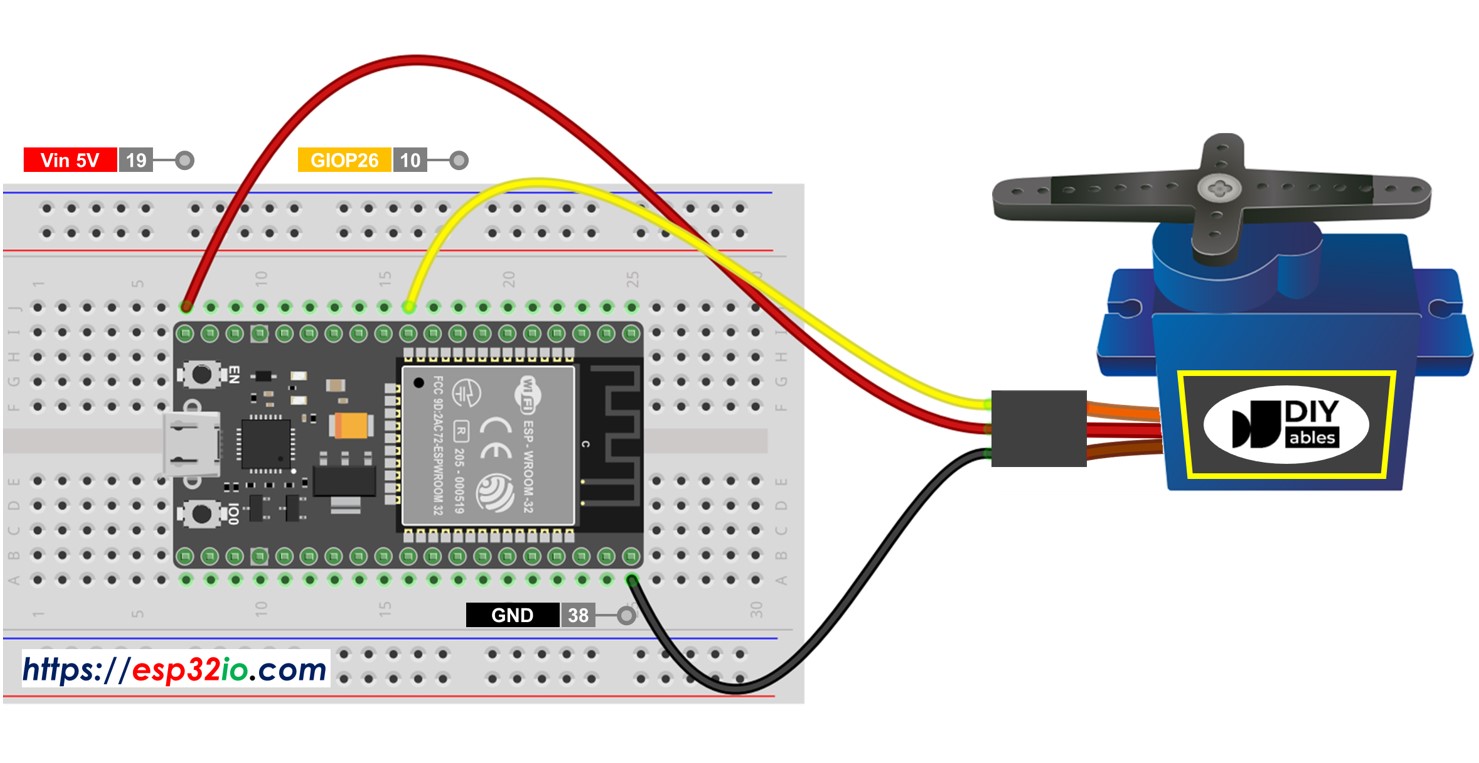
Start by connecting the ESP32 development board to your computer using the micro USB cable. Install the necessary drivers and open the Arduino IDE to begin programming the board. Connect the relay modules, sensors, LEDs, and other components to the ESP32 using the jumper wires and breadboard.
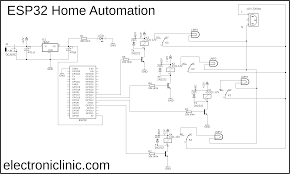
Make sure to follow the wiring diagram provided by the manufacturer for each component. Test each component individually to ensure they are working correctly.
Programming the ESP32
Once the hardware setup is complete, it’s time to upload the code to the ESP32. You can find sample codes and libraries online that will help you get started with programming the ESP32 for home automation.
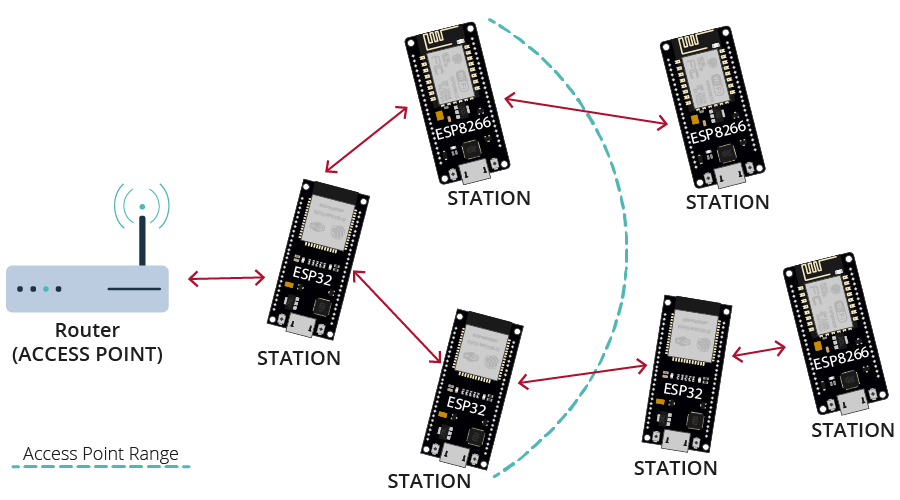
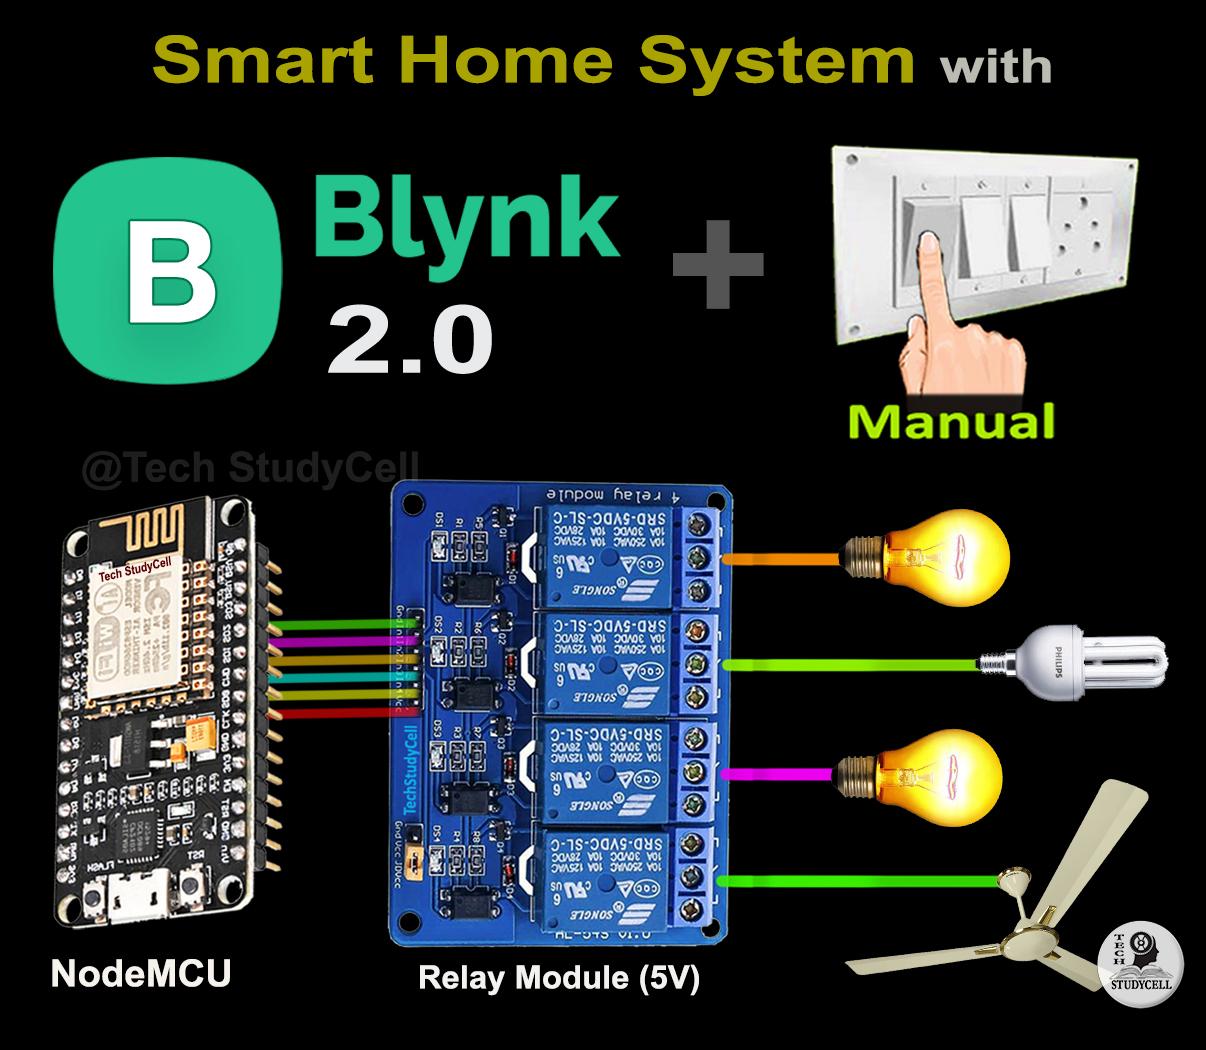
Write code to control the relay modules, read data from the sensors, and trigger actions based on specific conditions. You can also integrate the ESP32 with other smart devices and platforms such as Amazon Alexa or Google Home for voice control.
Testing and Troubleshooting
After uploading the code, test each component of your home automation system to ensure everything is working as expected. Troubleshoot any issues you may encounter by checking the wiring, code logic, and connections.
Make sure to secure your ESP32 with a strong password and keep it updated to protect it from security vulnerabilities. Regularly monitor your home automation system for any anomalies or malfunctions.
Expanding Your System
Once you have successfully set up your home automation system with ESP32, you can start expanding it by adding more sensors, modules, and functionalities. Customize your system to fit your specific needs and create a truly smart home experience.
Keep exploring new possibilities and integrating different devices to make your home automation system even more advanced and efficient. With ESP32, the possibilities are endless!
Conclusion
Setting up a DIY home automation system with ESP32 is a fun and rewarding project that can enhance the convenience and efficiency of your home. With the right components and a bit of programming knowledge, you can create a smart home system that meets your specific requirements.
Get started today and enjoy the benefits of a smart home powered by the versatile and affordable ESP32 microcontroller!
How to Set Up a DIY Home Automation System with ESP32
Are you interested in setting up a home automation system but don’t want to break the bank? With the ESP32 microcontroller, you can create your own DIY smart home system that is both affordable and customizable. In this article, we will guide you through the process of setting up a home automation system with ESP32. Let’s get started!
What You Will Need
- ESP32 Development Board
- Relay Modules
- Sensors (Motion, Temperature, Humidity, etc.)
- LEDs
- Jumper Wires
- Breadboard
- Micro USB Cable
- Power Supply
These are the basic components you will need to set up a simple home automation system with ESP32. You can always add more sensors and modules based on your specific needs and preferences.
Setting Up the Hardware
Start by connecting the ESP32 development board to your computer using the micro USB cable. Install the necessary drivers and open the Arduino IDE to begin programming the board. Connect the relay modules, sensors, LEDs, and other components to the ESP32 using the jumper wires and breadboard.
Make sure to follow the wiring diagram provided by the manufacturer for each component. Test each component individually to ensure they are working correctly.
Programming the ESP32
Once the hardware setup is complete, it’s time to upload the code to the ESP32. You can find sample codes and libraries online that will help you get started with programming the ESP32 for home automation.
Write code to control the relay modules, read data from the sensors, and trigger actions based on specific conditions. You can also integrate the ESP32 with other smart devices and platforms such as Amazon Alexa or Google Home for voice control.
Testing and Troubleshooting
After uploading the code, test each component of your home automation system to ensure everything is working as expected. Troubleshoot any issues you may encounter by checking the wiring, code logic, and connections.
Make sure to secure your ESP32 with a strong password and keep it updated to protect it from security vulnerabilities. Regularly monitor your home automation system for any anomalies or malfunctions.
Expanding Your System
Once you have successfully set up your home automation system with ESP32, you can start expanding it by adding more sensors, modules, and functionalities. Customize your system to fit your specific needs and create a truly smart home experience.
Keep exploring new possibilities and integrating different devices to make your home automation system even more advanced and efficient. With ESP32, the possibilities are endless!
Conclusion
Setting up a DIY home automation system with ESP32 is a fun and rewarding project that can enhance the convenience and efficiency of your home. With the right components and a bit of programming knowledge, you can create a smart home system that meets your specific requirements.
Get started today and enjoy the benefits of a smart home powered by the versatile and affordable ESP32 microcontroller!