How to Send Data from an ESP32 to a Server?
Are you looking to send data from your ESP32 microcontroller to a server? Whether you’re creating a home automation system, monitoring sensors remotely, or simply collecting data from your IoT devices, being able to send data to a server is a crucial step.
In this article, we will walk you through the steps of sending data from an ESP32 to a server, so you can start transferring and managing your data effectively.
Step 1: Setting Up Your ESP32
The first step is to set up your ESP32 microcontroller. Make sure you have the necessary tools and software installed, such as the Arduino IDE. Connect your ESP32 to your computer via USB and upload a basic sketch to ensure it’s working properly.
Next, you will need to connect your ESP32 to your Wi-Fi network. Include the necessary libraries for Wi-Fi connectivity and enter your network credentials in the code. Test the connection to ensure your ESP32 is successfully connected to the internet.
Step 2: Creating a Server
Now that your ESP32 is set up, you need to create a server to receive the data. This can be done using platforms like Node.js, Python, or any other server-side scripting language. Set up your server to listen for incoming data on a specific port.
Make sure your server is accessible from the internet, either by hosting it on a cloud service or setting up port forwarding on your router. Test the server to ensure it can receive data from external sources.
Step 3: Sending Data from ESP32 to Server
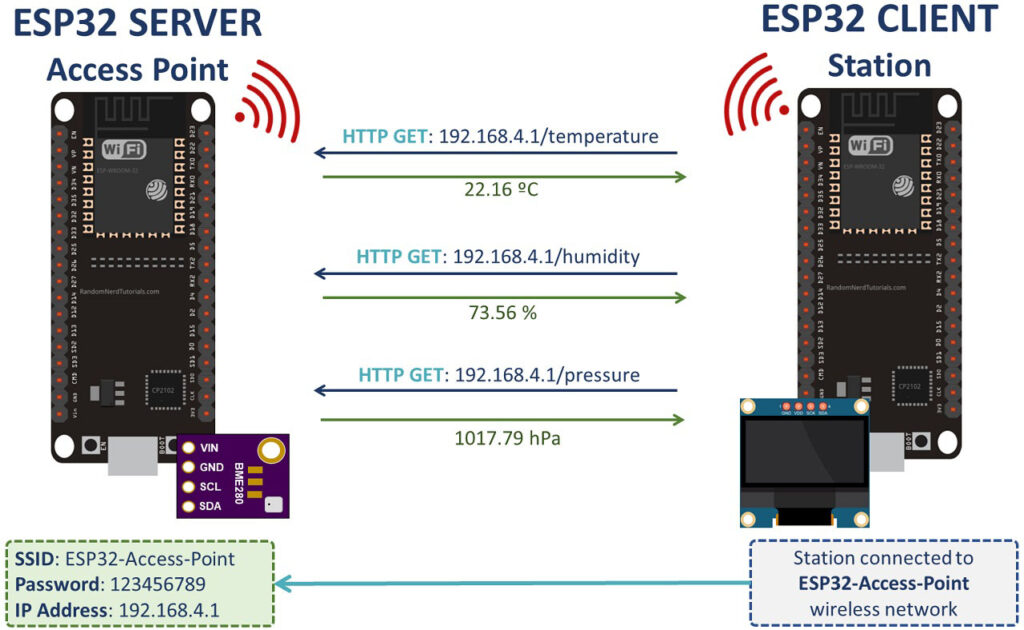
With your ESP32 and server set up, it’s time to send data from the microcontroller to the server. You can achieve this by making HTTP POST requests from your ESP32 to the server. Include the necessary libraries for HTTP communication and form your data into a JSON object.
Send the data to the server using the server’s IP address and port number. Make sure to handle errors and responses from the server to ensure the data is sent successfully.
Step 4: Processing Data on the Server
Once the data is received on the server, you can process it as needed. Parse the JSON data and store it in a database, trigger actions based on the received data, or perform any other operations required for your application.
Make sure to secure your server to prevent unauthorized access and ensure the data is transmitted securely over the internet.
Step 5: Monitoring and Troubleshooting
After setting up data transfer from ESP32 to the server, monitor the process to ensure data is being sent and received correctly. Use logging and monitoring tools to track data flow and troubleshoot any issues that may arise.
If you encounter any errors or data transmission failures, check your code, network settings, and server configuration to identify and resolve the issue promptly.
Conclusion
Sending data from an ESP32 to a server is a crucial aspect of IoT and data management. By following the steps outlined in this article, you can effectively transfer data from your microcontroller to a server, enabling remote monitoring, data collection, and automation capabilities.
Remember to secure your data transmission and monitor the process to ensure the seamless flow of data between your ESP32 and server. With proper setup and monitoring, you can leverage the power of IoT and data connectivity to enhance your projects and applications.


