How to Fix a Broken Cigarette Lighter Socket in a Honda Pilot
Does your cigarette lighter socket in your Honda Pilot stop working suddenly? Don’t worry! In this guide, we will walk you through the steps on how to repair a broken cigarette lighter socket in your vehicle.
Before we begin, it’s important to note that a broken cigarette lighter socket can be caused by various reasons such as a blown fuse, a faulty wiring connection, or a malfunctioning socket itself. By following the steps below, you can troubleshoot and fix the issue.
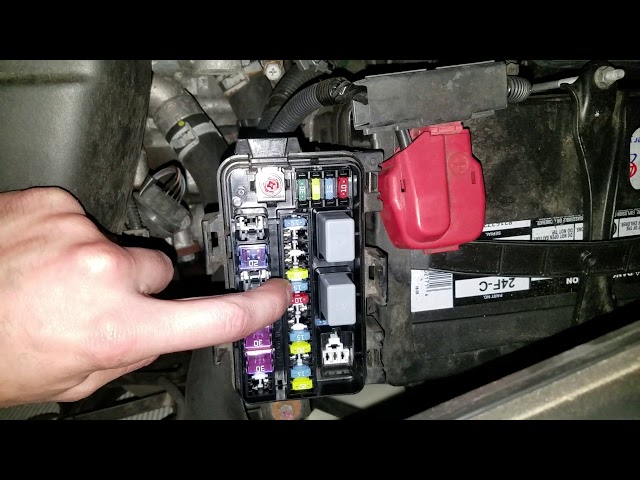
Step 1: Check the Fuse
The first thing you should do is check the fuse related to the cigarette lighter socket. You can find the fuse box in your Honda Pilot by consulting the owner’s manual. Once you locate the fuse box, look for the fuse that corresponds to the cigarette lighter socket. If the fuse is blown, replace it with a new one of the same amperage rating.
Step 2: Inspect the Wiring Connection
If the fuse is not the issue, the next step is to inspect the wiring connection to the cigarette lighter socket. Sometimes the wiring can become loose or disconnected, causing the socket to stop working. Check the wiring for any visible damage or loose connections. Reconnect any loose wires and repair any damaged ones.
Step 3: Test the Socket
After checking the fuse and wiring, it’s time to test the cigarette lighter socket to see if it’s working. Insert a cigarette lighter or any other device that uses the socket into it and see if it powers up. If the socket still doesn’t work, proceed to the next step.
Step 4: Replace the Socket
If all else fails, you may need to replace the cigarette lighter socket. You can purchase a replacement socket from an auto parts store or online. To replace the socket, disconnect the old one by removing the screws holding it in place and disconnecting the wiring. Install the new socket by connecting the wiring and securing it in place with screws.
Conclusion
Repairing a broken cigarette lighter socket in a Honda Pilot is a straightforward process that can be done at home with basic tools. By following the steps outlined in this guide, you can quickly diagnose and fix the issue, allowing you to use your cigarette lighter socket again for charging devices or powering accessories.
If you are uncomfortable performing the repairs yourself, don’t hesitate to seek professional help. A qualified mechanic can diagnose the issue and repair the cigarette lighter socket in no time. Remember, it’s essential to have a functioning cigarette lighter socket for convenience and safety while driving.
How to Fix a Broken Cigarette Lighter Socket in a Honda Pilot
Does your cigarette lighter socket in your Honda Pilot stop working suddenly? Don’t worry! In this guide, we will walk you through the steps on how to repair a broken cigarette lighter socket in your vehicle.
Before we begin, it’s important to note that a broken cigarette lighter socket can be caused by various reasons such as a blown fuse, a faulty wiring connection, or a malfunctioning socket itself. By following the steps below, you can troubleshoot and fix the issue.
Step 1: Check the Fuse
The first thing you should do is check the fuse related to the cigarette lighter socket. You can find the fuse box in your Honda Pilot by consulting the owner’s manual. Once you locate the fuse box, look for the fuse that corresponds to the cigarette lighter socket. If the fuse is blown, replace it with a new one of the same amperage rating.
Step 2: Inspect the Wiring Connection
If the fuse is not the issue, the next step is to inspect the wiring connection to the cigarette lighter socket. Sometimes the wiring can become loose or disconnected, causing the socket to stop working. Check the wiring for any visible damage or loose connections. Reconnect any loose wires and repair any damaged ones.
Step 3: Test the Socket
After checking the fuse and wiring, it’s time to test the cigarette lighter socket to see if it’s working. Insert a cigarette lighter or any other device that uses the socket into it and see if it powers up. If the socket still doesn’t work, proceed to the next step.
Step 4: Replace the Socket
If all else fails, you may need to replace the cigarette lighter socket. You can purchase a replacement socket from an auto parts store or online. To replace the socket, disconnect the old one by removing the screws holding it in place and disconnecting the wiring. Install the new socket by connecting the wiring and securing it in place with screws.
Conclusion
Repairing a broken cigarette lighter socket in a Honda Pilot is a straightforward process that can be done at home with basic tools. By following the steps outlined in this guide, you can quickly diagnose and fix the issue, allowing you to use your cigarette lighter socket again for charging devices or powering accessories.
If you are uncomfortable performing the repairs yourself, don’t hesitate to seek professional help. A qualified mechanic can diagnose the issue and repair the cigarette lighter socket in no time. Remember, it’s essential to have a functioning cigarette lighter socket for convenience and safety while driving.