How to Read Data from an INA219 Current Sensor
If you’re working on a project that involves monitoring and measuring current, the INA219 current sensor is a handy tool to have. This sensor can accurately measure current, voltage, and power, making it a popular choice for a wide range of applications.
However, getting started with the INA219 sensor and reading data from it can be a bit challenging for beginners. In this article, we’ll walk you through the process of reading data from an INA219 current sensor, step by step.
Step 1: Setting Up the Hardware
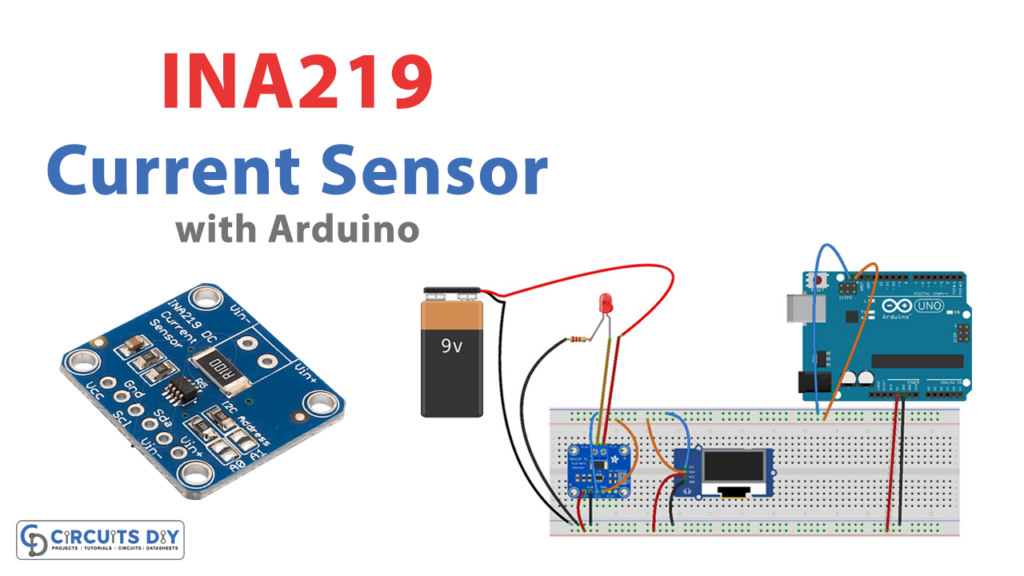
The first step in reading data from an INA219 current sensor is setting up the hardware. You’ll need to connect the sensor to your microcontroller using the I2C interface. Make sure to consult the sensor’s datasheet for the correct pinout and wiring instructions.
Additionally, you may need to provide power to the sensor through an external power source. Make sure to supply the correct voltage as specified in the sensor’s datasheet to avoid damaging the sensor.
Step 2: Installing the Necessary Libraries
Before you can start reading data from the INA219 sensor, you’ll need to install the necessary libraries for your microcontroller platform. Most popular platforms like Arduino have libraries available that make it easy to interface with the sensor.
Make sure to download and install the appropriate library for your microcontroller platform. You can usually find these libraries on the platform’s official website or on community forums.
Step 3: Writing the Code
Once you have the hardware set up and the libraries installed, it’s time to write the code to read data from the INA219 sensor. The specifics of the code will depend on your microcontroller platform and the library you’re using.
Typically, you’ll need to initialize the sensor, configure its settings, and then read the necessary data such as current, voltage, and power. Most libraries provide example code to help you get started.
Step 4: Testing the Setup
After you’ve written the code, it’s important to test the setup to ensure that everything is working correctly. Connect the sensor to your microcontroller, upload the code, and monitor the output on the serial monitor.
If everything is working as expected, you should see the sensor readings displayed on the serial monitor. Make any necessary adjustments to the code or wiring if you encounter any issues.
Step 5: Integrating the Data
Once you have successfully read data from the INA219 sensor, you can now integrate this data into your project. Use the sensor readings to monitor current consumption, track power usage, or trigger actions based on specific thresholds.
Get creative with how you use the data from the sensor to enhance the functionality of your project and achieve your desired outcomes.
By following these steps, you’ll be able to successfully read data from an INA219 current sensor and leverage its capabilities in your projects. Have fun experimenting with this versatile sensor and exploring the possibilities it offers!
How to Read Data from an INA219 Current Sensor
If you’re working on a project that involves monitoring and measuring current, the INA219 current sensor is a handy tool to have. This sensor can accurately measure current, voltage, and power, making it a popular choice for a wide range of applications.
However, getting started with the INA219 sensor and reading data from it can be a bit challenging for beginners. In this article, we’ll walk you through the process of reading data from an INA219 current sensor, step by step.
Step 1: Setting Up the Hardware
The first step in reading data from an INA219 current sensor is setting up the hardware. You’ll need to connect the sensor to your microcontroller using the I2C interface. Make sure to consult the sensor’s datasheet for the correct pinout and wiring instructions.
Additionally, you may need to provide power to the sensor through an external power source. Make sure to supply the correct voltage as specified in the sensor’s datasheet to avoid damaging the sensor.
Step 2: Installing the Necessary Libraries
Before you can start reading data from the INA219 sensor, you’ll need to install the necessary libraries for your microcontroller platform. Most popular platforms like Arduino have libraries available that make it easy to interface with the sensor.
Make sure to download and install the appropriate library for your microcontroller platform. You can usually find these libraries on the platform’s official website or on community forums.
Step 3: Writing the Code
Once you have the hardware set up and the libraries installed, it’s time to write the code to read data from the INA219 sensor. The specifics of the code will depend on your microcontroller platform and the library you’re using.
Typically, you’ll need to initialize the sensor, configure its settings, and then read the necessary data such as current, voltage, and power. Most libraries provide example code to help you get started.
Step 4: Testing the Setup
After you’ve written the code, it’s important to test the setup to ensure that everything is working correctly. Connect the sensor to your microcontroller, upload the code, and monitor the output on the serial monitor.
If everything is working as expected, you should see the sensor readings displayed on the serial monitor. Make any necessary adjustments to the code or wiring if you encounter any issues.
Step 5: Integrating the Data
Once you have successfully read data from the INA219 sensor, you can now integrate this data into your project. Use the sensor readings to monitor current consumption, track power usage, or trigger actions based on specific thresholds.
Get creative with how you use the data from the sensor to enhance the functionality of your project and achieve your desired outcomes.
By following these steps, you’ll be able to successfully read data from an INA219 current sensor and leverage its capabilities in your projects. Have fun experimenting with this versatile sensor and exploring the possibilities it offers!