How to read an accelerometer with a microcontroller?
Accelerometers are sensors that measure acceleration forces. They are commonly used in various applications, such as smartphones, tablets, drones, and even cars. In this article, we will discuss how to read an accelerometer with a microcontroller.
Microcontrollers are small computers that can be programmed to perform specific tasks. They are commonly used in electronic devices to control different functions. By combining an accelerometer with a microcontroller, you can gather data on acceleration forces and use it to control various applications.
Step 1: Choose the right accelerometer
There are various types of accelerometers available in the market, such as MEMS accelerometers and piezoelectric accelerometers. It’s essential to choose the right accelerometer based on your project requirements.
For beginners, we recommend starting with a MEMS accelerometer as they are easy to use and provide accurate results. Make sure to check the datasheet of the accelerometer to understand its specifications and how to connect it to a microcontroller.
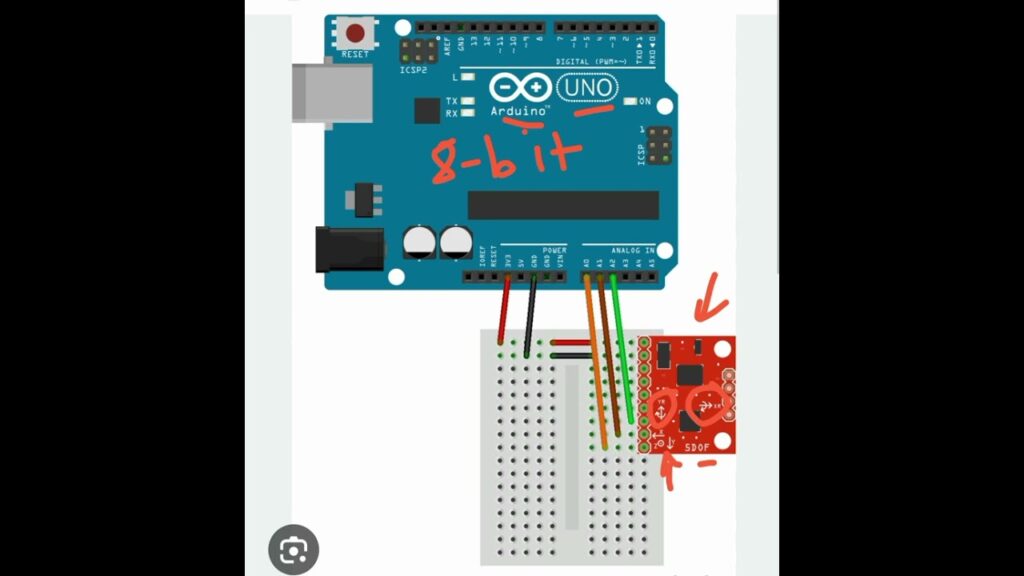
Step 2: Connect the accelerometer to the microcontroller
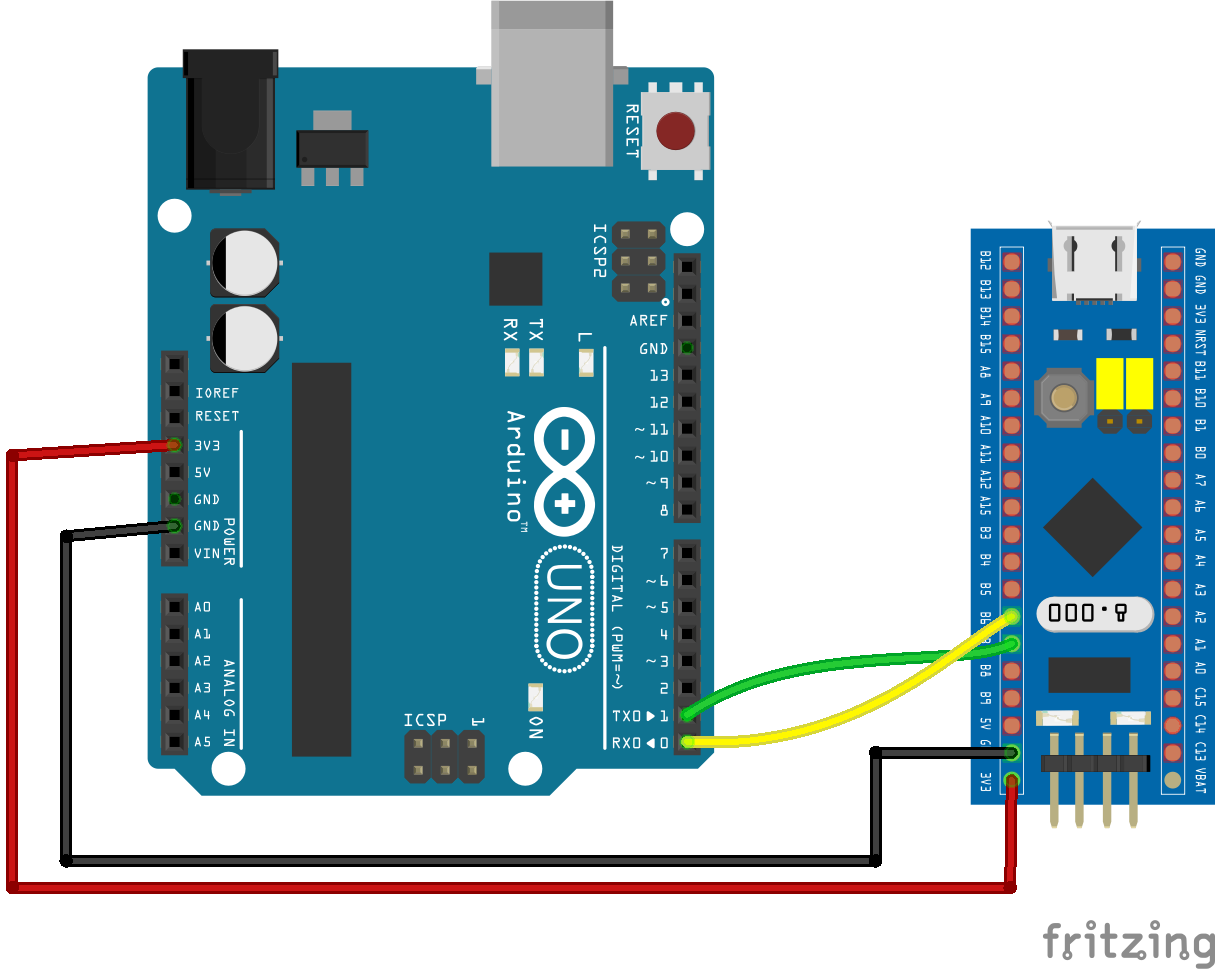
Once you have chosen the accelerometer, the next step is to connect it to the microcontroller. Most accelerometers use I2C or SPI communication protocols to interface with a microcontroller.
Follow the wiring diagram provided in the accelerometer datasheet to connect the accelerometer to the microcontroller correctly. Make sure to connect the power supply, ground, and data lines as per the specifications.
Step 3: Write the code to read accelerometer data
After connecting the accelerometer to the microcontroller, you need to write code to read the accelerometer data. Most accelerometers come with libraries or sample codes that can be used to read data from the sensor.
Depending on the microcontroller you are using, you can choose to write code in C, C++, or any other programming language supported by the microcontroller. Make sure to follow the accelerometer’s datasheet to understand how to read data from the sensor accurately.
Step 4: Calibrate the accelerometer
Before using the accelerometer data in your project, it’s essential to calibrate the sensor to ensure accurate results. Calibration involves setting the offset and sensitivity of the accelerometer to eliminate any errors in the data.
Most accelerometers come with calibration tools or algorithms that can be used to calibrate the sensor. Make sure to follow the calibration instructions provided in the accelerometer datasheet to achieve precise results.
Step 5: Integrate accelerometer data into your project
Once you have calibrated the accelerometer and obtained accurate data, you can now integrate the accelerometer data into your project. Depending on your application, you can use the accelerometer data to control motors, servos, or other devices.
Make sure to test the accelerometer data in your project and make necessary adjustments to ensure optimal performance. With the accelerometer integrated into your project, you can now measure acceleration forces and use them to control various applications.
In conclusion, reading an accelerometer with a microcontroller involves choosing the right accelerometer, connecting it to the microcontroller, writing code to read data, calibrating the sensor, and integrating the accelerometer data into your project. By following these steps, you can effectively read an accelerometer with a microcontroller and use it in your applications.
How to read an accelerometer with a microcontroller?
Accelerometers are sensors that measure acceleration forces. They are commonly used in various applications, such as smartphones, tablets, drones, and even cars. In this article, we will discuss how to read an accelerometer with a microcontroller.
Microcontrollers are small computers that can be programmed to perform specific tasks. They are commonly used in electronic devices to control different functions. By combining an accelerometer with a microcontroller, you can gather data on acceleration forces and use it to control various applications.
Step 1: Choose the right accelerometer
There are various types of accelerometers available in the market, such as MEMS accelerometers and piezoelectric accelerometers. It’s essential to choose the right accelerometer based on your project requirements.
For beginners, we recommend starting with a MEMS accelerometer as they are easy to use and provide accurate results. Make sure to check the datasheet of the accelerometer to understand its specifications and how to connect it to a microcontroller.
Step 2: Connect the accelerometer to the microcontroller
Once you have chosen the accelerometer, the next step is to connect it to the microcontroller. Most accelerometers use I2C or SPI communication protocols to interface with a microcontroller.
Follow the wiring diagram provided in the accelerometer datasheet to connect the accelerometer to the microcontroller correctly. Make sure to connect the power supply, ground, and data lines as per the specifications.
Step 3: Write the code to read accelerometer data
After connecting the accelerometer to the microcontroller, you need to write code to read the accelerometer data. Most accelerometers come with libraries or sample codes that can be used to read data from the sensor.
Depending on the microcontroller you are using, you can choose to write code in C, C++, or any other programming language supported by the microcontroller. Make sure to follow the accelerometer’s datasheet to understand how to read data from the sensor accurately.
Step 4: Calibrate the accelerometer
Before using the accelerometer data in your project, it’s essential to calibrate the sensor to ensure accurate results. Calibration involves setting the offset and sensitivity of the accelerometer to eliminate any errors in the data.
Most accelerometers come with calibration tools or algorithms that can be used to calibrate the sensor. Make sure to follow the calibration instructions provided in the accelerometer datasheet to achieve precise results.
Step 5: Integrate accelerometer data into your project
Once you have calibrated the accelerometer and obtained accurate data, you can now integrate the accelerometer data into your project. Depending on your application, you can use the accelerometer data to control motors, servos, or other devices.
Make sure to test the accelerometer data in your project and make necessary adjustments to ensure optimal performance. With the accelerometer integrated into your project, you can now measure acceleration forces and use them to control various applications.
In conclusion, reading an accelerometer with a microcontroller involves choosing the right accelerometer, connecting it to the microcontroller, writing code to read data, calibrating the sensor, and integrating the accelerometer data into your project. By following these steps, you can effectively read an accelerometer with a microcontroller and use it in your applications.