How to interface a microcontroller with a Raspberry Pi?
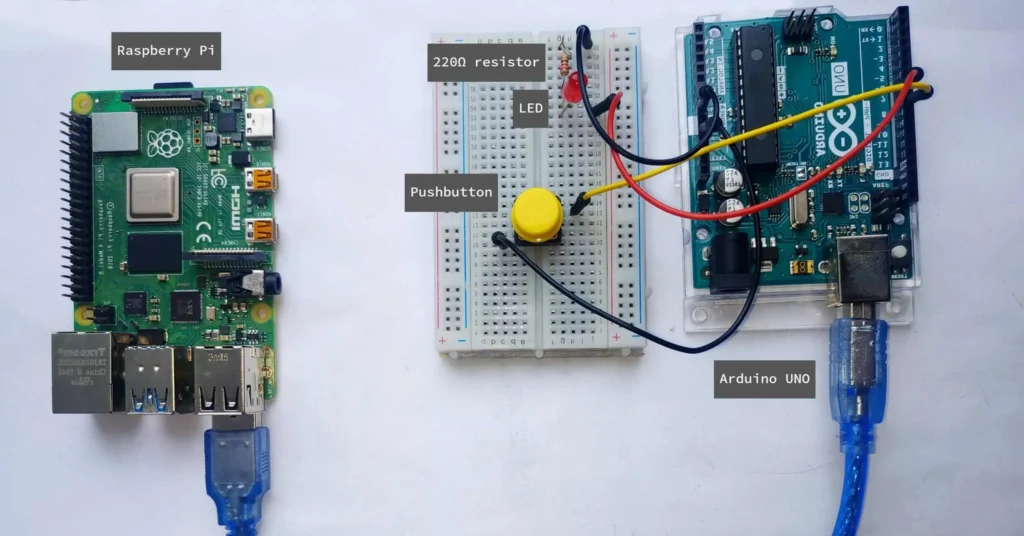
Microcontrollers are small computing devices that are used in nearly every electronics project. However, if you want to take your project to the next level by adding more functionality and processing power, you may want to consider interfacing a microcontroller with a Raspberry Pi. The Raspberry Pi is a versatile single-board computer that can act as the brain of your project while the microcontroller handles the more specialized tasks. In this article, we will explore how to interface a microcontroller with a Raspberry Pi.
Choosing the Right Microcontroller
The first step in interfacing a microcontroller with a Raspberry Pi is choosing the right microcontroller for your project. There are many different types of microcontrollers available, each with its own specific features and capabilities. Some popular microcontroller options include Arduino, ESP32, and STM32. Depending on your project requirements, you will need to select the microcontroller that best suits your needs.
Establishing Communication
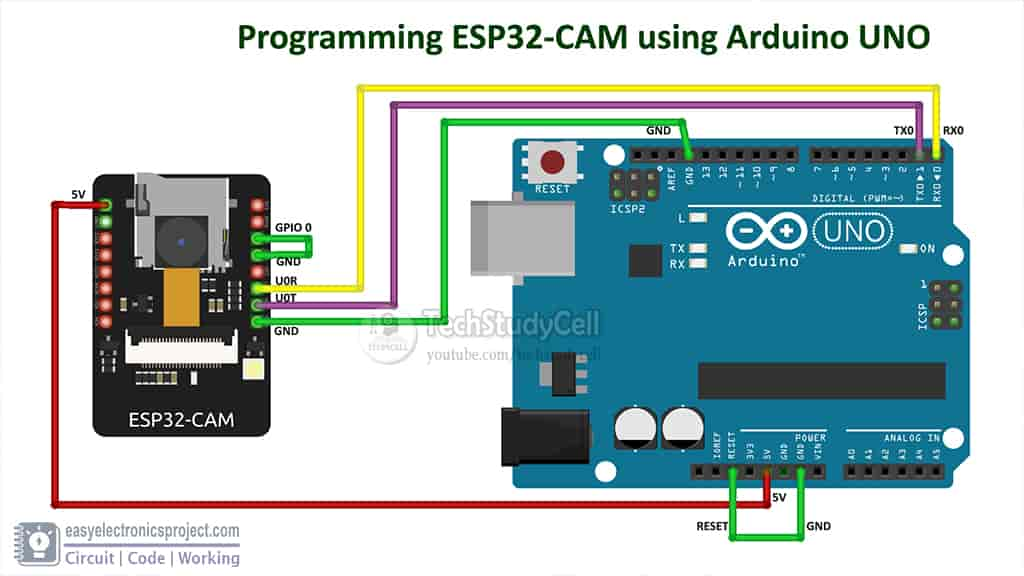
Once you have selected the microcontroller for your project, the next step is establishing communication between the microcontroller and the Raspberry Pi. One common way to do this is through serial communication. Serial communication involves sending data between devices one bit at a time over a single communication line. The Raspberry Pi has several UART pins that can be used for serial communication with a microcontroller.
Writing the Code
After establishing communication between the microcontroller and the Raspberry Pi, the next step is writing the code that will allow the two devices to communicate effectively. Depending on the microcontroller and Raspberry Pi models you are using, the code will need to be adapted to work with the specific hardware. You can use programming languages such as Python, C, or Arduino IDE to write the code for your project.
Testing and Troubleshooting
Once you have written the code for your project, it is essential to test it thoroughly to ensure that the microcontroller and Raspberry Pi are communicating correctly. You may encounter some issues during the testing phase, such as incorrect wiring or syntax errors in your code. By carefully testing and troubleshooting your project, you can identify and fix any issues that may arise before deploying it.
Adding Additional Hardware
Once you have successfully interfaced the microcontroller with the Raspberry Pi, you can consider adding additional hardware to your project to enhance its functionality. For example, you could add sensors, actuators, or displays to create a more interactive and versatile project. The Raspberry Pi’s GPIO pins can be used to connect additional hardware to your project and expand its capabilities.
Conclusion
Interfacing a microcontroller with a Raspberry Pi can open up a world of possibilities for your electronics projects. By leveraging the processing power of the Raspberry Pi and the specialized capabilities of a microcontroller, you can create more complex and functional projects than ever before. With the right hardware, code, and testing procedures, you can successfully interface a microcontroller with a Raspberry Pi and take your projects to the next level.


