Installing a Dash Cam in Your Tesla Model S: A Step-by-Step Guide
Are you looking to install a dash cam in your Tesla Model S? Whether you want to capture scenic drives or have evidence in case of an accident, a dash cam is a great investment. In this guide, we’ll walk you through the process of installing a dash cam in your Tesla Model S. Follow these steps carefully to ensure a seamless installation.
Step 1: Choose the Right Dash Cam for Your Tesla Model S
Before you begin the installation process, you need to select the right dash cam for your Tesla Model S. Make sure to choose a dash cam that is compatible with your car’s make and model. Look for features such as high-resolution video recording, wide-angle lens, and parking mode. Popular dash cam brands for Tesla Model S include BlackVue and Thinkware.
Step 2: Gather the Necessary Tools and Materials
Next, gather the tools and materials you’ll need for the installation. This may include a dash cam, power cable, trim removal tool, plastic pry tool, screwdriver set, and cable clips. Make sure to have all the necessary items on hand before starting the installation process.
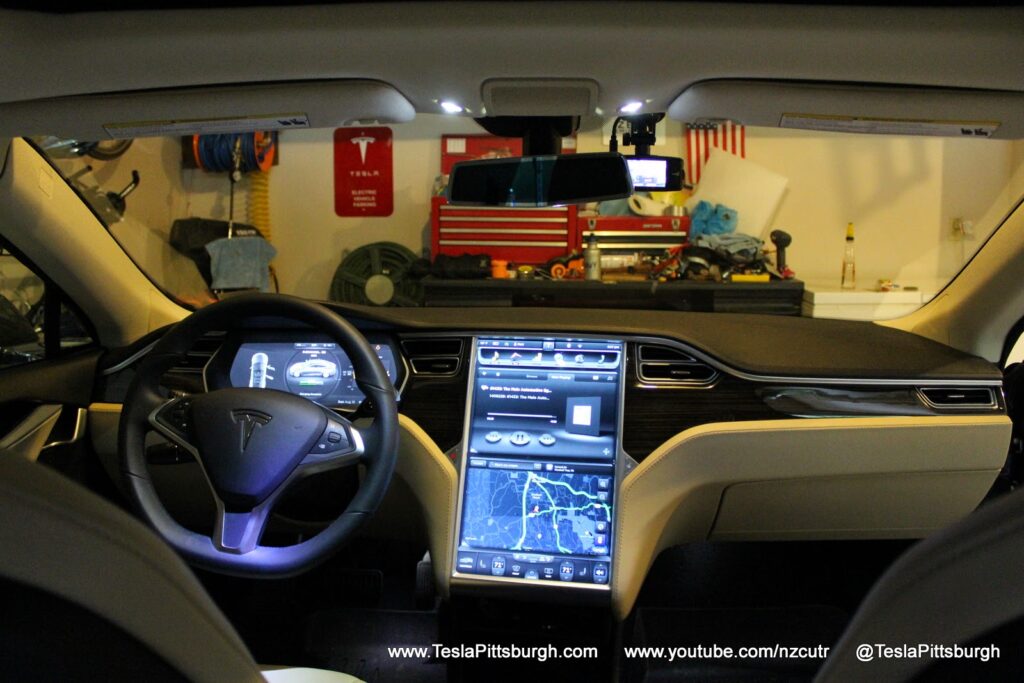
Step 3: Locate a Suitable Mounting Position
Choose a suitable mounting position for your dash cam. Ideally, you’ll want to place it behind the rearview mirror to ensure an unobstructed view of the road. Use the trim removal tool to carefully remove the paneling around the mirror, taking care not to damage the interior of your Tesla Model S.
Step 4: Install the Dash Cam Power Cable
Next, route the dash cam power cable along the headliner of your Tesla Model S. Use the plastic pry tool and cable clips to secure the cable in place and prevent it from dangling. Make sure to follow the existing wiring harnesses to ensure a neat and tidy installation.
Step 5: Connect the Dash Cam to a Power Source
Once you’ve routed the power cable, connect the dash cam to a power source in your Tesla Model S. This may involve tapping into the fuse box or using a USB adapter. Make sure to test the dash cam to ensure it powers on and begins recording properly.
Step 6: Adjust the Dash Cam Settings
Finally, adjust the settings on your dash cam to ensure it captures high-quality footage. You may need to adjust the resolution, frame rate, and other settings to suit your preferences. Test the dash cam by taking a short drive to ensure it’s functioning correctly.
Step 7: Enjoy Peace of Mind on the Road
Congratulations, you’ve successfully installed a dash cam in your Tesla Model S! Now you can enjoy peace of mind knowing that you have a reliable witness on the road. Remember to regularly check and maintain your dash cam to ensure it continues to function properly. Safe driving!
Installing a Dash Cam in Your Tesla Model S: A Step-by-Step Guide
Are you looking to install a dash cam in your Tesla Model S? Whether you want to capture scenic drives or have evidence in case of an accident, a dash cam is a great investment. In this guide, we’ll walk you through the process of installing a dash cam in your Tesla Model S. Follow these steps carefully to ensure a seamless installation.
Step 1: Choose the Right Dash Cam for Your Tesla Model S
Before you begin the installation process, you need to select the right dash cam for your Tesla Model S. Make sure to choose a dash cam that is compatible with your car’s make and model. Look for features such as high-resolution video recording, wide-angle lens, and parking mode. Popular dash cam brands for Tesla Model S include BlackVue and Thinkware.
Step 2: Gather the Necessary Tools and Materials
Next, gather the tools and materials you’ll need for the installation. This may include a dash cam, power cable, trim removal tool, plastic pry tool, screwdriver set, and cable clips. Make sure to have all the necessary items on hand before starting the installation process.
Step 3: Locate a Suitable Mounting Position
Choose a suitable mounting position for your dash cam. Ideally, you’ll want to place it behind the rearview mirror to ensure an unobstructed view of the road. Use the trim removal tool to carefully remove the paneling around the mirror, taking care not to damage the interior of your Tesla Model S.
Step 4: Install the Dash Cam Power Cable
Next, route the dash cam power cable along the headliner of your Tesla Model S. Use the plastic pry tool and cable clips to secure the cable in place and prevent it from dangling. Make sure to follow the existing wiring harnesses to ensure a neat and tidy installation.
Step 5: Connect the Dash Cam to a Power Source
Once you’ve routed the power cable, connect the dash cam to a power source in your Tesla Model S. This may involve tapping into the fuse box or using a USB adapter. Make sure to test the dash cam to ensure it powers on and begins recording properly.
Step 6: Adjust the Dash Cam Settings
Finally, adjust the settings on your dash cam to ensure it captures high-quality footage. You may need to adjust the resolution, frame rate, and other settings to suit your preferences. Test the dash cam by taking a short drive to ensure it’s functioning correctly.
Step 7: Enjoy Peace of Mind on the Road
Congratulations, you’ve successfully installed a dash cam in your Tesla Model S! Now you can enjoy peace of mind knowing that you have a reliable witness on the road. Remember to regularly check and maintain your dash cam to ensure it continues to function properly. Safe driving!