How to design a basic audio amplifier?
Designing a basic audio amplifier can be a fun and rewarding project for those interested in electronics and DIY audio equipment. Whether you’re a hobbyist looking to build your own sound system or a student studying electrical engineering, understanding the principles behind audio amplifier design is essential. In this article, we will guide you through the process of designing a basic audio amplifier from scratch.
1. Define your requirements
The first step in designing an audio amplifier is to define your requirements. Ask yourself what kind of audio signals you want to amplify, and how much power you need. Are you looking to amplify music from your smartphone, or do you need a powerful amplifier for a home theater system? Understanding your requirements will help you choose the right components for your amplifier.
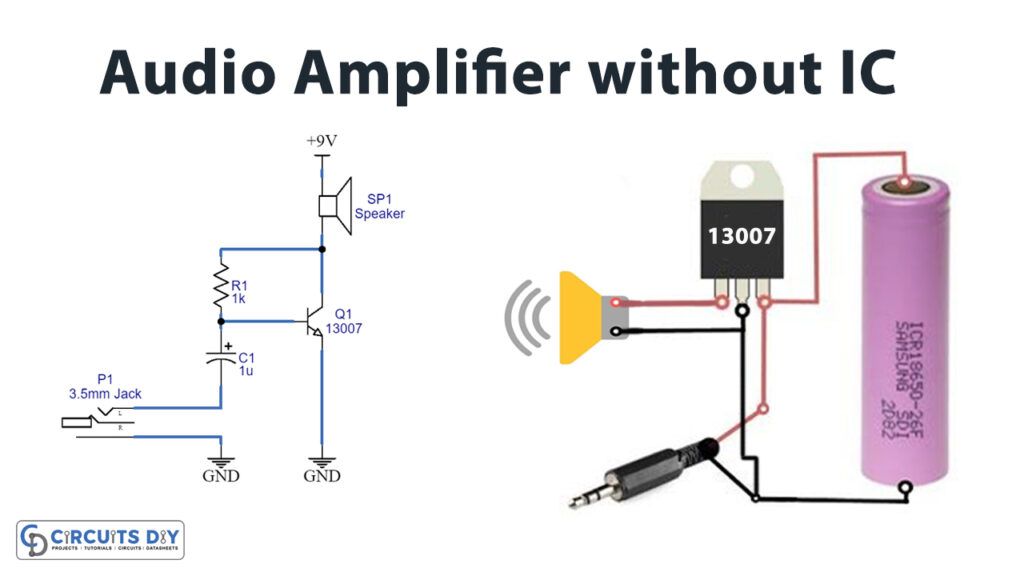
2. Choose your components
Once you have defined your requirements, it’s time to choose the components for your audio amplifier. The key components of any amplifier circuit include transistors, resistors, capacitors, and inductors. You will also need a power supply to provide the necessary voltage and current for your amplifier to function.
- Transistors: Transistors act as the amplifying element in the circuit, increasing the amplitude of the input audio signal.
- Resistors: Resistors are used to control the flow of current in the circuit and set the gain of the amplifier.
- Capacitors: Capacitors are used to filter out unwanted noise and stabilize the voltage in the circuit.
- Inductors: Inductors can be used in audio amplifier circuits to create filters and improve the overall performance of the amplifier.
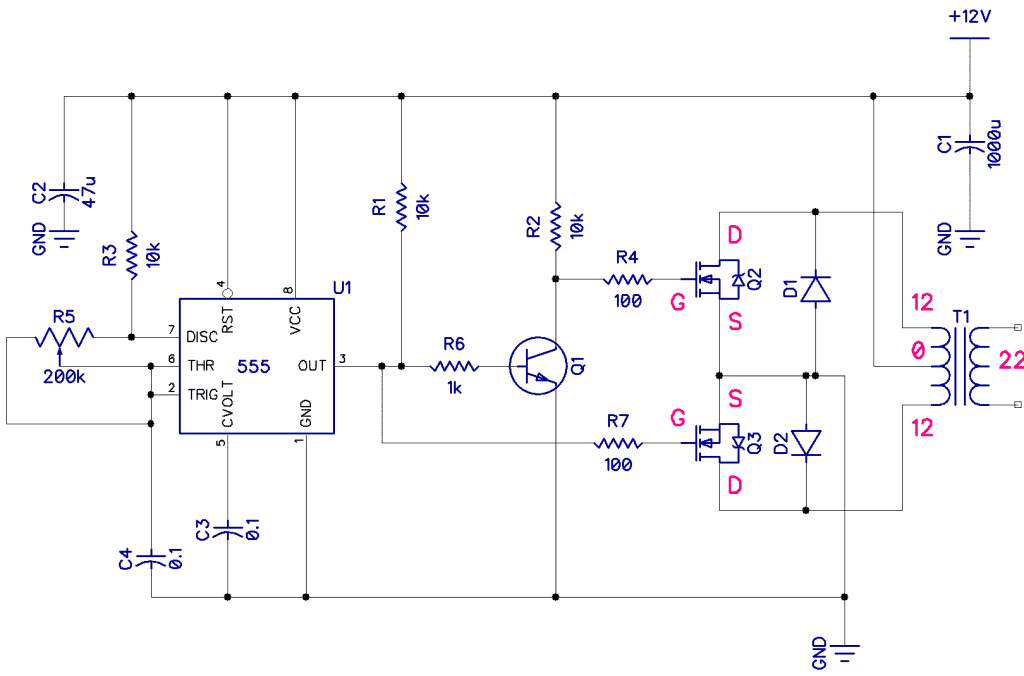
3. Design your circuit
With your components selected, it’s time to design your audio amplifier circuit. You can choose to build a simple Class A amplifier for low power applications, or a more complex Class AB amplifier for higher power output. Be sure to follow a schematic diagram and pay attention to the connections between components to avoid any mistakes.
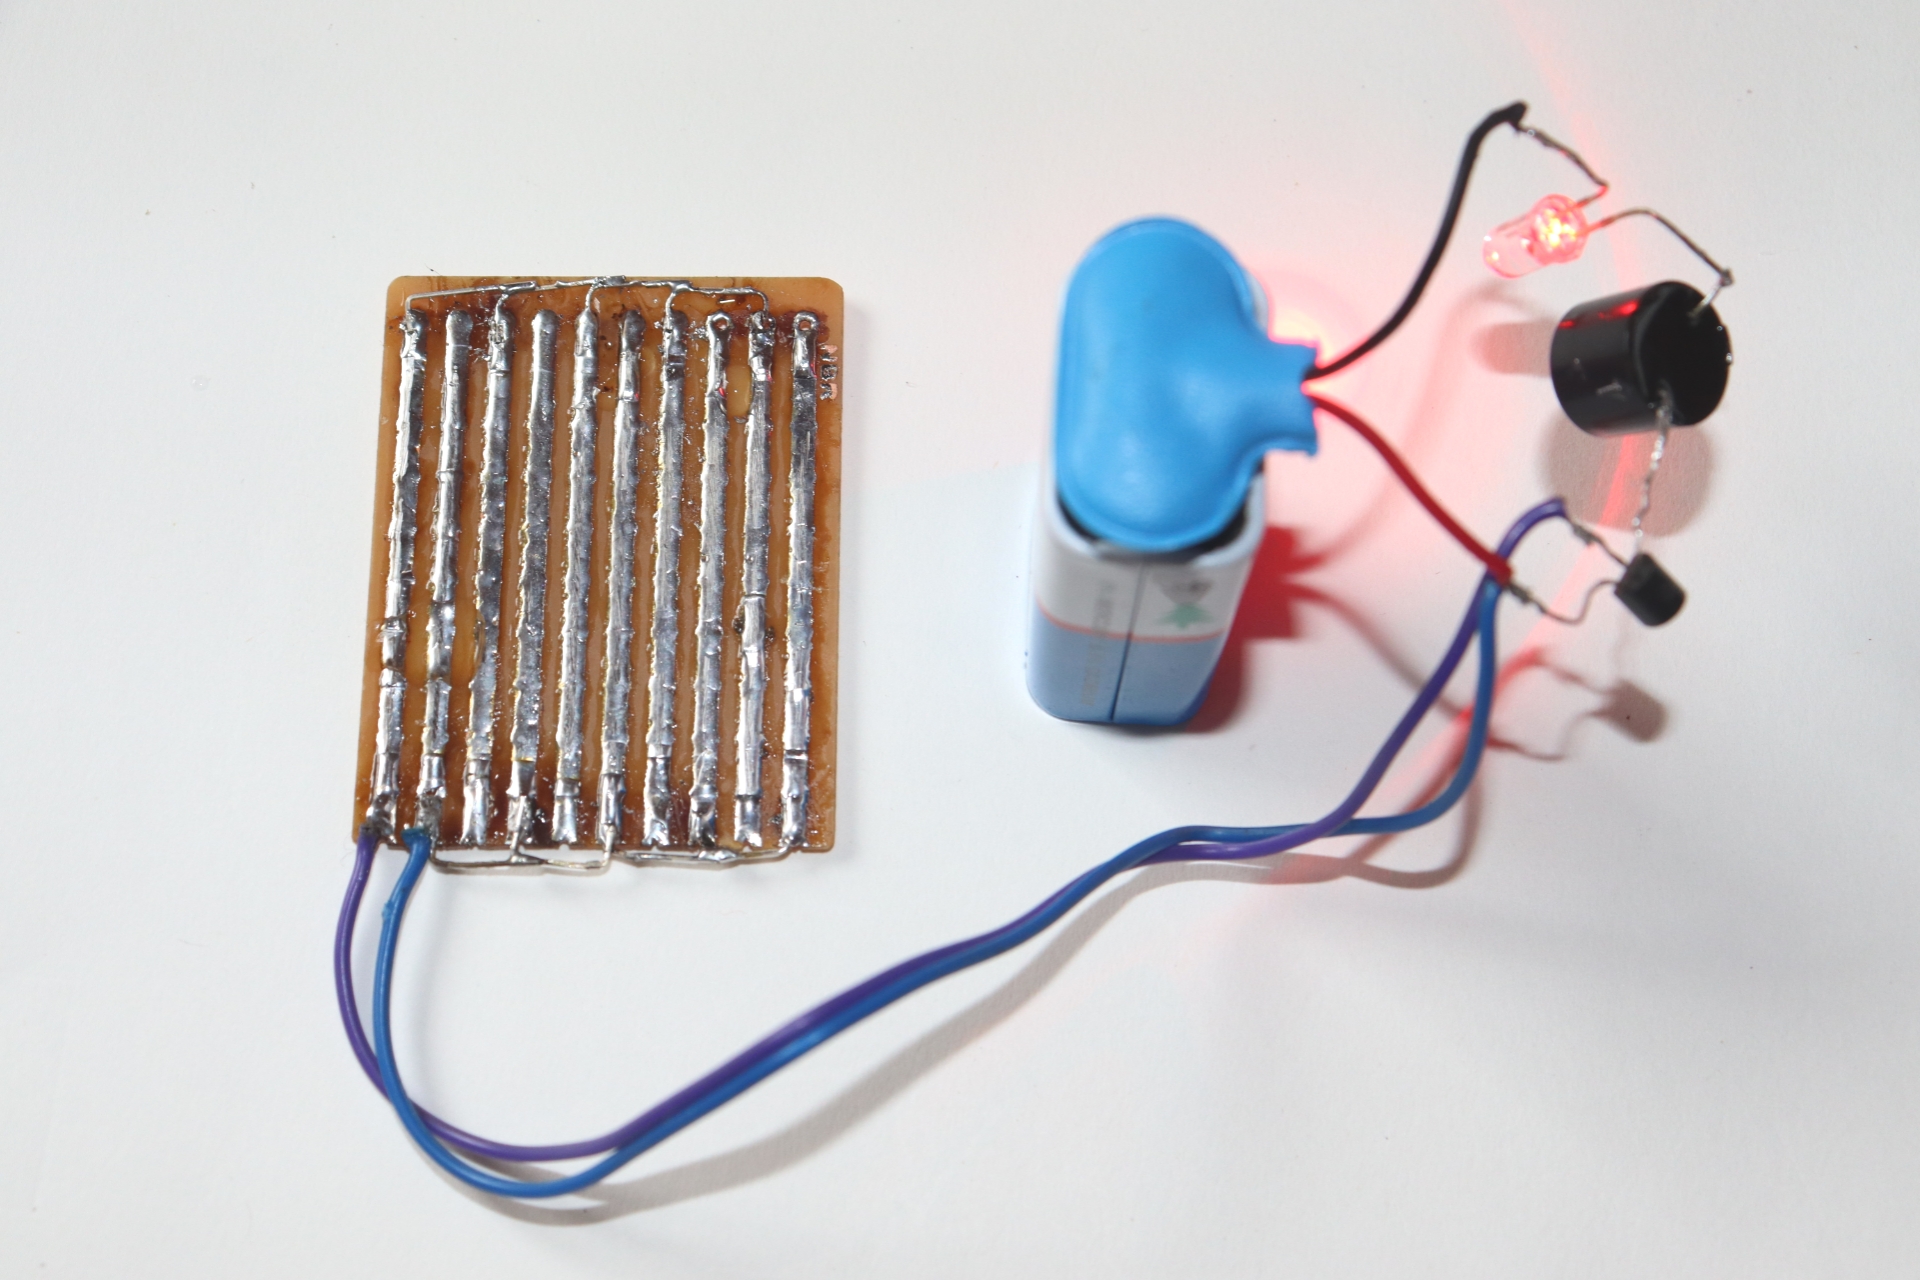
4. Build and test your amplifier
Once you have designed your circuit, it’s time to build and test your audio amplifier. Start by assembling the components on a breadboard or PCB, following your schematic diagram carefully. Ensure that all connections are secure and double-check your work before powering up the amplifier.
- Power up the amplifier: Connect your amplifier to a power source and test the output using a multimeter or oscilloscope. Adjust the gain and volume controls to ensure that the amplifier is working correctly.
- Test the performance: Play some audio through your amplifier and listen for any distortion or noise. Make adjustments to the circuit as needed to improve the sound quality.
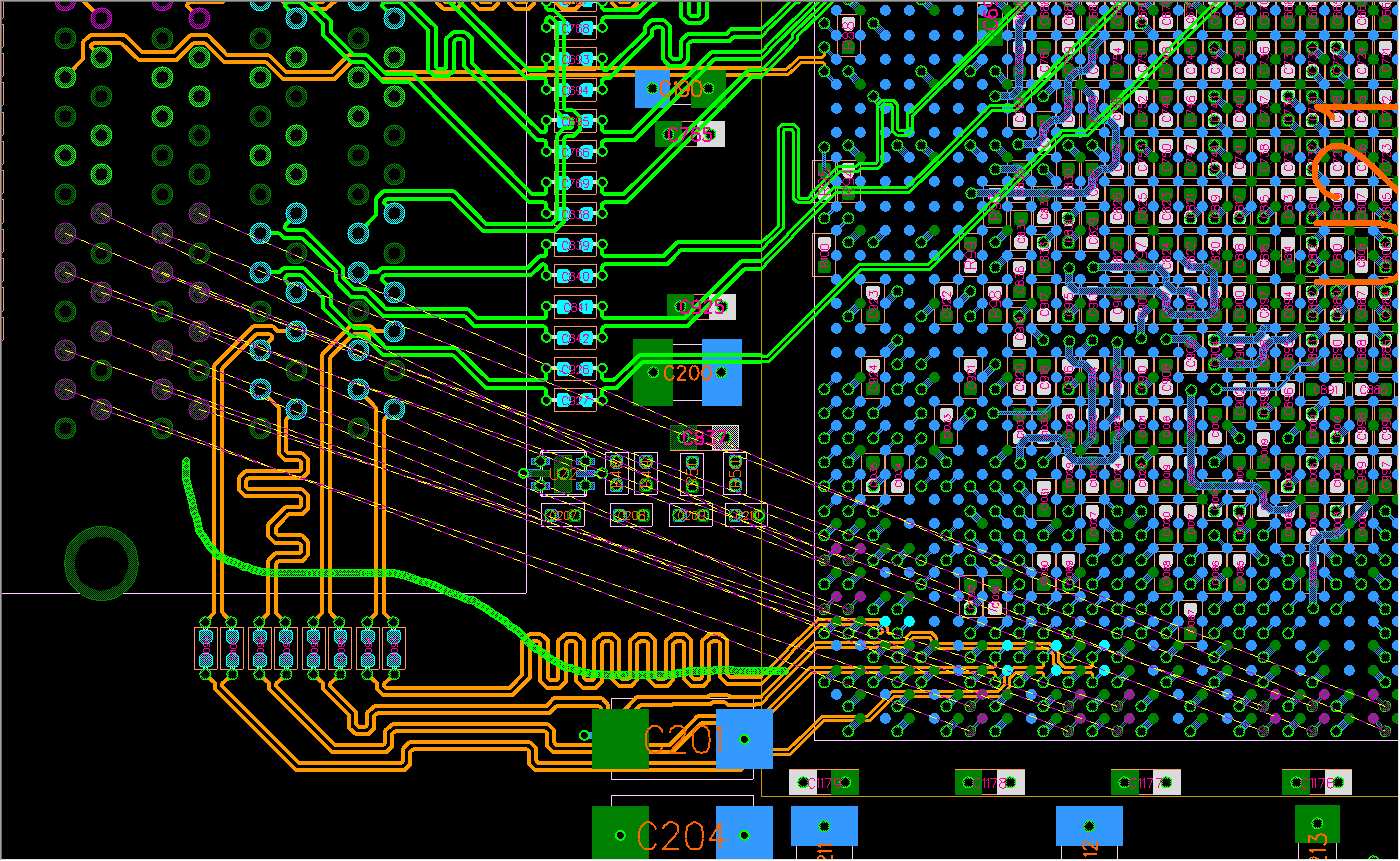
- Finalize the design: Once you are satisfied with the performance of your amplifier, finalize the design by creating a PCB layout or housing for the circuit.
Designing a basic audio amplifier is a challenging but rewarding project that can help you gain a deeper understanding of electronic circuits and audio technology. With the right components, careful design, and testing, you can build a high-quality amplifier that will enhance your listening experience. So roll up your sleeves, grab your soldering iron, and start designing your own audio amplifier today!
How to design a basic audio amplifier?
Designing a basic audio amplifier can be a fun and rewarding project for those interested in electronics and DIY audio equipment. Whether you’re a hobbyist looking to build your own sound system or a student studying electrical engineering, understanding the principles behind audio amplifier design is essential. In this article, we will guide you through the process of designing a basic audio amplifier from scratch.
1. Define your requirements
The first step in designing an audio amplifier is to define your requirements. Ask yourself what kind of audio signals you want to amplify, and how much power you need. Are you looking to amplify music from your smartphone, or do you need a powerful amplifier for a home theater system? Understanding your requirements will help you choose the right components for your amplifier.
2. Choose your components
Once you have defined your requirements, it’s time to choose the components for your audio amplifier. The key components of any amplifier circuit include transistors, resistors, capacitors, and inductors. You will also need a power supply to provide the necessary voltage and current for your amplifier to function.
- Transistors: Transistors act as the amplifying element in the circuit, increasing the amplitude of the input audio signal.
- Resistors: Resistors are used to control the flow of current in the circuit and set the gain of the amplifier.
- Capacitors: Capacitors are used to filter out unwanted noise and stabilize the voltage in the circuit.
- Inductors: Inductors can be used in audio amplifier circuits to create filters and improve the overall performance of the amplifier.
3. Design your circuit
With your components selected, it’s time to design your audio amplifier circuit. You can choose to build a simple Class A amplifier for low power applications, or a more complex Class AB amplifier for higher power output. Be sure to follow a schematic diagram and pay attention to the connections between components to avoid any mistakes.
4. Build and test your amplifier
Once you have designed your circuit, it’s time to build and test your audio amplifier. Start by assembling the components on a breadboard or PCB, following your schematic diagram carefully. Ensure that all connections are secure and double-check your work before powering up the amplifier.
- Power up the amplifier: Connect your amplifier to a power source and test the output using a multimeter or oscilloscope. Adjust the gain and volume controls to ensure that the amplifier is working correctly.
- Test the performance: Play some audio through your amplifier and listen for any distortion or noise. Make adjustments to the circuit as needed to improve the sound quality.
- Finalize the design: Once you are satisfied with the performance of your amplifier, finalize the design by creating a PCB layout or housing for the circuit.
Designing a basic audio amplifier is a challenging but rewarding project that can help you gain a deeper understanding of electronic circuits and audio technology. With the right components, careful design, and testing, you can build a high-quality amplifier that will enhance your listening experience. So roll up your sleeves, grab your soldering iron, and start designing your own audio amplifier today!