How to Check a Diode with a Multimeter
Diodes are electronic components that allow current to flow in one direction only. They are commonly used in electronic circuits to control the flow of electricity. If you suspect that a diode in your circuit is faulty, you can use a multimeter to check it. In this article, we will guide you through the process of checking a diode with a multimeter.
Step 1: Set your multimeter to the diode test mode
Before you can test a diode with a multimeter, you need to set your multimeter to the diode test mode. This mode is usually denoted by a diode symbol on the multimeter dial. If you are unsure, refer to your multimeter’s user manual for instructions on how to select the diode test mode.
Step 2: Identify the anode and cathode of the diode
Before you can test a diode, you need to identify the anode and cathode terminals. The anode is the positive terminal, while the cathode is the negative terminal. Most diodes have a band on one end to indicate the cathode terminal. If you are unsure, refer to the diode’s datasheet for information on the pinout.
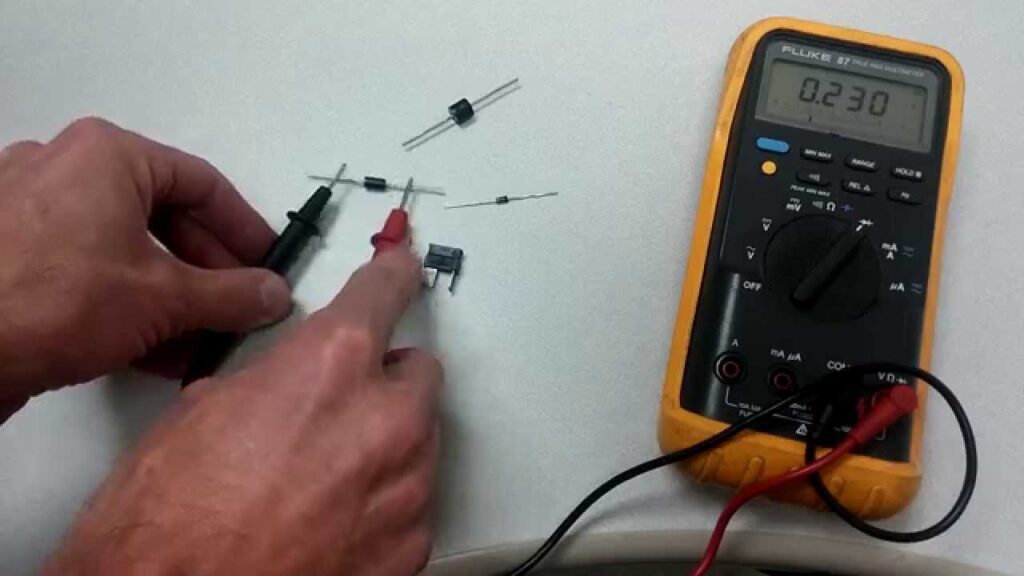
Step 3: Place the multimeter leads on the diode terminals
Once you have identified the anode and cathode terminals, place the red lead of the multimeter on the anode terminal and the black lead on the cathode terminal. Make sure that the leads are in contact with the terminals and not touching each other.
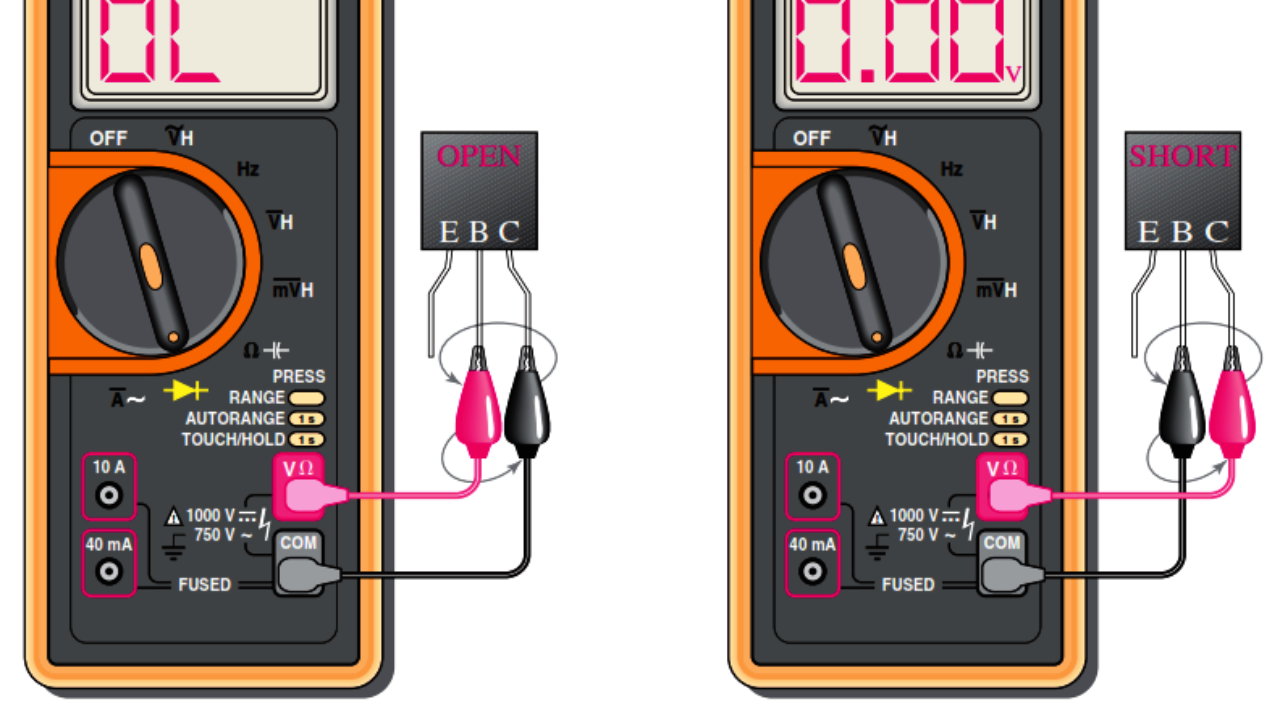
Step 4: Read the multimeter display
With the multimeter leads in place, the multimeter will display a voltage reading. A good diode will show a forward voltage drop of around 0.6 to 0.7 volts. If the diode is faulty, the multimeter will not display any reading, or the reading will be significantly different from the expected value.
Step 5: Test the diode in reverse bias
To further test the diode, you can reverse the polarity of the multimeter leads. Place the red lead on the cathode terminal and the black lead on the anode terminal. In this configuration, a good diode should show no reading on the multimeter. If the multimeter displays a reading, the diode is faulty.
Step 6: Interpret the results
Based on the multimeter readings, you can determine the condition of the diode. If the diode shows the expected voltage drop in forward bias and no reading in reverse bias, it is functioning correctly. If the readings are inconsistent or show no change, the diode is faulty and needs to be replaced.
By following these steps, you can easily check a diode with a multimeter and verify its functionality in your electronic circuit. Remember to always exercise caution when working with electricity and ensure that the circuit is properly powered off before testing the diode.
Conclusion
Checking a diode with a multimeter is a simple process that can help you troubleshoot faulty components in your electronic circuits. By following the steps outlined in this article, you can quickly identify if a diode is working correctly or if it needs to be replaced. Remember to always refer to the datasheet of the diode for accurate pinout information and exercise caution when working with electricity.
How to Check a Diode with a Multimeter
Diodes are electronic components that allow current to flow in one direction only. They are commonly used in electronic circuits to control the flow of electricity. If you suspect that a diode in your circuit is faulty, you can use a multimeter to check it. In this article, we will guide you through the process of checking a diode with a multimeter.
Step 1: Set your multimeter to the diode test mode
Before you can test a diode with a multimeter, you need to set your multimeter to the diode test mode. This mode is usually denoted by a diode symbol on the multimeter dial. If you are unsure, refer to your multimeter’s user manual for instructions on how to select the diode test mode.
Step 2: Identify the anode and cathode of the diode
Before you can test a diode, you need to identify the anode and cathode terminals. The anode is the positive terminal, while the cathode is the negative terminal. Most diodes have a band on one end to indicate the cathode terminal. If you are unsure, refer to the diode’s datasheet for information on the pinout.
Step 3: Place the multimeter leads on the diode terminals
Once you have identified the anode and cathode terminals, place the red lead of the multimeter on the anode terminal and the black lead on the cathode terminal. Make sure that the leads are in contact with the terminals and not touching each other.
Step 4: Read the multimeter display
With the multimeter leads in place, the multimeter will display a voltage reading. A good diode will show a forward voltage drop of around 0.6 to 0.7 volts. If the diode is faulty, the multimeter will not display any reading, or the reading will be significantly different from the expected value.
Step 5: Test the diode in reverse bias
To further test the diode, you can reverse the polarity of the multimeter leads. Place the red lead on the cathode terminal and the black lead on the anode terminal. In this configuration, a good diode should show no reading on the multimeter. If the multimeter displays a reading, the diode is faulty.
Step 6: Interpret the results
Based on the multimeter readings, you can determine the condition of the diode. If the diode shows the expected voltage drop in forward bias and no reading in reverse bias, it is functioning correctly. If the readings are inconsistent or show no change, the diode is faulty and needs to be replaced.
By following these steps, you can easily check a diode with a multimeter and verify its functionality in your electronic circuit. Remember to always exercise caution when working with electricity and ensure that the circuit is properly powered off before testing the diode.
Conclusion
Checking a diode with a multimeter is a simple process that can help you troubleshoot faulty components in your electronic circuits. By following the steps outlined in this article, you can quickly identify if a diode is working correctly or if it needs to be replaced. Remember to always refer to the datasheet of the diode for accurate pinout information and exercise caution when working with electricity.