Best way to use timers on an ESP8266

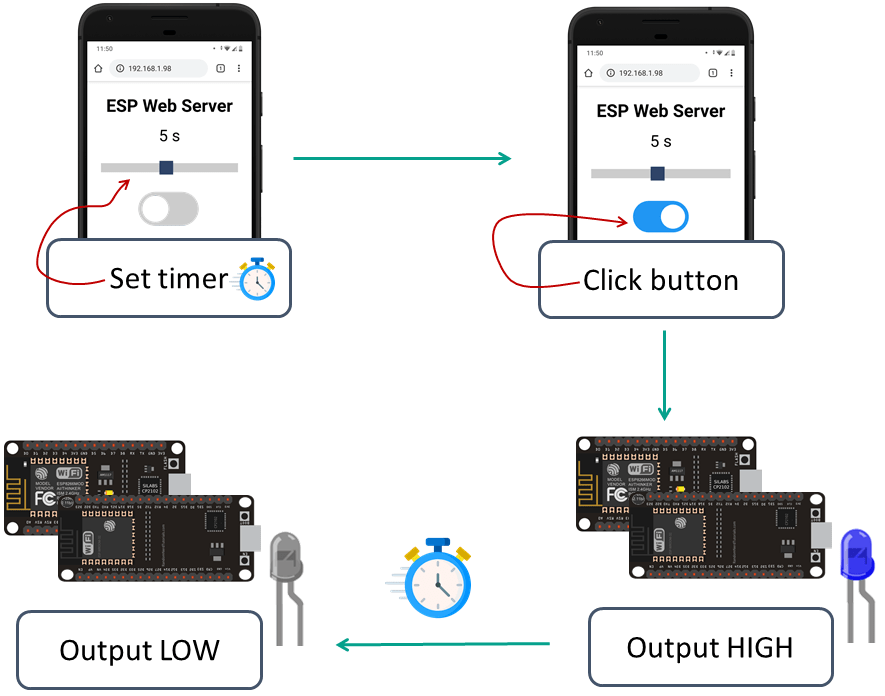
Timers are an essential part of programming on the ESP8266 microcontroller. They allow you to schedule tasks, create delays, and execute actions at precise intervals. However, using timers on the ESP8266 can be a bit tricky if you’re not familiar with the process. In this article, we’ll walk you through the best way to use timers on an ESP8266 for your projects.
Understanding the Basics
Before diving into the specifics of using timers on an ESP8266, it’s important to understand the basics. The ESP8266 microcontroller comes with built-in timers that can be configured to trigger events at specified times. These timers can be used to generate PWM signals, perform periodic tasks, or simply create delays in your program.
Using Timers in Arduino IDE
If you’re using the Arduino IDE to program your ESP8266, leveraging timers is relatively straightforward. The os_timer_ library provides an easy way to create and manage timers in your sketch. Simply include the library at the beginning of your code and use functions like os_timer_setfn() to define timer callbacks.
- Create a new timer instance using
os_timer_t myTimer. - Initialize the timer with
os_timer_setfn(&myTimer, myTimerCallback, NULL). - Start the timer with
os_timer_arm(&myTimer, interval, repeat).
By following these steps, you can easily incorporate timers into your ESP8266 sketch to perform tasks at specific intervals or trigger actions based on certain events.
ESPresso – A TimerLibrary for ESP8266 Arduino
If you’re looking for a more advanced timer library for your ESP8266 projects, ESPEsso is an excellent choice. This powerful library provides a variety of timer types, including single, interval, and delayed timers, with precise control over their execution.
ESPEsso simplifies the process of setting up and managing timers, allowing you to create complex timing sequences with ease. Whether you need to schedule tasks, create delays, or trigger events based on specific conditions, ESPEsso has you covered.
Conclusion
Using timers on an ESP8266 is a powerful way to add time-based functionality to your projects. Whether you’re a beginner or an experienced developer, understanding how to effectively use timers can significantly enhance the performance and capabilities of your ESP8266 applications. By following the best practices outlined in this article, you’ll be able to leverage timers to create more efficient and reliable code for your projects.
Best way to use timers on an ESP8266

Timers are an essential part of programming on the ESP8266 microcontroller. They allow you to schedule tasks, create delays, and execute actions at precise intervals. However, using timers on the ESP8266 can be a bit tricky if you’re not familiar with the process. In this article, we’ll walk you through the best way to use timers on an ESP8266 for your projects.
Understanding the Basics
Before diving into the specifics of using timers on an ESP8266, it’s important to understand the basics. The ESP8266 microcontroller comes with built-in timers that can be configured to trigger events at specified times. These timers can be used to generate PWM signals, perform periodic tasks, or simply create delays in your program.
Using Timers in Arduino IDE
If you’re using the Arduino IDE to program your ESP8266, leveraging timers is relatively straightforward. The os_timer_ library provides an easy way to create and manage timers in your sketch. Simply include the library at the beginning of your code and use functions like os_timer_setfn() to define timer callbacks.
- Create a new timer instance using
os_timer_t myTimer. - Initialize the timer with
os_timer_setfn(&myTimer, myTimerCallback, NULL). - Start the timer with
os_timer_arm(&myTimer, interval, repeat).
By following these steps, you can easily incorporate timers into your ESP8266 sketch to perform tasks at specific intervals or trigger actions based on certain events.
ESPresso – A TimerLibrary for ESP8266 Arduino
If you’re looking for a more advanced timer library for your ESP8266 projects, ESPEsso is an excellent choice. This powerful library provides a variety of timer types, including single, interval, and delayed timers, with precise control over their execution.
ESPEsso simplifies the process of setting up and managing timers, allowing you to create complex timing sequences with ease. Whether you need to schedule tasks, create delays, or trigger events based on specific conditions, ESPEsso has you covered.
Conclusion
Using timers on an ESP8266 is a powerful way to add time-based functionality to your projects. Whether you’re a beginner or an experienced developer, understanding how to effectively use timers can significantly enhance the performance and capabilities of your ESP8266 applications. By following the best practices outlined in this article, you’ll be able to leverage timers to create more efficient and reliable code for your projects.


