Best Way to Use ESP32 for Home Automation
Home automation is becoming more popular than ever, and a key player in this trend is the ESP32 microcontroller. With its built-in Wi-Fi and Bluetooth capabilities, the ESP32 is the perfect tool for creating smart home devices that can be controlled remotely.
But what is the best way to use ESP32 for home automation? In this article, we’ll explore some tips and tricks for getting the most out of your ESP32 device.
1. Choose the Right ESP32 Board
When it comes to using the ESP32 for home automation, one of the first decisions you’ll need to make is which ESP32 board to use. There are many different options available, each with its own set of features and capabilities.
Some popular ESP32 boards for home automation include the ESP32 DevKitC, ESP-WROOM-32, and NodeMCU ESP-32S. Each board has its own advantages and disadvantages, so be sure to research each one before making a decision.
2. Set Up Your Development Environment
Before you can start using the ESP32 for home automation, you’ll need to set up your development environment. This typically involves installing the necessary drivers, tools, and libraries for programming the ESP32.
Some popular development environments for the ESP32 include the Arduino IDE, PlatformIO, and Espressif IDF. Choose the one that best fits your needs and follow the installation instructions to get started.
3. Learn to Program the ESP32
Once you have your development environment set up, it’s time to start programming the ESP32. The ESP32 can be programmed using a variety of languages, including C, C++, and MicroPython.
If you’re new to programming, don’t worry! There are plenty of tutorials and resources available online to help you get started. Start simple with blinking an LED, and then move on to more complex projects as you become more comfortable.
4. Connect Your ESP32 to Wi-Fi
One of the key features of the ESP32 is its built-in Wi-Fi capabilities. By connecting your ESP32 to Wi-Fi, you can control your smart home devices from anywhere in the world.
To connect your ESP32 to Wi-Fi, you’ll need to program it with your Wi-Fi network’s credentials. This typically involves editing the SSID and password in your code and uploading it to the ESP32.
5. Start Building Your Smart Home Devices
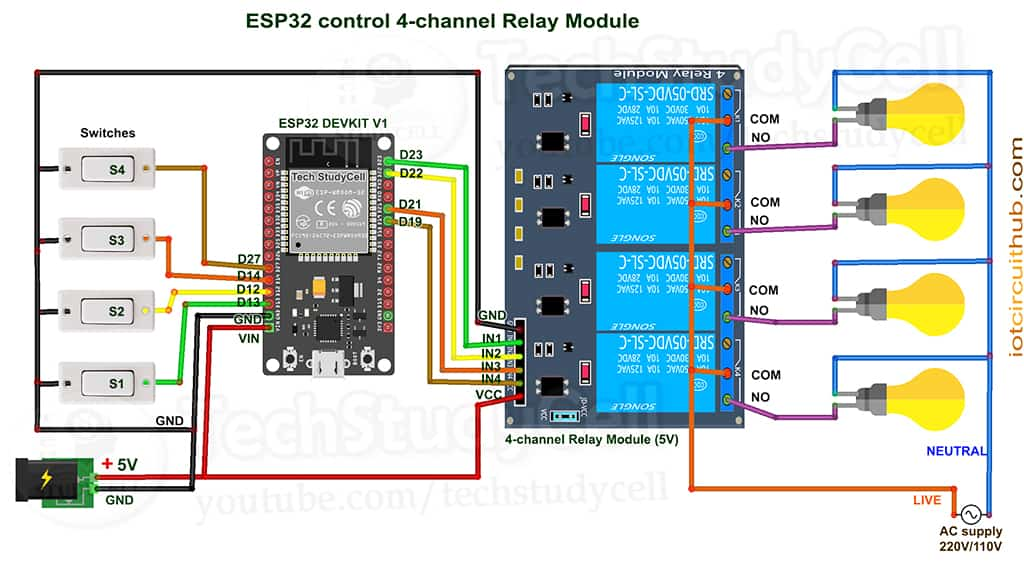
With your ESP32 programmed and connected to Wi-Fi, you’re ready to start building your smart home devices. From controlling lights and appliances to monitoring your home security system, the possibilities are endless.
Start small with a simple project, such as a smart light switch, and then gradually add more devices as you become more comfortable with using the ESP32 for home automation. Before you know it, you’ll have a fully automated smart home that you can control with the touch of a button.
Conclusion
The ESP32 is a powerful tool for home automation, allowing you to create custom smart home devices that can be controlled remotely. By choosing the right ESP32 board, setting up your development environment, learning to program the ESP32, connecting it to Wi-Fi, and starting to build your smart home devices, you can take full advantage of everything the ESP32 has to offer.
So what are you waiting for? Get started with the ESP32 for home automation today and turn your house into a smart home!


