Best way to measure pH with an Arduino?
As technology advances, the potential for DIY projects with Arduino boards continues to grow. One popular project idea is measuring pH levels using an Arduino. Whether you’re a hobbyist or a professional looking to monitor water quality in an agricultural setting, measuring pH with an Arduino can be a valuable tool. In this article, we’ll explore the best way to measure pH with an Arduino to help you get started on your project.
The pH scale is a measure of the acidity or alkalinity of a solution, ranging from 0 to 14. A pH of 7 is considered neutral, while anything below 7 is acidic and anything above 7 is alkaline. To measure pH with an Arduino, you’ll need a pH sensor, a pH probe, and some basic electronics knowledge.
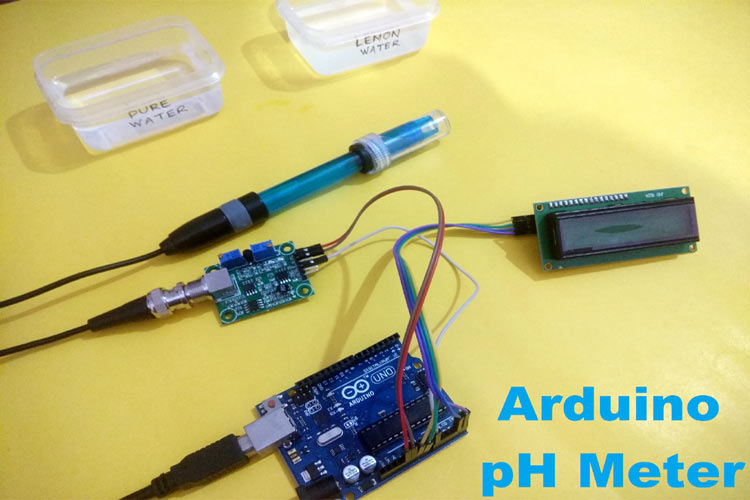
One of the best ways to measure pH with an Arduino is to use a pH sensor module. These modules typically consist of a pH probe connected to a circuit board that outputs a voltage proportional to the pH level. Some popular pH sensor modules include the Atlas Scientific EZO pH Circuit, the Gravity Analog pH Sensor / Meter Kit, and the SEN0161 pH Sensor Module.
When working with a pH sensor module, it’s important to calibrate the sensor to ensure accurate measurements. Most pH sensor modules come with calibration solutions and instructions to help you calibrate the sensor correctly. Calibration is typically done by immersing the pH probe in a calibration solution with a known pH level and adjusting the sensor’s output voltage accordingly.
Once you have your pH sensor module calibrated, you can connect it to your Arduino board. Most pH sensor modules have a simple analog or digital output that can be connected to an analog or digital pin on the Arduino. You can then use Arduino programming to read the sensor’s output voltage and convert it to a pH value using a mathematical formula.
For example, if you’re using the Atlas Scientific EZO pH Circuit, you can use the corresponding Arduino library and example code provided by Atlas Scientific to get started. The library simplifies reading pH values from the sensor and includes functions for calibrating the sensor and performing temperature compensation.
When measuring pH with an Arduino, it’s important to consider factors that can affect the accuracy of your measurements. Temperature, for example, can significantly impact pH readings, so it’s essential to account for temperature variations when calibrating and measuring pH. Some pH sensor modules come with built-in temperature compensation features, while others may require additional components or calculations.
Overall, measuring pH with an Arduino can be a fun and educational project. Whether you’re monitoring the pH of a fish tank, a hydroponic system, or a swimming pool, using an Arduino to measure pH can provide valuable insights into water quality. By following best practices for calibration and measurement, you can ensure accurate and reliable pH readings for your project.
So, if you’re looking to get started with measuring pH with an Arduino, consider using a pH sensor module, calibrating the sensor correctly, and accounting for factors like temperature. With the right setup and programming, you can easily measure pH levels and take your DIY projects to the next level.
Best way to measure pH with an Arduino?
As technology advances, the potential for DIY projects with Arduino boards continues to grow. One popular project idea is measuring pH levels using an Arduino. Whether you’re a hobbyist or a professional looking to monitor water quality in an agricultural setting, measuring pH with an Arduino can be a valuable tool. In this article, we’ll explore the best way to measure pH with an Arduino to help you get started on your project.
The pH scale is a measure of the acidity or alkalinity of a solution, ranging from 0 to 14. A pH of 7 is considered neutral, while anything below 7 is acidic and anything above 7 is alkaline. To measure pH with an Arduino, you’ll need a pH sensor, a pH probe, and some basic electronics knowledge.
One of the best ways to measure pH with an Arduino is to use a pH sensor module. These modules typically consist of a pH probe connected to a circuit board that outputs a voltage proportional to the pH level. Some popular pH sensor modules include the Atlas Scientific EZO pH Circuit, the Gravity Analog pH Sensor / Meter Kit, and the SEN0161 pH Sensor Module.
When working with a pH sensor module, it’s important to calibrate the sensor to ensure accurate measurements. Most pH sensor modules come with calibration solutions and instructions to help you calibrate the sensor correctly. Calibration is typically done by immersing the pH probe in a calibration solution with a known pH level and adjusting the sensor’s output voltage accordingly.
Once you have your pH sensor module calibrated, you can connect it to your Arduino board. Most pH sensor modules have a simple analog or digital output that can be connected to an analog or digital pin on the Arduino. You can then use Arduino programming to read the sensor’s output voltage and convert it to a pH value using a mathematical formula.
For example, if you’re using the Atlas Scientific EZO pH Circuit, you can use the corresponding Arduino library and example code provided by Atlas Scientific to get started. The library simplifies reading pH values from the sensor and includes functions for calibrating the sensor and performing temperature compensation.
When measuring pH with an Arduino, it’s important to consider factors that can affect the accuracy of your measurements. Temperature, for example, can significantly impact pH readings, so it’s essential to account for temperature variations when calibrating and measuring pH. Some pH sensor modules come with built-in temperature compensation features, while others may require additional components or calculations.
Overall, measuring pH with an Arduino can be a fun and educational project. Whether you’re monitoring the pH of a fish tank, a hydroponic system, or a swimming pool, using an Arduino to measure pH can provide valuable insights into water quality. By following best practices for calibration and measurement, you can ensure accurate and reliable pH readings for your project.
So, if you’re looking to get started with measuring pH with an Arduino, consider using a pH sensor module, calibrating the sensor correctly, and accounting for factors like temperature. With the right setup and programming, you can easily measure pH levels and take your DIY projects to the next level.