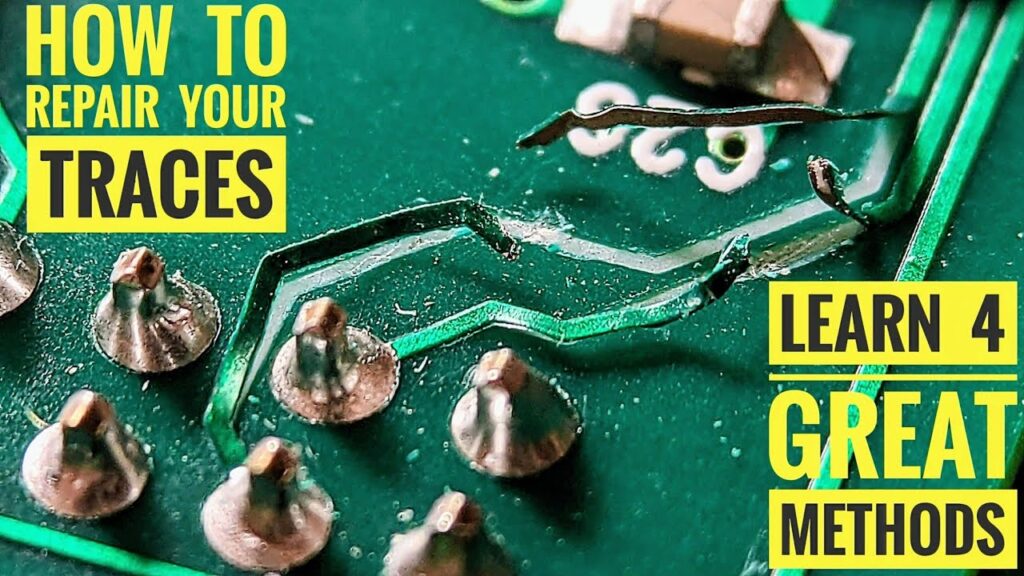
Best Way to Fix a Broken PCB Trace
Printed circuit boards (PCBs) are a crucial component in electronic devices. They provide the necessary connectivity for all the electronic components to work together seamlessly. However, PCBs are susceptible to damage, and one common issue that many electronic enthusiasts face is a broken PCB trace. If you’re dealing with a broken PCB trace, worry not! In this article, we will guide you on the best way to fix it.
Identifying the Broken Trace
Before you can fix a broken PCB trace, you first need to identify the location of the break. To do this, visually inspect the PCB for any signs of physical damage such as cracks, scratches, or discolored areas. You can also use a multimeter to perform a continuity test to pinpoint the exact location of the break. Once you have identified the broken trace, you can proceed to fix it.
Tools and Materials Needed
- Soldering iron
- Solder wire
- Flux
- Desoldering wick
- PCB repair wire or copper tape
Fixing the Broken Trace
Once you have gathered all the necessary tools and materials, you can now proceed to fix the broken PCB trace. Here’s a step-by-step guide to help you through the process:
Clean the Area
Start by cleaning the area around the broken trace using isopropyl alcohol to remove any dirt, grime, or oxidation. This will ensure a clean surface for soldering.
Apply Flux
Apply flux to the broken trace area to help improve the flow of solder and make the soldering process easier.
Solder the Broken Trace
Use a soldering iron to heat up the broken trace and apply solder to bridge the gap. Be careful not to apply too much heat as it can damage the PCB.
Reinforce with PCB Repair Wire or Copper Tape
If the trace is severely damaged, you can use PCB repair wire or copper tape to reinforce the connection and ensure its durability.
Testing the Fix
Once you have fixed the broken PCB trace, it’s important to test the connection to ensure that it’s working properly. Use a multimeter to perform a continuity test to verify that the trace is properly connected.
Conclusion
Fixing a broken PCB trace may seem daunting at first, but with the right tools and techniques, it can be a simple and straightforward process. By following the steps outlined in this article, you can effectively repair a broken PCB trace and get your electronic device back up and running in no time.