How to set up a painting robot for creative automation?
Automation has revolutionized the way we work, and it’s no different in the creative industry. Painting robots are becoming increasingly popular among artists and designers for their ability to execute intricate designs with precision and speed. In this article, we will guide you through the process of setting up a painting robot for creative automation.
1. Choose the right painting robot
Before you can set up your painting robot, you need to choose the right one for your needs. Consider factors such as the size of the canvas you will be working with, the type of paint you will be using, and the level of detail required in your designs. There are many different painting robots available on the market, so do your research and select one that meets your specific requirements.
2. Prepare your workspace
Setting up a painting robot requires a clean and organized workspace. Make sure you have enough room for the robot to move around freely and that there are no obstacles in its path. Set up a ventilation system to ensure proper air circulation, as painting can produce fumes that may be harmful if inhaled.
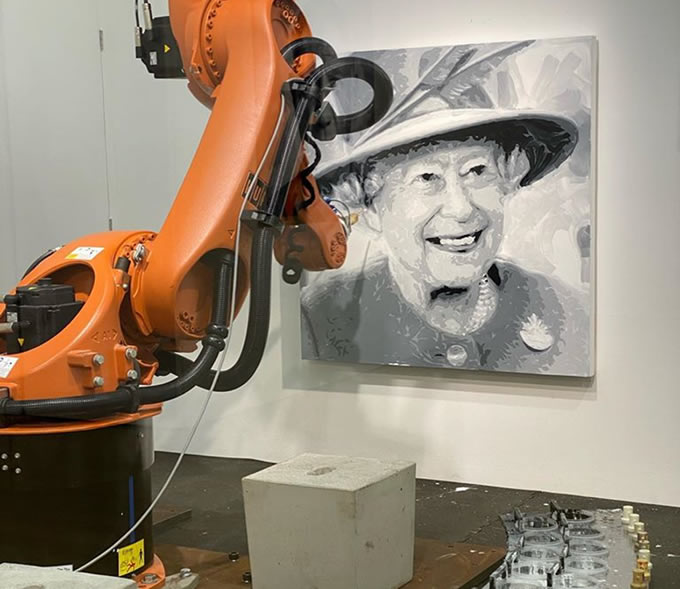
3. Install and calibrate the robot
Once you have chosen the right painting robot and prepared your workspace, it’s time to install and calibrate the robot. Follow the manufacturer’s instructions for assembly and installation, and make sure that all the parts are securely in place. Calibrate the robot’s sensors and actuators to ensure precise movement and accurate painting.
4. Load the paint and set up the design
Before you can start painting, you need to load the paint into the robot’s reservoirs and set up the design you want to execute. Use a computer program or controller to upload your design to the robot and adjust the settings for paint flow, brush size, and speed. Test the robot on a small area to make sure everything is working correctly before starting on your final piece.
5. Monitor and adjust as needed
Once the painting robot is up and running, monitor its progress and make adjustments as needed. Check the quality of the paint application and adjust the settings if necessary. Keep an eye on the paint levels and refill as needed to prevent any interruptions in the painting process. Remember that automation is a tool to enhance your creativity, so don’t be afraid to experiment and try new things with your painting robot.
6. Maintain and clean the robot regularly
To ensure optimal performance and longevity of your painting robot, it’s important to maintain and clean it regularly. Follow the manufacturer’s guidelines for maintenance, such as oiling the moving parts, cleaning the nozzles, and replacing worn-out components. Regular maintenance will not only extend the life of your robot but also ensure that it continues to produce high-quality paintings.
7. Stay updated with new technologies
The field of robotics and automation is constantly evolving, with new technologies and innovations being introduced regularly. Stay updated with the latest developments in painting robots and automation tools to keep your work fresh and exciting. Attend workshops, conferences, and exhibitions to learn from other artists and designers who are also using painting robots for creative automation.
Conclusion
Setting up a painting robot for creative automation can be a rewarding experience that opens up new possibilities for artistic expression. By following the steps outlined in this guide and staying curious and innovative, you can create stunning works of art with the help of automation. Embrace the future of art with painting robots and let your creativity soar to new heights.
Was this helpful?
0 / 0