How to Interface a Current Sensor with ESP32?
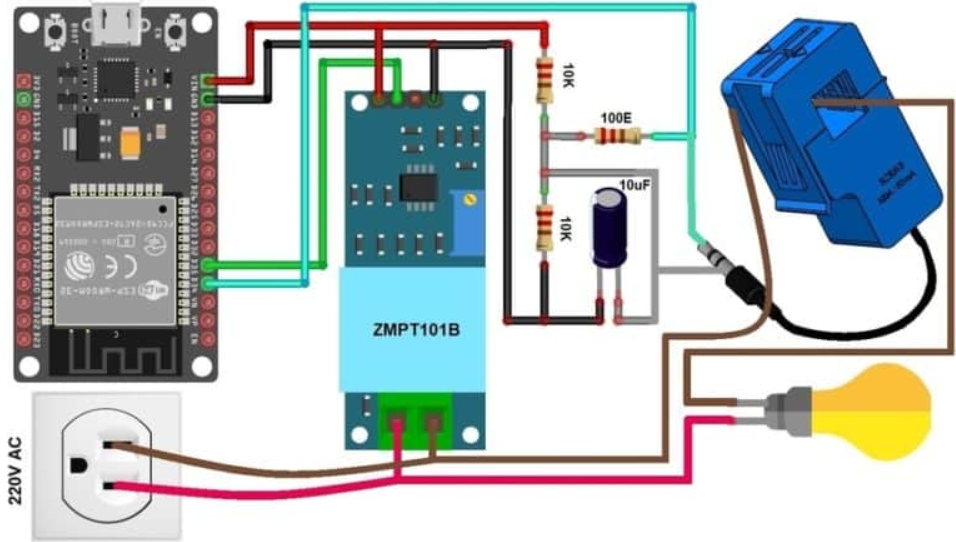
Interfacing a current sensor with an ESP32 microcontroller can be a crucial step in various IoT projects and applications. Current sensors are essential components that help measure the flow of electric current in a circuit, allowing you to monitor and analyze power consumption, battery charging, and other electrical parameters in real-time.
In this article, we will guide you on how to interface a current sensor with an ESP32 microcontroller using a non-invasive current sensor module. This tutorial is suitable for beginners and advanced users who want to integrate current sensing capabilities into their IoT projects.
Step 1: Understanding Current Sensors
Before diving into the interfacing process, it is essential to have a basic understanding of current sensors. Current sensors can be categorized into two types: invasive (where the current-carrying conductor passes through the sensor) and non-invasive (where the current is measured without interrupting the circuit).
In this tutorial, we will be using a non-invasive current sensor module based on the Hall-effect principle. This module can measure AC and DC currents accurately and output a voltage that is proportional to the current flow.
Step 2: Gathering Components
- ESP32 Development Board
- ACS712 Current Sensor Module
- Jumper Wires
- Breadboard
Make sure to have all the components ready before proceeding with the interfacing process.
Step 3: Interfacing the Current Sensor
Firstly, connect the VCC and GND pins of the ACS712 current sensor module to the 3.3V and GND pins of the ESP32 development board, respectively. Next, connect the OUT pin of the sensor module to any analog input pin on the ESP32 board.
Once the connections are made, you can start writing the code to read the output voltage from the current sensor and display the current values on the ESP32’s serial monitor. You can use the Arduino IDE and the ESP32 board support package to program the microcontroller.
Step 4: Writing the Code
Below is a sample Arduino code snippet that reads the analog voltage from the current sensor module and calculates the current value:
#include

int sensorPin = A0;
float sensitivity = 0.185; // Sensitivity of ACS712 sensor
float current = 0.0;
float voltage = 0.0;

void setup() {
  Serial.begin(9600);
}

void loop() {
  int sensorValue = analogRead(sensorPin);
  voltage = sensorValue * (3.3 / 4095); // Convert ADC value to voltage
  current = (voltage - 2.5) / sensitivity; // Calculate current value
  Serial.print("Current: ");
  Serial.print(current);
  Serial.println("A");
  delay(1000);
}
Upload the code to your ESP32 board and open the serial monitor to view the current values being measured by the sensor module.
Step 5: Integration and Applications
Once you have successfully interfaced the current sensor with the ESP32 microcontroller, you can integrate this setup into various IoT projects such as smart energy monitoring systems, battery management systems, and IoT devices that require real-time current monitoring.
Experiment with different current sensor modules and calibration settings to optimize the accuracy and performance of your current sensing applications.
Conclusion
Interfacing a current sensor with an ESP32 microcontroller is a valuable skill that can open up a wide range of possibilities in the field of IoT and electronics. By following this tutorial and understanding the basic concepts of current sensing, you can create innovative projects that require precise current monitoring and control.


