How to Detect Rain with an Arduino Rain Sensor?
Do you want to build a weather station that can accurately detect rain using an Arduino rain sensor? Look no further! In this article, we will guide you through the process of setting up an Arduino rain sensor and programming it to detect rain. Let’s get started!
What You Will Need:
- Arduino Board (e.g., Arduino Uno)
- Rain Sensor Module
- Jumper Wires
Before we begin, make sure you have all the necessary components listed above. Once you have everything ready, follow the step-by-step guide below to detect rain with an Arduino rain sensor.
Step 1: Connect the Rain Sensor to the Arduino Board
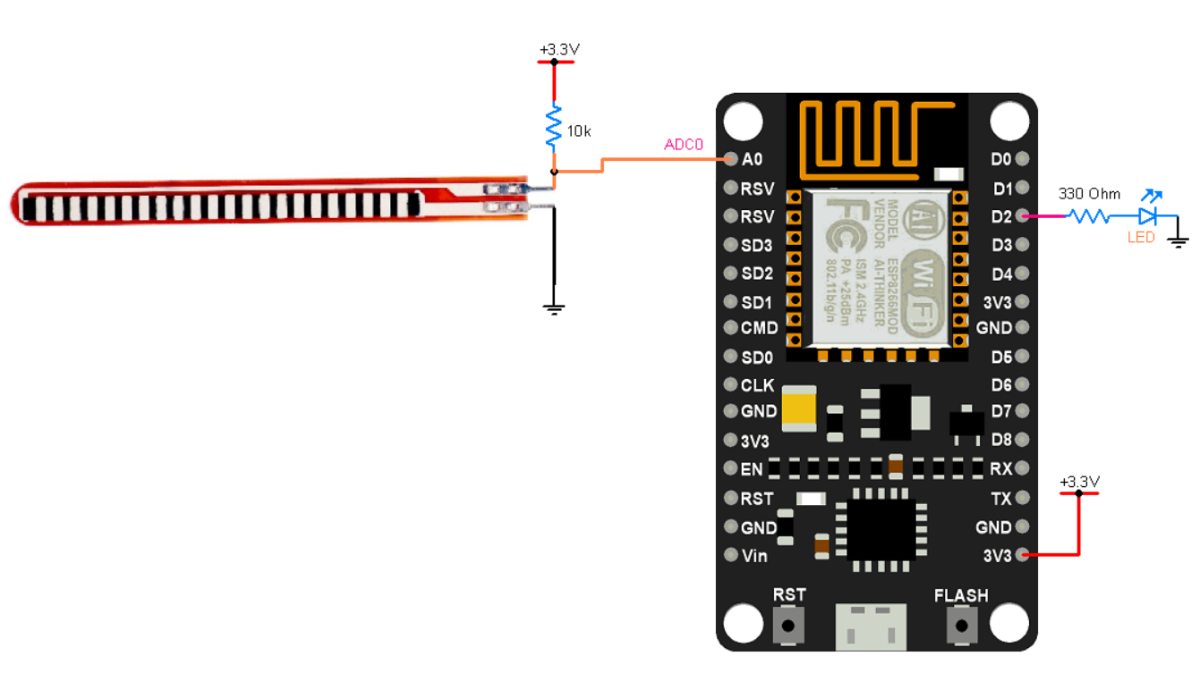
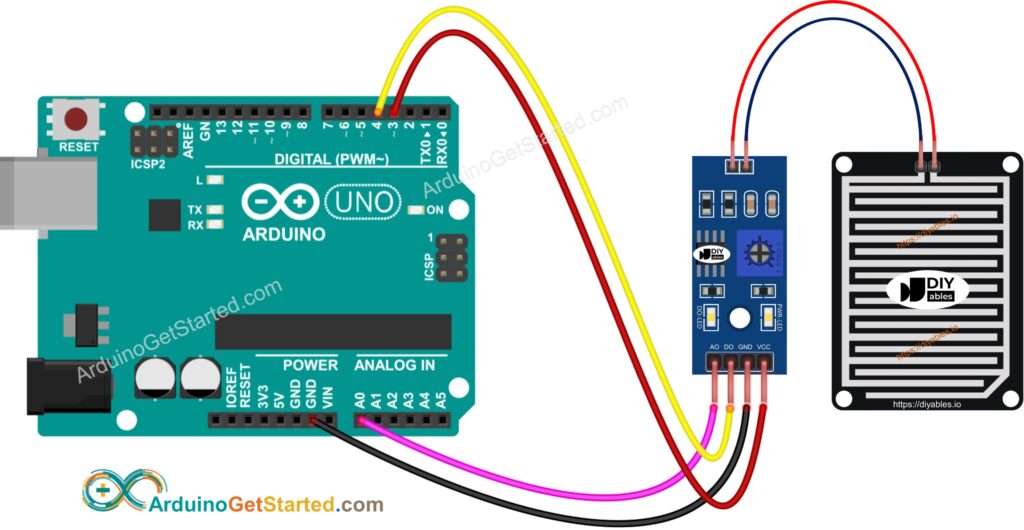
Start by connecting the rain sensor module to your Arduino board using jumper wires. The rain sensor typically has three pins: VCC, GND, and A0. Connect the VCC pin to the 5V pin on the Arduino, the GND pin to the GND pin, and the A0 pin to any analog pin (e.g., A0) on the Arduino board.
Step 2: Write the Arduino Code
Next, open the Arduino IDE on your computer and write the code to read the output from the rain sensor. Here’s a sample code snippet:
void setup() {
  Serial.begin(9600);
}

void loop() {
  int sensorValue = analogRead(A0);
  Serial.print("Rain intensity: ");
  Serial.println(sensorValue);
  delay(1000); // Delay for 1 second
}
This code snippet reads the output from the rain sensor connected to pin A0 and prints the sensor value to the serial monitor. You can modify the code based on your specific requirements.
Step 3: Test the Rain Sensor
Upload the code to your Arduino board and open the serial monitor in the Arduino IDE. You should see the rain intensity values being printed on the serial monitor. Place a few drops of water on the rain sensor to simulate rain and observe the changes in the sensor values.
Step 4: Build Your Weather Station
Once you have successfully tested the rain sensor, you can incorporate it into your weather station project. You can add additional sensors for temperature, humidity, and pressure to create a complete weather monitoring system using Arduino.
With a bit of creativity and experimentation, you can customize your weather station to suit your needs and preferences. Have fun tinkering with different sensors and components to enhance your weather station project.
Conclusion
Building a weather station with an Arduino rain sensor is a fun and educational project that can help you learn more about electronics and programming. By following the steps outlined in this article, you can create a weather station that accurately detects rain and other weather conditions. So, roll up your sleeves, grab your Arduino board, and start building your weather station today!
How to Detect Rain with an Arduino Rain Sensor?
Do you want to build a weather station that can accurately detect rain using an Arduino rain sensor? Look no further! In this article, we will guide you through the process of setting up an Arduino rain sensor and programming it to detect rain. Let’s get started!
What You Will Need:
- Arduino Board (e.g., Arduino Uno)
- Rain Sensor Module
- Jumper Wires
Before we begin, make sure you have all the necessary components listed above. Once you have everything ready, follow the step-by-step guide below to detect rain with an Arduino rain sensor.
Step 1: Connect the Rain Sensor to the Arduino Board
Start by connecting the rain sensor module to your Arduino board using jumper wires. The rain sensor typically has three pins: VCC, GND, and A0. Connect the VCC pin to the 5V pin on the Arduino, the GND pin to the GND pin, and the A0 pin to any analog pin (e.g., A0) on the Arduino board.
Step 2: Write the Arduino Code
Next, open the Arduino IDE on your computer and write the code to read the output from the rain sensor. Here’s a sample code snippet:
void setup() {
  Serial.begin(9600);
}

void loop() {
  int sensorValue = analogRead(A0);
  Serial.print("Rain intensity: ");
  Serial.println(sensorValue);
  delay(1000); // Delay for 1 second
}
This code snippet reads the output from the rain sensor connected to pin A0 and prints the sensor value to the serial monitor. You can modify the code based on your specific requirements.
Step 3: Test the Rain Sensor
Upload the code to your Arduino board and open the serial monitor in the Arduino IDE. You should see the rain intensity values being printed on the serial monitor. Place a few drops of water on the rain sensor to simulate rain and observe the changes in the sensor values.
Step 4: Build Your Weather Station
Once you have successfully tested the rain sensor, you can incorporate it into your weather station project. You can add additional sensors for temperature, humidity, and pressure to create a complete weather monitoring system using Arduino.
With a bit of creativity and experimentation, you can customize your weather station to suit your needs and preferences. Have fun tinkering with different sensors and components to enhance your weather station project.
Conclusion
Building a weather station with an Arduino rain sensor is a fun and educational project that can help you learn more about electronics and programming. By following the steps outlined in this article, you can create a weather station that accurately detects rain and other weather conditions. So, roll up your sleeves, grab your Arduino board, and start building your weather station today!