How to Make a Wireless Charging Circuit
Wireless charging has become a popular way to power up electronic devices without the hassle of cords and cables. While many smartphones and tablets now come equipped with wireless charging capabilities, you can also create your own wireless charging circuit for other devices. In this article, we will walk you through the process of making a simple wireless charging circuit that you can use to power up your projects.
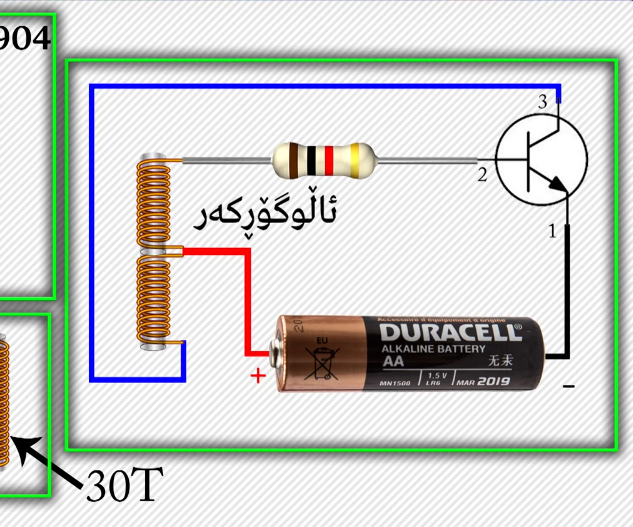
Materials Needed:
- Inductive charging coil
- Bridge rectifier
- Capacitor
- LED
- Resistor
- Transistor
- Diode
- Wireless charging receiver module
- Breadboard
- Jumper wires
- Soldering iron
- Solder
- Power source (battery or adapter)
Step 1: Building the Circuit
Start by placing the inductive charging coil on the breadboard. Connect the positive terminal of the bridge rectifier to one end of the coil and the negative terminal to the other end. Connect a capacitor between the output terminals of the bridge rectifier to smooth out the voltage. Add an LED in parallel with the capacitor to indicate when the circuit is charging.
Next, connect a resistor to the base of the transistor and then connect the emitter terminal to ground. Connect the collector terminal to the bridge rectifier output. Connect a diode in parallel with the coil to protect the circuit from reverse voltage spikes. Finally, connect the wireless charging receiver module to the circuit to receive the power wirelessly.
Step 2: Testing the Circuit
Once you have assembled the circuit, power it up using a battery or adapter. Place the wireless charging receiver module near the inductive charging coil and ensure that the LED lights up, indicating that the circuit is charging wirelessly. Test the circuit by powering up different devices using the wireless charging capabilities.
Step 3: Troubleshooting and Optimization
If the circuit is not working properly, double-check all the connections and components to ensure everything is in place. You may need to adjust the values of the components or optimize the circuit layout for better performance. Experiment with different configurations and components to find the best setup for your wireless charging circuit.
Conclusion
Creating a wireless charging circuit can be a fun and rewarding project for electronics enthusiasts. By following the steps outlined in this article, you can build your own wireless charging circuit and power up your devices without the need for cords and cables. Experiment with different components and configurations to customize your circuit and optimize its performance. Happy building!
Was this helpful?
0 / 0