How to Design a 12V Solar Charge Controller
Designing a 12V solar charge controller is a crucial step in setting up a solar power system. A charge controller is essential for regulating the voltage and current from solar panels to the battery. It protects the battery from overcharging and ensures maximum efficiency of the solar system. In this article, we will guide you on how to design a 12V solar charge controller from scratch.
1. Determine the Voltage and Current Ratings
The first step in designing a charge controller is to determine the voltage and current ratings of your solar panels and battery. For a 12V system, you need a charge controller that can handle at least 12V and the maximum current output of your panels. Make sure to choose a controller that has a higher current rating than your panels to avoid overheating and damage.
2. Select the Type of Charge Controller
There are three main types of charge controllers: PWM (Pulse Width Modulation), MPPT (Maximum Power Point Tracking), and simple on/off regulators. PWM controllers are more affordable and suitable for smaller systems, while MPPT controllers are more efficient and better for larger installations. Choose the type that best suits your needs and budget.
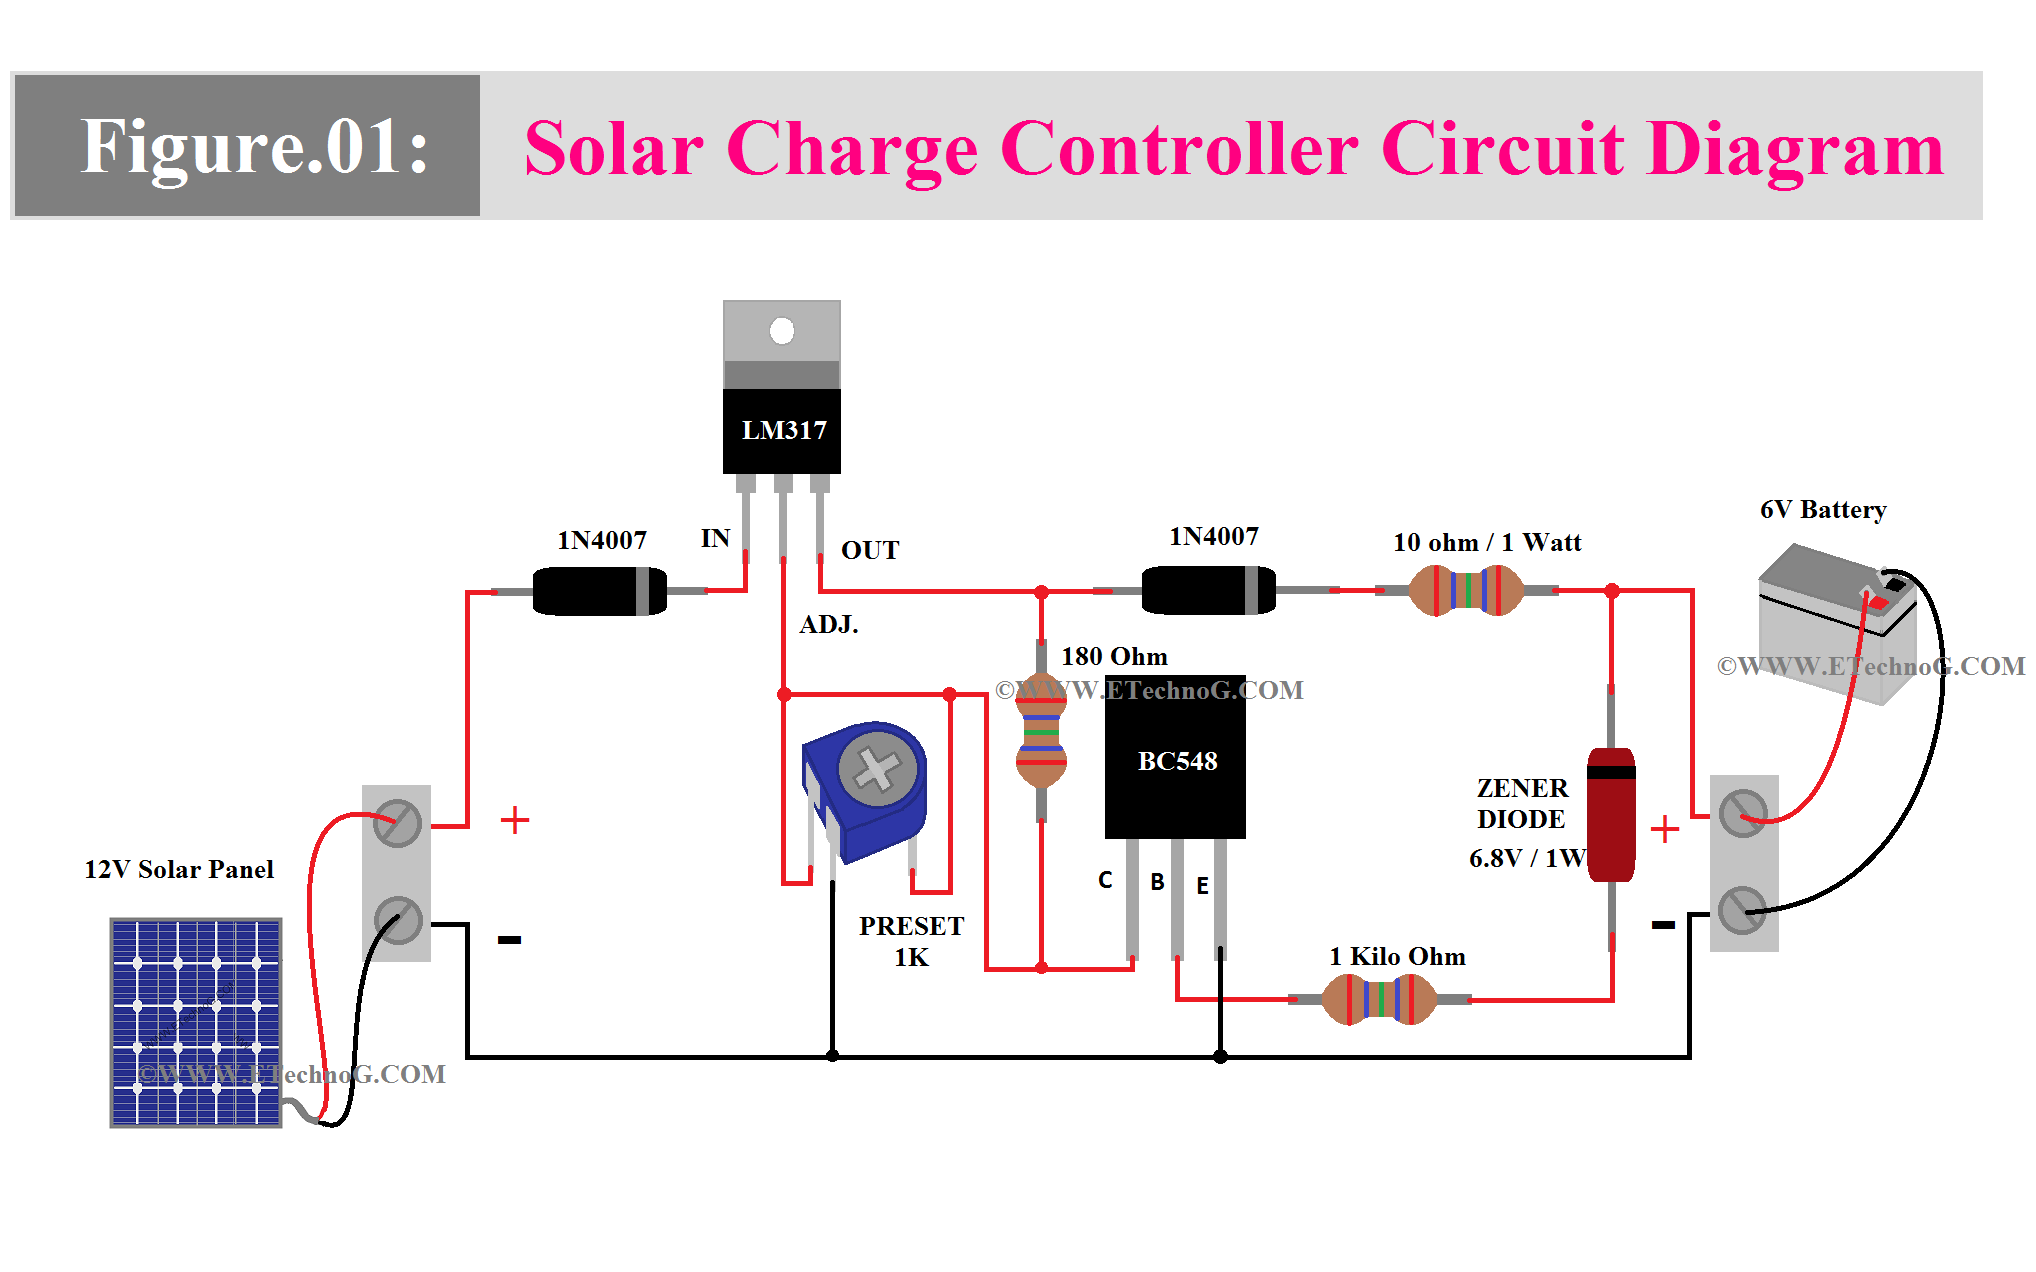
3. Design the Circuit Diagram
Once you have determined the voltage, current, and type of charge controller, it’s time to create a circuit diagram. The circuit should include components such as MOSFETs, resistors, capacitors, and diodes to regulate the voltage and current flow between the solar panels and battery. Make sure to follow the guidelines provided by the charge controller manufacturer.
4. Test the Charge Controller
After designing the circuit, it’s essential to test the charge controller to ensure its functionality and efficiency. Connect the controller to the solar panels and battery and monitor the voltage and current output. Make adjustments if necessary to optimize the performance of the system.
5. Install the Charge Controller
Once the charge controller has been tested and verified, it’s time to install it in your solar power system. Mount the controller in a secure and well-ventilated location near the battery bank. Make sure to connect the solar panels, battery, and load according to the circuit diagram to ensure proper functioning.
6. Monitor and Maintain the Charge Controller
Lastly, it’s crucial to monitor and maintain the charge controller regularly to ensure the longevity and efficiency of your solar power system. Check the connections, voltage levels, and overall performance of the controller periodically. Clean the controller from dust and debris to prevent overheating and malfunction.
Designing a 12V solar charge controller requires careful planning, knowledge of electrical circuits, and attention to detail. By following the steps outlined in this article, you can create a reliable and efficient charge controller for your solar power system. Remember to consult with professionals or manufacturers if you encounter any challenges during the design process.
Was this helpful?
0 / 0