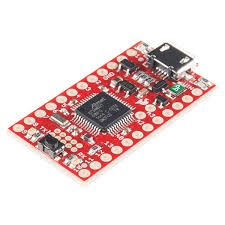
How to Program a SAMD21 Microcontroller
The SAMD21 microcontroller is a powerful and versatile microcontroller that is commonly used in a variety of electronic projects. Whether you are a beginner or an experienced developer, programming a SAMD21 microcontroller can be a rewarding experience. In this article, we will guide you through the process of programming a SAMD21 microcontroller from start to finish.
Step 1: Set Up Your Development Environment
Before you can start programming your SAMD21 microcontroller, you will need to set up your development environment. To do this, you will need to install the necessary software tools and drivers on your computer. The most common software tools used for programming SAMD21 microcontrollers are Atmel Studio and Arduino IDE.
Step 2: Connect Your SAMD21 Microcontroller to Your Computer
Once you have set up your development environment, you will need to connect your SAMD21 microcontroller to your computer. You can do this by using a USB cable to connect the microcontroller to your computer’s USB port. Make sure that the microcontroller is properly connected and recognized by your computer before proceeding to the next step.
Step 3: Write Your Code
Now that you have set up your development environment and connected your SAMD21 microcontroller to your computer, it is time to write your code. You can write your code in Atmel Studio or Arduino IDE, depending on your preference. Make sure to write clean and well-structured code to avoid any issues during the programming process.
Step 4: Compile and Upload Your Code
Once you have written your code, you will need to compile it and upload it to your SAMD21 microcontroller. This can be done using the programming tool provided by Atmel Studio or Arduino IDE. Make sure to follow the instructions carefully to ensure that your code is successfully uploaded to the microcontroller.
Step 5: Test Your Code
After you have uploaded your code to your SAMD21 microcontroller, it is time to test it. Make sure to test all the functionality of your code to ensure that it is working as expected. If you encounter any issues, go back and review your code to identify and fix any errors.
Step 6: Debug and Troubleshoot
If you encounter any issues while testing your code, you will need to debug and troubleshoot the problem. Use the debugging tools provided by Atmel Studio or Arduino IDE to identify the source of the issue. Once you have identified the problem, make the necessary corrections to your code and retest it.
Step 7: Rinse and Repeat
Programming a SAMD21 microcontroller can be a challenging but rewarding experience. By following the steps outlined in this article, you should be able to successfully program your SAMD21 microcontroller and create amazing projects. Remember, practice makes perfect, so don’t be afraid to experiment and learn from your mistakes. Happy programming!
Was this helpful?
0 / 0