How to Program a Microcontroller with USB
Microcontrollers are versatile devices that can be programmed to perform a wide range of functions. Programming a microcontroller with a USB connection can be a convenient and efficient way to upload code and interact with the device. In this article, we will walk you through the steps to program a microcontroller using a USB connection.
Step 1: Choose the Right Microcontroller
Before you can start programming a microcontroller with USB, you will need to choose the right microcontroller for your project. There are a variety of microcontrollers available on the market, each with its own set of features and capabilities. Some popular microcontroller brands that support USB programming include Arduino, Raspberry Pi, and ESP32.
Step 2: Install the Necessary Software
Once you have selected the microcontroller for your project, the next step is to install the necessary software on your computer. Most microcontrollers have their own programming environments that can be downloaded from the manufacturer’s website. For example, if you are using an Arduino, you will need to download the Arduino IDE.
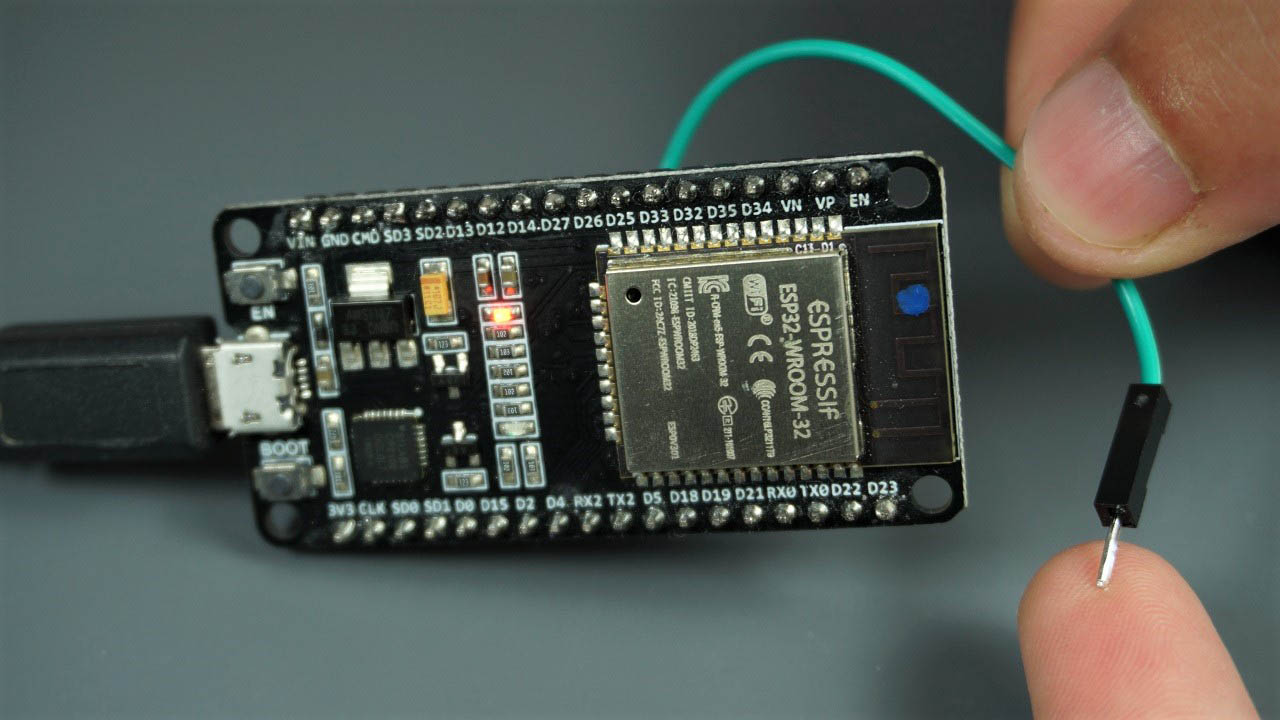
Step 3: Connect the Microcontroller to your Computer
Before you can start programming the microcontroller with USB, you will need to connect the device to your computer. Most microcontrollers come with a USB port that can be used to establish the connection. Make sure to use a high-quality USB cable to avoid any connection issues.
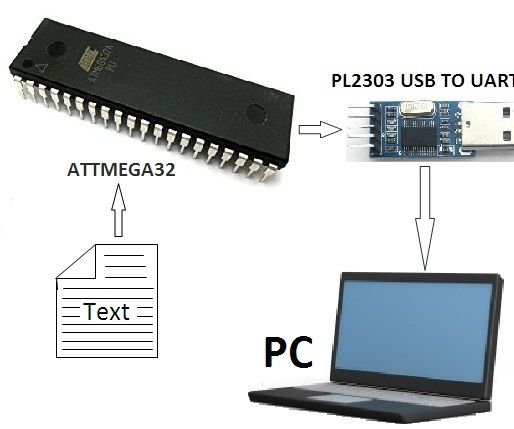
Step 4: Upload Code to the Microcontroller
Once the microcontroller is connected to your computer, you can start uploading code to the device. Most programming environments have a dedicated upload button that will send the code to the microcontroller via the USB connection. Make sure to follow the instructions provided by the manufacturer to ensure successful code upload.
Step 5: Test your Code
After uploading the code to the microcontroller, it is important to test the program to ensure that it is functioning as expected. Most programming environments have a serial monitor feature that allows you to monitor the output of the program in real-time. Use this feature to debug any issues and make necessary adjustments to the code.
Conclusion
Programming a microcontroller with USB can be a convenient and efficient way to interact with the device and upload code. By following the steps outlined in this article, you can easily program a microcontroller using a USB connection. Remember to choose the right microcontroller for your project, install the necessary software, connect the device to your computer, upload code, and test your program to ensure successful execution.
How to Program a Microcontroller with USB
Microcontrollers are versatile devices that can be programmed to perform a wide range of functions. Programming a microcontroller with a USB connection can be a convenient and efficient way to upload code and interact with the device. In this article, we will walk you through the steps to program a microcontroller using a USB connection.
Step 1: Choose the Right Microcontroller
Before you can start programming a microcontroller with USB, you will need to choose the right microcontroller for your project. There are a variety of microcontrollers available on the market, each with its own set of features and capabilities. Some popular microcontroller brands that support USB programming include Arduino, Raspberry Pi, and ESP32.
Step 2: Install the Necessary Software
Once you have selected the microcontroller for your project, the next step is to install the necessary software on your computer. Most microcontrollers have their own programming environments that can be downloaded from the manufacturer’s website. For example, if you are using an Arduino, you will need to download the Arduino IDE.
Step 3: Connect the Microcontroller to your Computer
Before you can start programming the microcontroller with USB, you will need to connect the device to your computer. Most microcontrollers come with a USB port that can be used to establish the connection. Make sure to use a high-quality USB cable to avoid any connection issues.
Step 4: Upload Code to the Microcontroller
Once the microcontroller is connected to your computer, you can start uploading code to the device. Most programming environments have a dedicated upload button that will send the code to the microcontroller via the USB connection. Make sure to follow the instructions provided by the manufacturer to ensure successful code upload.
Step 5: Test your Code
After uploading the code to the microcontroller, it is important to test the program to ensure that it is functioning as expected. Most programming environments have a serial monitor feature that allows you to monitor the output of the program in real-time. Use this feature to debug any issues and make necessary adjustments to the code.
Conclusion
Programming a microcontroller with USB can be a convenient and efficient way to interact with the device and upload code. By following the steps outlined in this article, you can easily program a microcontroller using a USB connection. Remember to choose the right microcontroller for your project, install the necessary software, connect the device to your computer, upload code, and test your program to ensure successful execution.