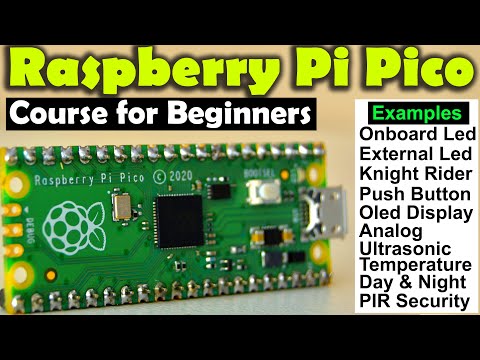
How to Program an RP2040 Microcontroller
If you’re looking to dive into the world of embedded systems and microcontrollers, the RP2040 microcontroller is a great place to start. Developed by Raspberry Pi, this powerful microcontroller offers a wide range of features and capabilities, making it ideal for a variety of projects. In this article, we’ll walk you through the process of programming an RP2040 microcontroller, from setting up your development environment to writing and uploading code. Let’s get started!
Setting up Your Development Environment
Before you can start programming your RP2040 microcontroller, you’ll need to set up your development environment. To do this, you’ll need to install the necessary software on your computer. The RP2040 is compatible with a wide range of development tools, but one of the most popular options is the Raspberry Pi Pico SDK. This SDK provides a set of libraries and utilities that make it easy to write and compile code for the RP2040.
To get started, head to the Raspberry Pi website and download the latest version of the Pico SDK. Once you’ve downloaded the SDK, follow the installation instructions to set it up on your computer. This will typically involve running a setup script or installing some dependencies using a package manager like apt-get or homebrew. Once the SDK is installed, you’re ready to start writing code!
Writing Code for the RP2040
Now that you’ve set up your development environment, it’s time to start writing some code for your RP2040 microcontroller. The RP2040 supports a variety of programming languages, including C and C++, so you can choose the language that you’re most comfortable with. To get started, create a new project folder and create a new source file with a .c or .cpp extension.
Once you’ve created your source file, you can start writing your code. The RP2040 SDK provides a set of libraries that make it easy to interact with the microcontroller’s hardware peripherals, such as GPIO pins, PWM controllers, and SPI interfaces. You can find detailed documentation on the RP2040 SDK website that explains how to use these libraries in your code.
Compiling and Uploading Your Code
Once you’ve written your code, you’ll need to compile it into a binary file that can be uploaded to your RP2040 microcontroller. To do this, you’ll need to use the pico-build tool that comes with the Raspberry Pi Pico SDK. Navigate to your project folder in a terminal window and run the pico-build command to compile your code. If there are no errors, the tool will generate a .uf2 file that you can upload to your RP2040.
To upload the compiled code to your RP2040, plug your microcontroller into your computer using a USB cable while holding down the BOOTSEL button. This will put the RP2040 into bootloader mode, allowing you to drag and drop the .uf2 file onto the microcontroller’s USB storage device. Once the file has been uploaded, reset the RP2040 by pressing the RESET button, and your code will start running.
Experimenting and Exploring
Now that you’ve successfully programmed your RP2040 microcontroller, it’s time to start experimenting and exploring its capabilities. Try connecting different sensors, displays, and peripherals to your RP2040 to see what you can create. There are endless possibilities for projects that you can build with the RP2040, so don’t be afraid to try new things and push the boundaries of what’s possible.
Remember, programming a microcontroller is a hands-on learning experience, so don’t be discouraged by challenges or mistakes. The more you experiment and practice, the more comfortable you’ll become with programming the RP2040 and other microcontrollers. Enjoy the process and have fun exploring the exciting world of embedded systems!
Was this helpful?
0 / 0