How to Program an ATmega2560 using USBasp
If you’re looking to program an ATmega2560 microcontroller using a USBasp programmer, you’re in the right place! While the process may seem daunting at first, with the right tools and knowledge, you’ll be able to upload code to your ATmega2560 with ease.
Before we dive into the step-by-step guide, it’s essential to understand what the ATmega2560 is and why you might want to program it. The ATmega2560 is a powerful microcontroller chip that can be found on Arduino Mega boards. By programming the ATmega2560, you can customize the behavior of your Arduino projects, create standalone applications, and much more.
Step 1: Install USBasp Drivers
The first step in programming your ATmega2560 is to install the necessary drivers for your USBasp programmer. Depending on your operating system, you may need to download and install specific drivers to ensure proper communication between your computer and the USBasp.
For Windows users, you can download the drivers from the official USBasp website or use a tool like Zadig to automatically install the drivers. Mac and Linux users may need to install additional drivers or software to recognize the USBasp programmer.
Step 2: Connect the USBasp Programmer
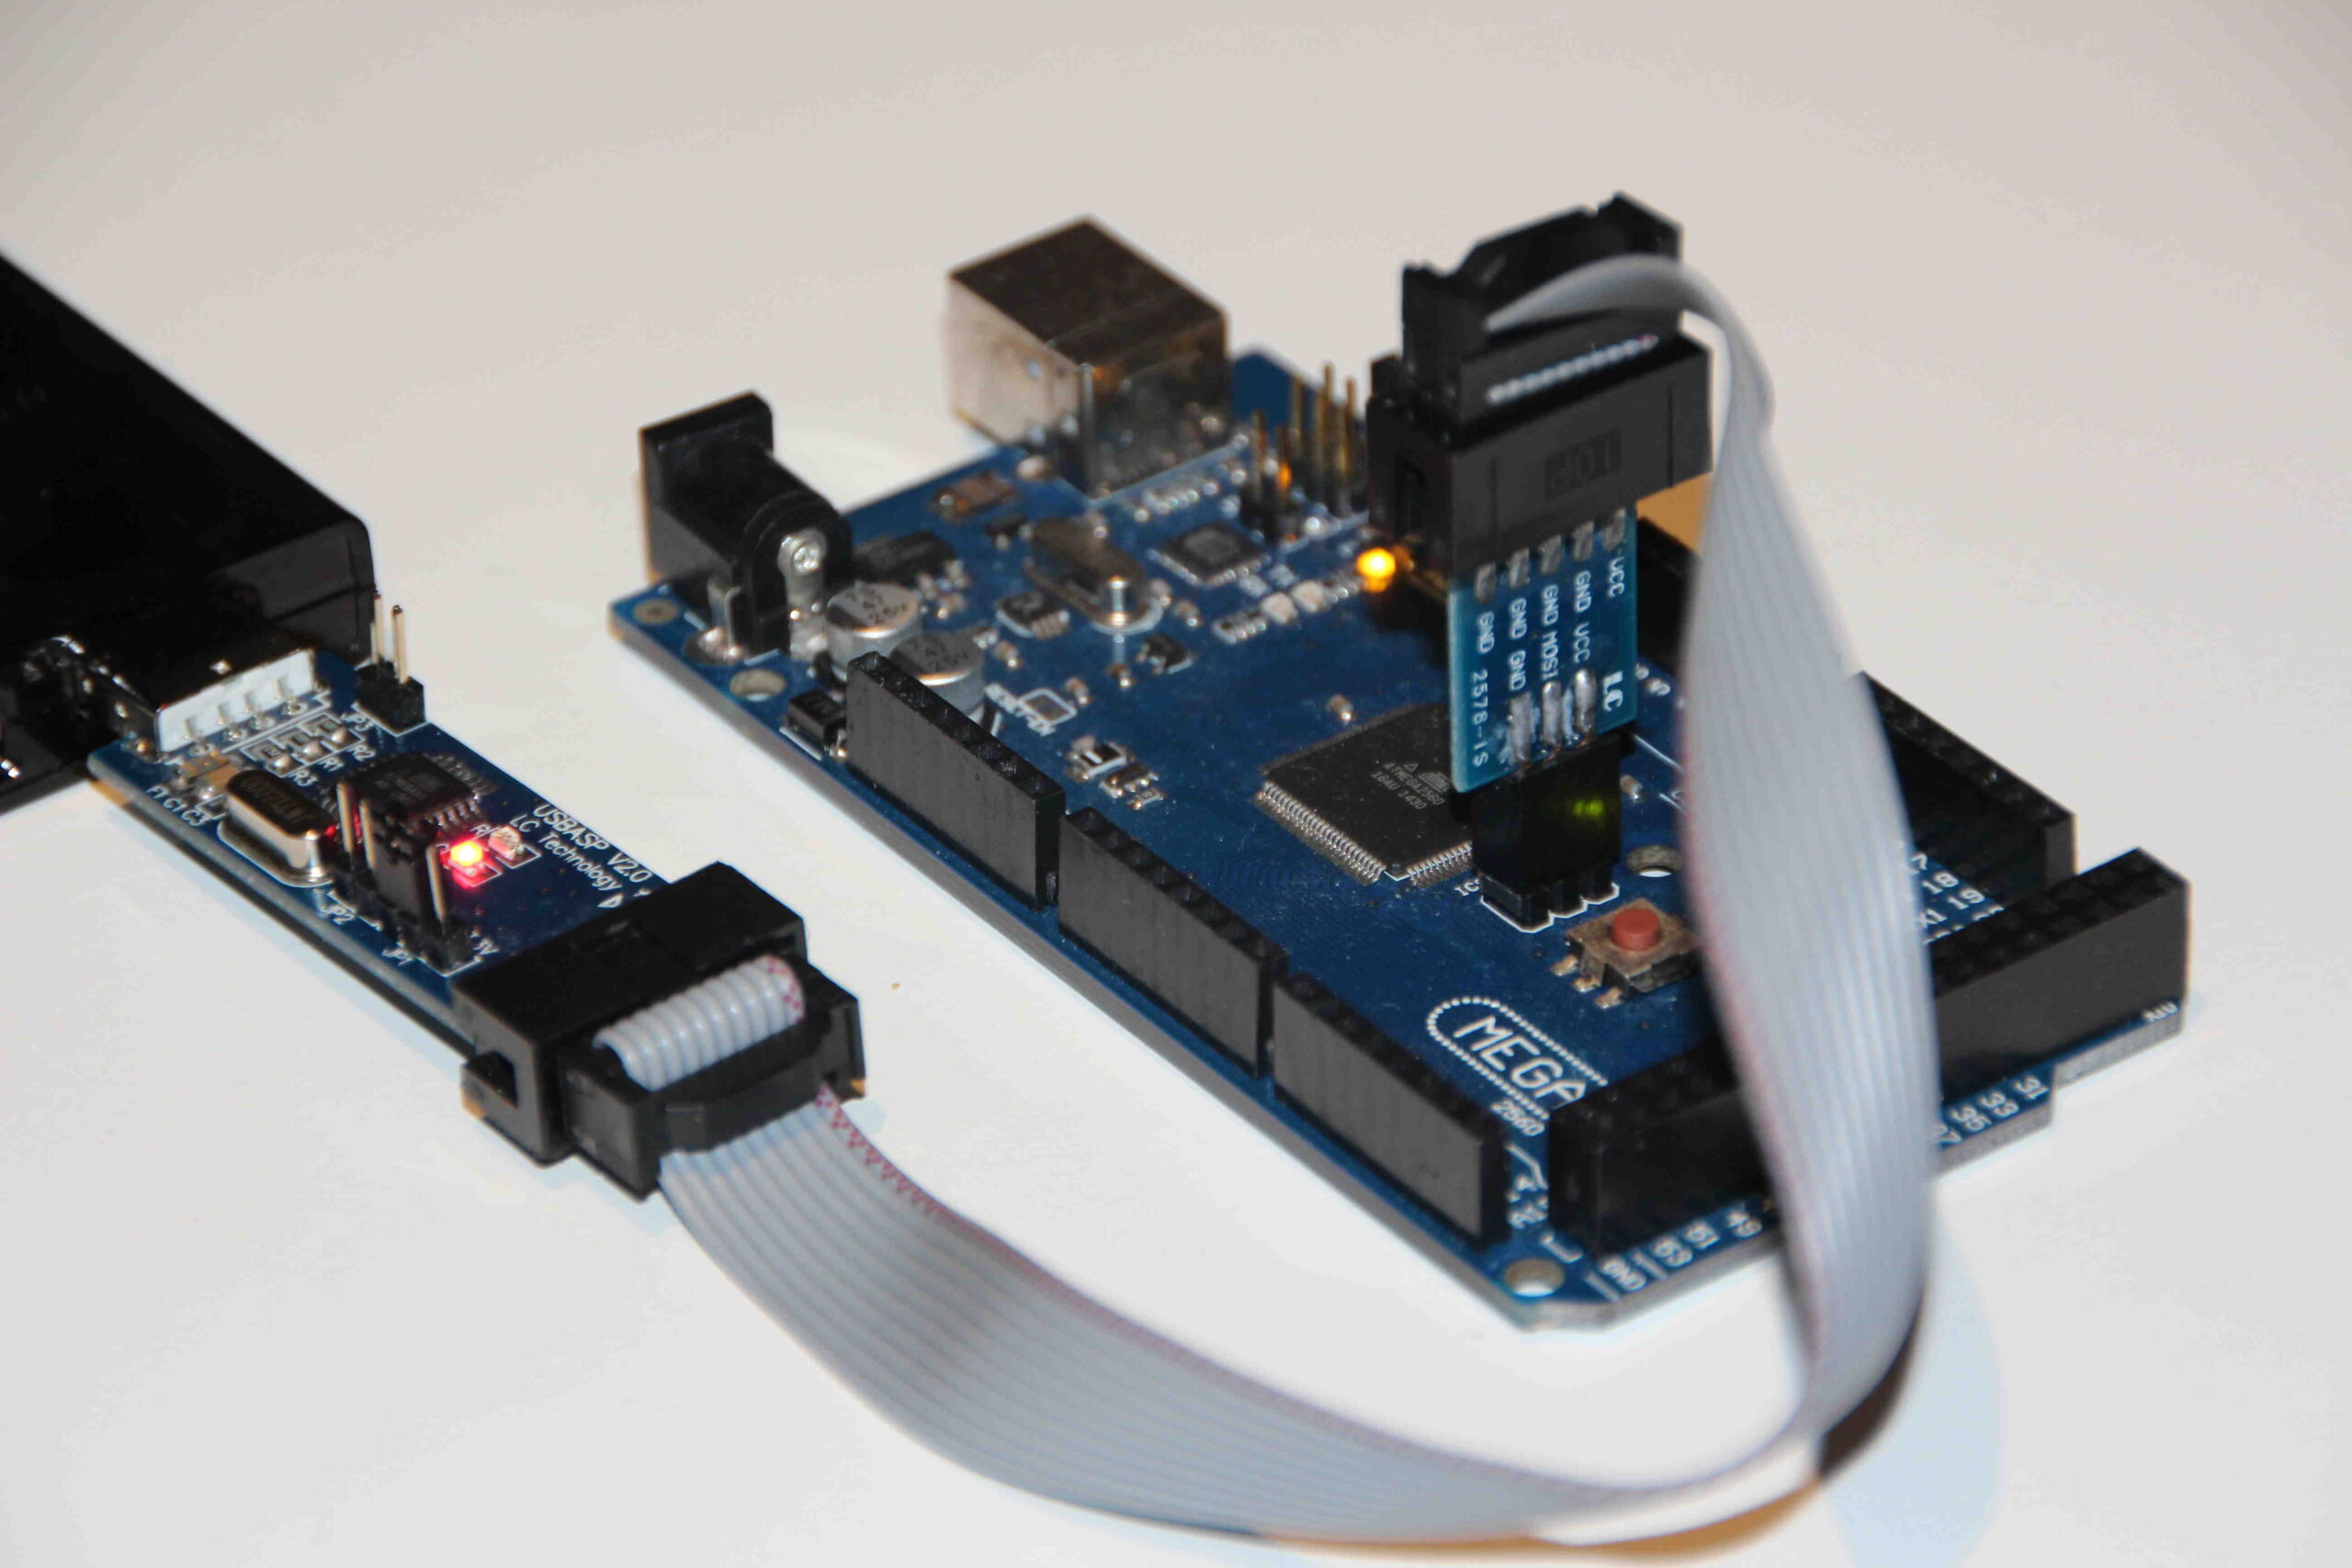
Once you have installed the drivers, it’s time to connect the USBasp programmer to your computer and the ATmega2560 microcontroller. The USBasp programmer typically comes with a 6-pin connector that plugs into the ATmega2560’s programming header.
Make sure the connections are secure and that the orientation is correct before proceeding to the next step. It’s essential to double-check the connections to avoid any issues during the programming process.
Step 3: Upload Code to the ATmega2560
With the USBasp programmer connected to your computer and the ATmega2560, you can now upload code to the microcontroller. Using a software like AVRDUDE, you can specify the programming options, target device, and the hex file containing your code.
Before uploading the code, ensure that the USBasp programmer is recognized by your computer and that the connections are secure. Once everything is set up correctly, you can upload the code to the ATmega2560 and test your program on the microcontroller.
Conclusion
Programming an ATmega2560 using a USBasp programmer may seem intimidating at first, but with the right tools and knowledge, you can unleash the full potential of this powerful microcontroller. By following the steps outlined in this guide, you’ll be able to program your ATmega2560 with ease and take your Arduino projects to the next level.
Remember to double-check your connections, install the necessary drivers, and test your code thoroughly before deploying it on your ATmega2560. With practice and patience, you’ll become proficient in programming the ATmega2560 and creating innovative projects that showcase your skills.
Was this helpful?
0 / 0