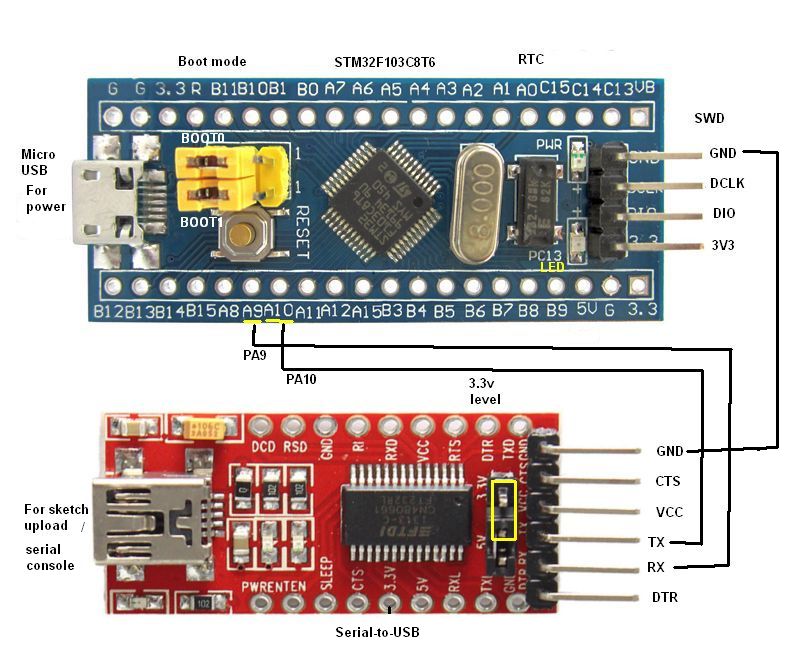
How to Program an STM32 with Arduino IDE?
If you’re looking to program an STM32 microcontroller using Arduino IDE, you’re in the right place! While Arduino was originally designed to work with Atmel AVR microcontrollers, with a few tweaks and the right libraries, you can also program STM32 microcontrollers with the same familiar Arduino IDE environment.
Programming an STM32 with Arduino IDE is a great way to leverage the simplicity and ease of use provided by the Arduino ecosystem while taking advantage of the power and performance of STM32 microcontrollers. In this article, we will walk you through the necessary steps to get started programming your STM32 board with Arduino IDE.
Step 1: Install Arduino IDE
The first step is to download and install Arduino IDE on your computer if you haven’t already. You can download the latest version of Arduino IDE from the official Arduino website and follow the installation instructions for your operating system.
Step 2: Install STM32 Board Support
Next, you will need to install the necessary board support package for STM32 microcontrollers in Arduino IDE. To do this, open Arduino IDE and go to File > Preferences. In the Additional Board Manager URLs field, add the following URL:
https://github.com/stm32duino/BoardManagerFiles/raw/main/STM32/package_stm_index.json
After adding the URL, go to Tools > Board > Boards Manager and search for “STM32” to install the STM32 boards support package.
Step 3: Select STM32 Board and Port
With the STM32 board support package installed, you can now select the STM32 board you are using from the Tools > Board menu in Arduino IDE. Additionally, make sure to select the correct port under Tools > Port to communicate with your STM32 board.
Step 4: Write and Upload Your Sketch
Now that everything is set up, you can start writing your Arduino sketch for the STM32 microcontroller. Write your code in the Arduino IDE editor, verify it, and upload it to your STM32 board by clicking the upload button.
Once the upload is complete, you should see your sketch running on the STM32 board, just like you would with any other Arduino-compatible board. Congratulations, you have successfully programmed an STM32 microcontroller with Arduino IDE!
Conclusion
Programming an STM32 microcontroller with Arduino IDE opens up a world of possibilities, allowing you to combine the simplicity of Arduino programming with the performance of STM32 microcontrollers. By following the steps outlined in this article, you can easily get started programming your STM32 board with Arduino IDE and start building your projects.
So what are you waiting for? Grab your STM32 board, fire up Arduino IDE, and start coding!
Was this helpful?
0 / 0