How to connect ESP8266 to Microsoft Azure IoT Hub?
Microsoft Azure IoT Hub is a powerful cloud-based service that allows you to connect, monitor, and manage your IoT devices. One popular device in the IoT world is the ESP8266, a low-cost Wi-Fi module that can be easily integrated into your projects. In this article, we will show you how to connect your ESP8266 to Microsoft Azure IoT Hub and start sending data to the cloud.
Step 1: Set up Azure IoT Hub
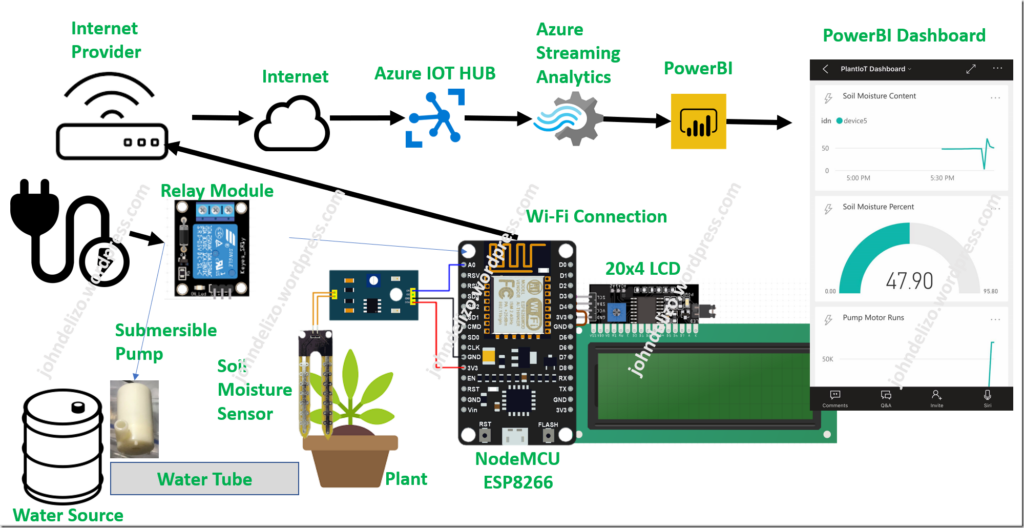
The first step is to create an Azure IoT Hub in your Azure portal. Simply navigate to the Azure portal, click on “Create a resource,” search for “IoT Hub,” and follow the prompts to set up your IoT Hub. Make sure to take note of your IoT Hub hostname and shared access key, as you will need this information later on.
Step 2: Install the necessary libraries
Next, you will need to install the necessary libraries to connect your ESP8266 to Azure IoT Hub. You can use the Arduino IDE to install the AzureIoTHub and AzureIoTUtility libraries. Simply open the Arduino IDE, go to “Sketch” -> “Include Library” -> “Manage Libraries,” and search for “AzureIoTHub” and “AzureIoTUtility.” Click on install to add these libraries to your IDE.
Step 3: Write the code
Now, it’s time to write the code to connect your ESP8266 to Azure IoT Hub. Below is a sample code snippet to get you started:
#include
#include
#include "ESP8266WiFi.h"

// Define your IoT Hub connection string
static const char* connectionString = "HostName=your-iot-hub.azure-devices.net;DeviceId=your-device-id;SharedAccessKey=your-shared-access-key";

// Initialize the WiFi client
WiFiClient wifiClient;

// Initialize the Azure IoT Hub client
IoTHubClient client(wifiClient, connectionString, false, MQTT_Protocol);

void setup() {
  // Connect to WiFi
  WiFi.begin("your-ssid", "your-password");

  // Connect to Azure IoT Hub
  client.begin();
}

void loop() {
  // Send data to Azure IoT Hub
  client.loop();
}
Make sure to replace “your-iot-hub.azure-devices.net,” “your-device-id,” and “your-shared-access-key” with your actual IoT Hub information. Also, replace “your-ssid” and “your-password” with your WiFi network credentials.
Step 4: Test your connection
Upload the code to your ESP8266 board and open the serial monitor. You should see the ESP8266 connect to your WiFi network and then connect to Azure IoT Hub. You can test the connection by sending some data from your ESP8266 to Azure IoT Hub.
That’s it! You have successfully connected your ESP8266 to Microsoft Azure IoT Hub. Now you can start building amazing IoT projects and take advantage of the powerful features offered by Azure IoT Hub.
How to connect ESP8266 to Microsoft Azure IoT Hub?
Microsoft Azure IoT Hub is a powerful cloud-based service that allows you to connect, monitor, and manage your IoT devices. One popular device in the IoT world is the ESP8266, a low-cost Wi-Fi module that can be easily integrated into your projects. In this article, we will show you how to connect your ESP8266 to Microsoft Azure IoT Hub and start sending data to the cloud.
Step 1: Set up Azure IoT Hub
The first step is to create an Azure IoT Hub in your Azure portal. Simply navigate to the Azure portal, click on “Create a resource,” search for “IoT Hub,” and follow the prompts to set up your IoT Hub. Make sure to take note of your IoT Hub hostname and shared access key, as you will need this information later on.
Step 2: Install the necessary libraries
Next, you will need to install the necessary libraries to connect your ESP8266 to Azure IoT Hub. You can use the Arduino IDE to install the AzureIoTHub and AzureIoTUtility libraries. Simply open the Arduino IDE, go to “Sketch” -> “Include Library” -> “Manage Libraries,” and search for “AzureIoTHub” and “AzureIoTUtility.” Click on install to add these libraries to your IDE.
Step 3: Write the code
Now, it’s time to write the code to connect your ESP8266 to Azure IoT Hub. Below is a sample code snippet to get you started:
#include
#include
#include "ESP8266WiFi.h"

// Define your IoT Hub connection string
static const char* connectionString = "HostName=your-iot-hub.azure-devices.net;DeviceId=your-device-id;SharedAccessKey=your-shared-access-key";

// Initialize the WiFi client
WiFiClient wifiClient;

// Initialize the Azure IoT Hub client
IoTHubClient client(wifiClient, connectionString, false, MQTT_Protocol);

void setup() {
  // Connect to WiFi
  WiFi.begin("your-ssid", "your-password");

  // Connect to Azure IoT Hub
  client.begin();
}

void loop() {
  // Send data to Azure IoT Hub
  client.loop();
}
Make sure to replace “your-iot-hub.azure-devices.net,” “your-device-id,” and “your-shared-access-key” with your actual IoT Hub information. Also, replace “your-ssid” and “your-password” with your WiFi network credentials.
Step 4: Test your connection
Upload the code to your ESP8266 board and open the serial monitor. You should see the ESP8266 connect to your WiFi network and then connect to Azure IoT Hub. You can test the connection by sending some data from your ESP8266 to Azure IoT Hub.
That’s it! You have successfully connected your ESP8266 to Microsoft Azure IoT Hub. Now you can start building amazing IoT projects and take advantage of the powerful features offered by Azure IoT Hub.