How to Control Relays with ESP8266 and MQTT
In this tutorial, we will guide you through the process of controlling relays using the ESP8266 microcontroller and MQTT protocol. This project is perfect for those interested in home automation, IoT, or DIY electronics. By the end of this tutorial, you will be able to turn on and off relays remotely using a simple web interface.
What You’ll Need
- ESP8266 Development Board
- Relay Module
- MQTT Broker (such as Mosquitto)
- Arduino IDE
- Smartphone or Computer
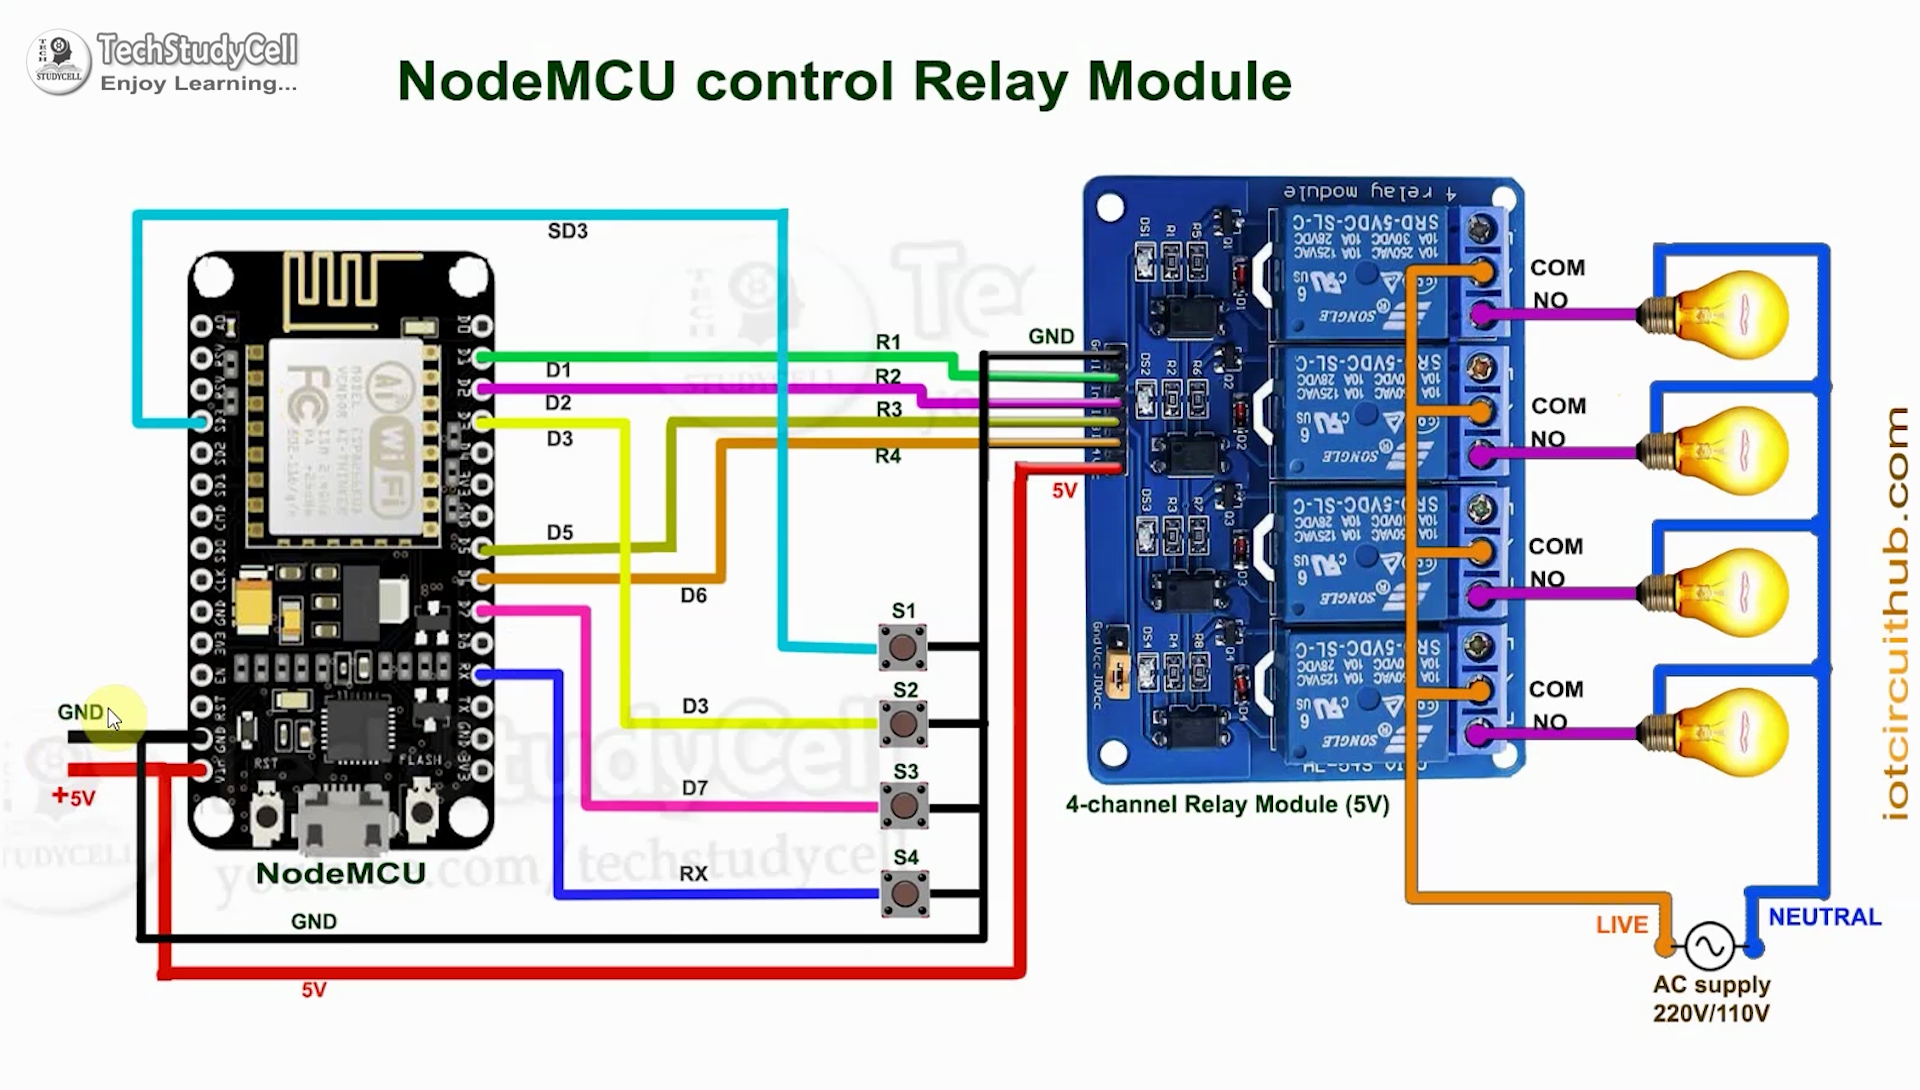
Setting Up the Hardware
First, connect the relay module to the ESP8266 development board. Make sure to connect the control pin of the relay to one of the GPIO pins on the ESP8266. Next, power up the ESP8266 board using a micro USB cable.
Now, connect your ESP8266 to your MQTT broker. You will need to configure your ESP8266 with the necessary MQTT credentials. These credentials include the broker IP address, port number, client ID, username, and password.
Programming the ESP8266
Open the Arduino IDE and install the necessary libraries for ESP8266 and MQTT. Next, write the code to subscribe to a specific MQTT topic that controls the relay. Once the ESP8266 receives a message on that topic, it will turn the relay on or off accordingly.
Upload the code to your ESP8266 board and monitor the serial output to ensure everything is working correctly. You can also test the relay by sending MQTT messages from your smartphone or computer.
Creating a Web Interface
To control the relay remotely, you can create a simple web interface using HTML, CSS, and JavaScript. This interface will send MQTT messages to the ESP8266 to turn the relay on or off. You can access this web interface from your smartphone or computer.
Once the web interface is set up, you can easily toggle the relay on and off with just a click of a button. This allows you to control devices such as lights, fans, or appliances connected to the relay remotely.
Conclusion
By following this tutorial, you have learned how to control relays using the ESP8266 and MQTT. This project opens up a world of possibilities for home automation and IoT applications. Feel free to experiment with different relay configurations and MQTT topics to suit your specific needs.
We hope you enjoyed this tutorial and found it helpful. If you have any questions or run into any issues, feel free to reach out to us for assistance. Happy tinkering!
Was this helpful?
0 / 0