How to Connect an MCP23017 I/O Expander
Are you looking to expand your microcontroller’s input/output capabilities? The MCP23017 I/O expander is a great solution that allows you to add more digital inputs and outputs to your project. In this article, we will guide you through the process of connecting and using an MCP23017 I/O expander.
What is an MCP23017 I/O Expander?
The MCP23017 is a 16-bit I/O expander that provides additional input/output pins to a microcontroller using the I2C communication protocol. It allows you to control up to 16 digital inputs or outputs with just two pins from your microcontroller, freeing up valuable GPIO pins for other tasks.
Step 1: Gather Your Materials
Before you can connect the MCP23017 to your microcontroller, you will need the following materials:
- MCP23017 I/O expander
- Breadboard
- Jumper wires
- Microcontroller (Arduino, Raspberry Pi, etc.)
- Power supply
Step 2: Connect the MCP23017
Follow these steps to connect the MCP23017 I/O expander to your microcontroller:
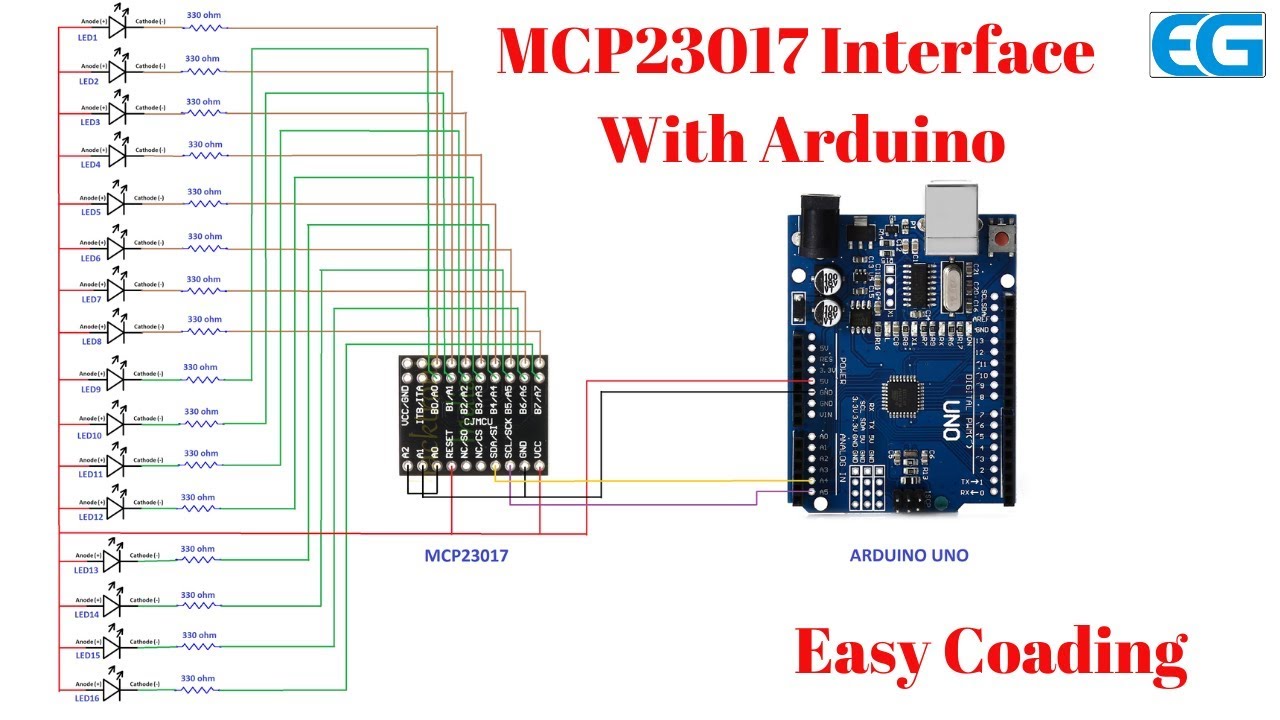
- Connect the VCC pin on the MCP23017 to your power supply’s positive terminal.
- Connect the GND pin on the MCP23017 to your power supply’s ground terminal.
- Connect the SCL pin on the MCP23017 to the SCL pin on your microcontroller.
- Connect the SDA pin on the MCP23017 to the SDA pin on your microcontroller.
Step 3: Program the MCP23017
Once you have connected the MCP23017 to your microcontroller, you will need to program it to control the digital inputs and outputs. Here is an example Arduino code snippet to get you started:
#include
#include

Adafruit_MCP23017 mcp;

void setup() {
  mcp.begin();
}

void loop() {
  mcp.digitalWrite(0, HIGH);
  delay(1000);
  mcp.digitalWrite(0, LOW);
  delay(1000);
}
Step 4: Test Your Setup
Upload the code to your microcontroller and test the digital outputs on the MCP23017. You should see the connected LEDs blink on and off at one-second intervals, indicating that the MCP23017 is working correctly.
Congratulations!
You have successfully connected and programmed an MCP23017 I/O expander to your microcontroller. Now you can expand your project’s capabilities and control more digital inputs and outputs with ease. Have fun experimenting with your new setup!
Was this helpful?
0 / 0