How to Test a 1N4007 Diode
Diodes are essential electronic components that allow current to flow in only one direction. One common type of diode is the 1N4007, which is widely used in various electronic circuits. Testing a diode is crucial to ensure it is functioning correctly. In this article, we will discuss how to test a 1N4007 diode using a multimeter.
Materials Required
- A 1N4007 diode
- A multimeter (analog or digital)
Step-by-Step Guide
Follow these steps to test a 1N4007 diode using a multimeter:
Step 1: Set the Multimeter
Turn on your multimeter and set it to the diode testing mode. In this mode, the multimeter will send a small current through the diode and measure the voltage drop across it.
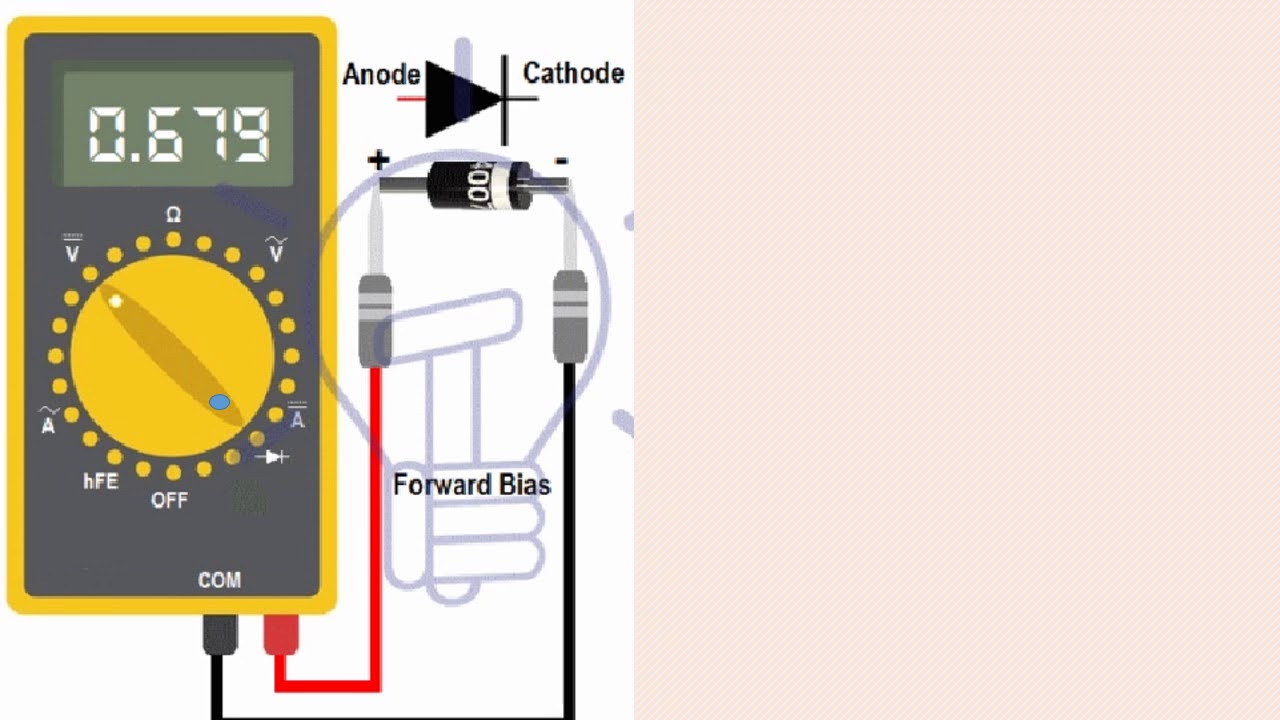
Step 2: Identify the Anode and Cathode
Locate the anode and cathode of the 1N4007 diode. The cathode is marked with a band on one end of the diode, while the other end is the anode.
Step 3: Test the Diode
Place the red probe of the multimeter on the anode of the diode and the black probe on the cathode. The multimeter should show a voltage drop of around 0.6 to 0.7 volts, indicating that the diode is functioning correctly.
Conclusion
Testing a 1N4007 diode is a simple process that can be done quickly with a multimeter. By following the steps outlined in this guide, you can ensure that your diode is working properly and avoid any issues in your electronic circuits.
Remember to always test your diodes before using them in any circuit to prevent potential damage to your components. Happy testing!
Was this helpful?
0 / 0