How to Make a Home Security Alarm Circuit
When it comes to protecting your home and loved ones, having a reliable security system in place is essential. One way to enhance your home’s security is by building your own DIY home security alarm circuit. In this article, we will guide you through the process of creating a simple yet effective home security alarm circuit using basic electronic components.
Components Needed:
- 1x PIR sensor
- 1x LM358 dual operational amplifier
- 1x 555 timer IC
- 1x BC547 transistor
- 1x 12V relay
- 1x 12V power supply
- 1x 100k resistor
- 1x 10k resistor
- 1x 10M resistor
- 1x 0.01uF capacitor
- 1x 100uF capacitor
- 1x 10uF capacitor
- 1x 1N4007 diode
- 1x buzzer
- 1x breadboard
- Jumper wires
Circuit Diagram:
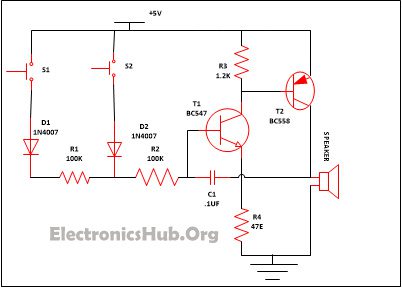
Before you start assembling the circuit, take a look at the circuit diagram below:

Step-by-Step Instructions:
Follow these step-by-step instructions to build your own home security alarm circuit:
- Step 1: Connect the LM358 dual operational amplifier to the breadboard.
- Step 2: Connect the PIR sensor to the LM358 operational amplifier.
- Step 3: Connect the output of the operational amplifier to the 555 timer IC.
- Step 4: Connect the output of the 555 timer IC to the BC547 transistor.
- Step 5: Connect the buzzer and relay to the transistor.
- Step 6: Connect the power supply to the circuit.
- Step 7: Test the circuit by moving in front of the PIR sensor. The buzzer should sound when motion is detected.
Testing and Troubleshooting:
After assembling the circuit, test it to ensure that it functions correctly. If you encounter any issues, check the connections and components for any faults. You can also refer to the circuit diagram and double-check your wiring.
Conclusion:
By following these simple instructions, you can create your own home security alarm circuit to enhance the safety of your residence. Remember to test the circuit periodically and make any necessary adjustments to ensure its effectiveness. Stay safe and secure!
Was this helpful?
0 / 0