How to design a Bluetooth-controlled circuit
Bluetooth-controlled circuits are a popular choice for electronics enthusiasts looking to create wireless and remote-controlled devices. Whether you’re designing a robot, a smart home appliance, or simply want to explore the capabilities of Bluetooth technology, designing a Bluetooth-controlled circuit can be a fun and rewarding experience. In this article, we’ll guide you through the process of designing and building your own Bluetooth-controlled circuit.
Step 1: Define Your Project Goals
Before you start designing your Bluetooth-controlled circuit, it’s important to define your project goals. What do you want your circuit to do? Are you looking to control a specific device or system wirelessly? Understanding your project goals will help you determine the features and components you’ll need for your circuit.
Step 2: Choose the Right Components
Once you’ve defined your project goals, it’s time to choose the right components for your Bluetooth-controlled circuit. You’ll need a Bluetooth module, a microcontroller, sensors (if required), and other electronic components such as resistors, capacitors, and LEDs. Make sure to research and select components that are compatible with each other and meet the requirements of your project.
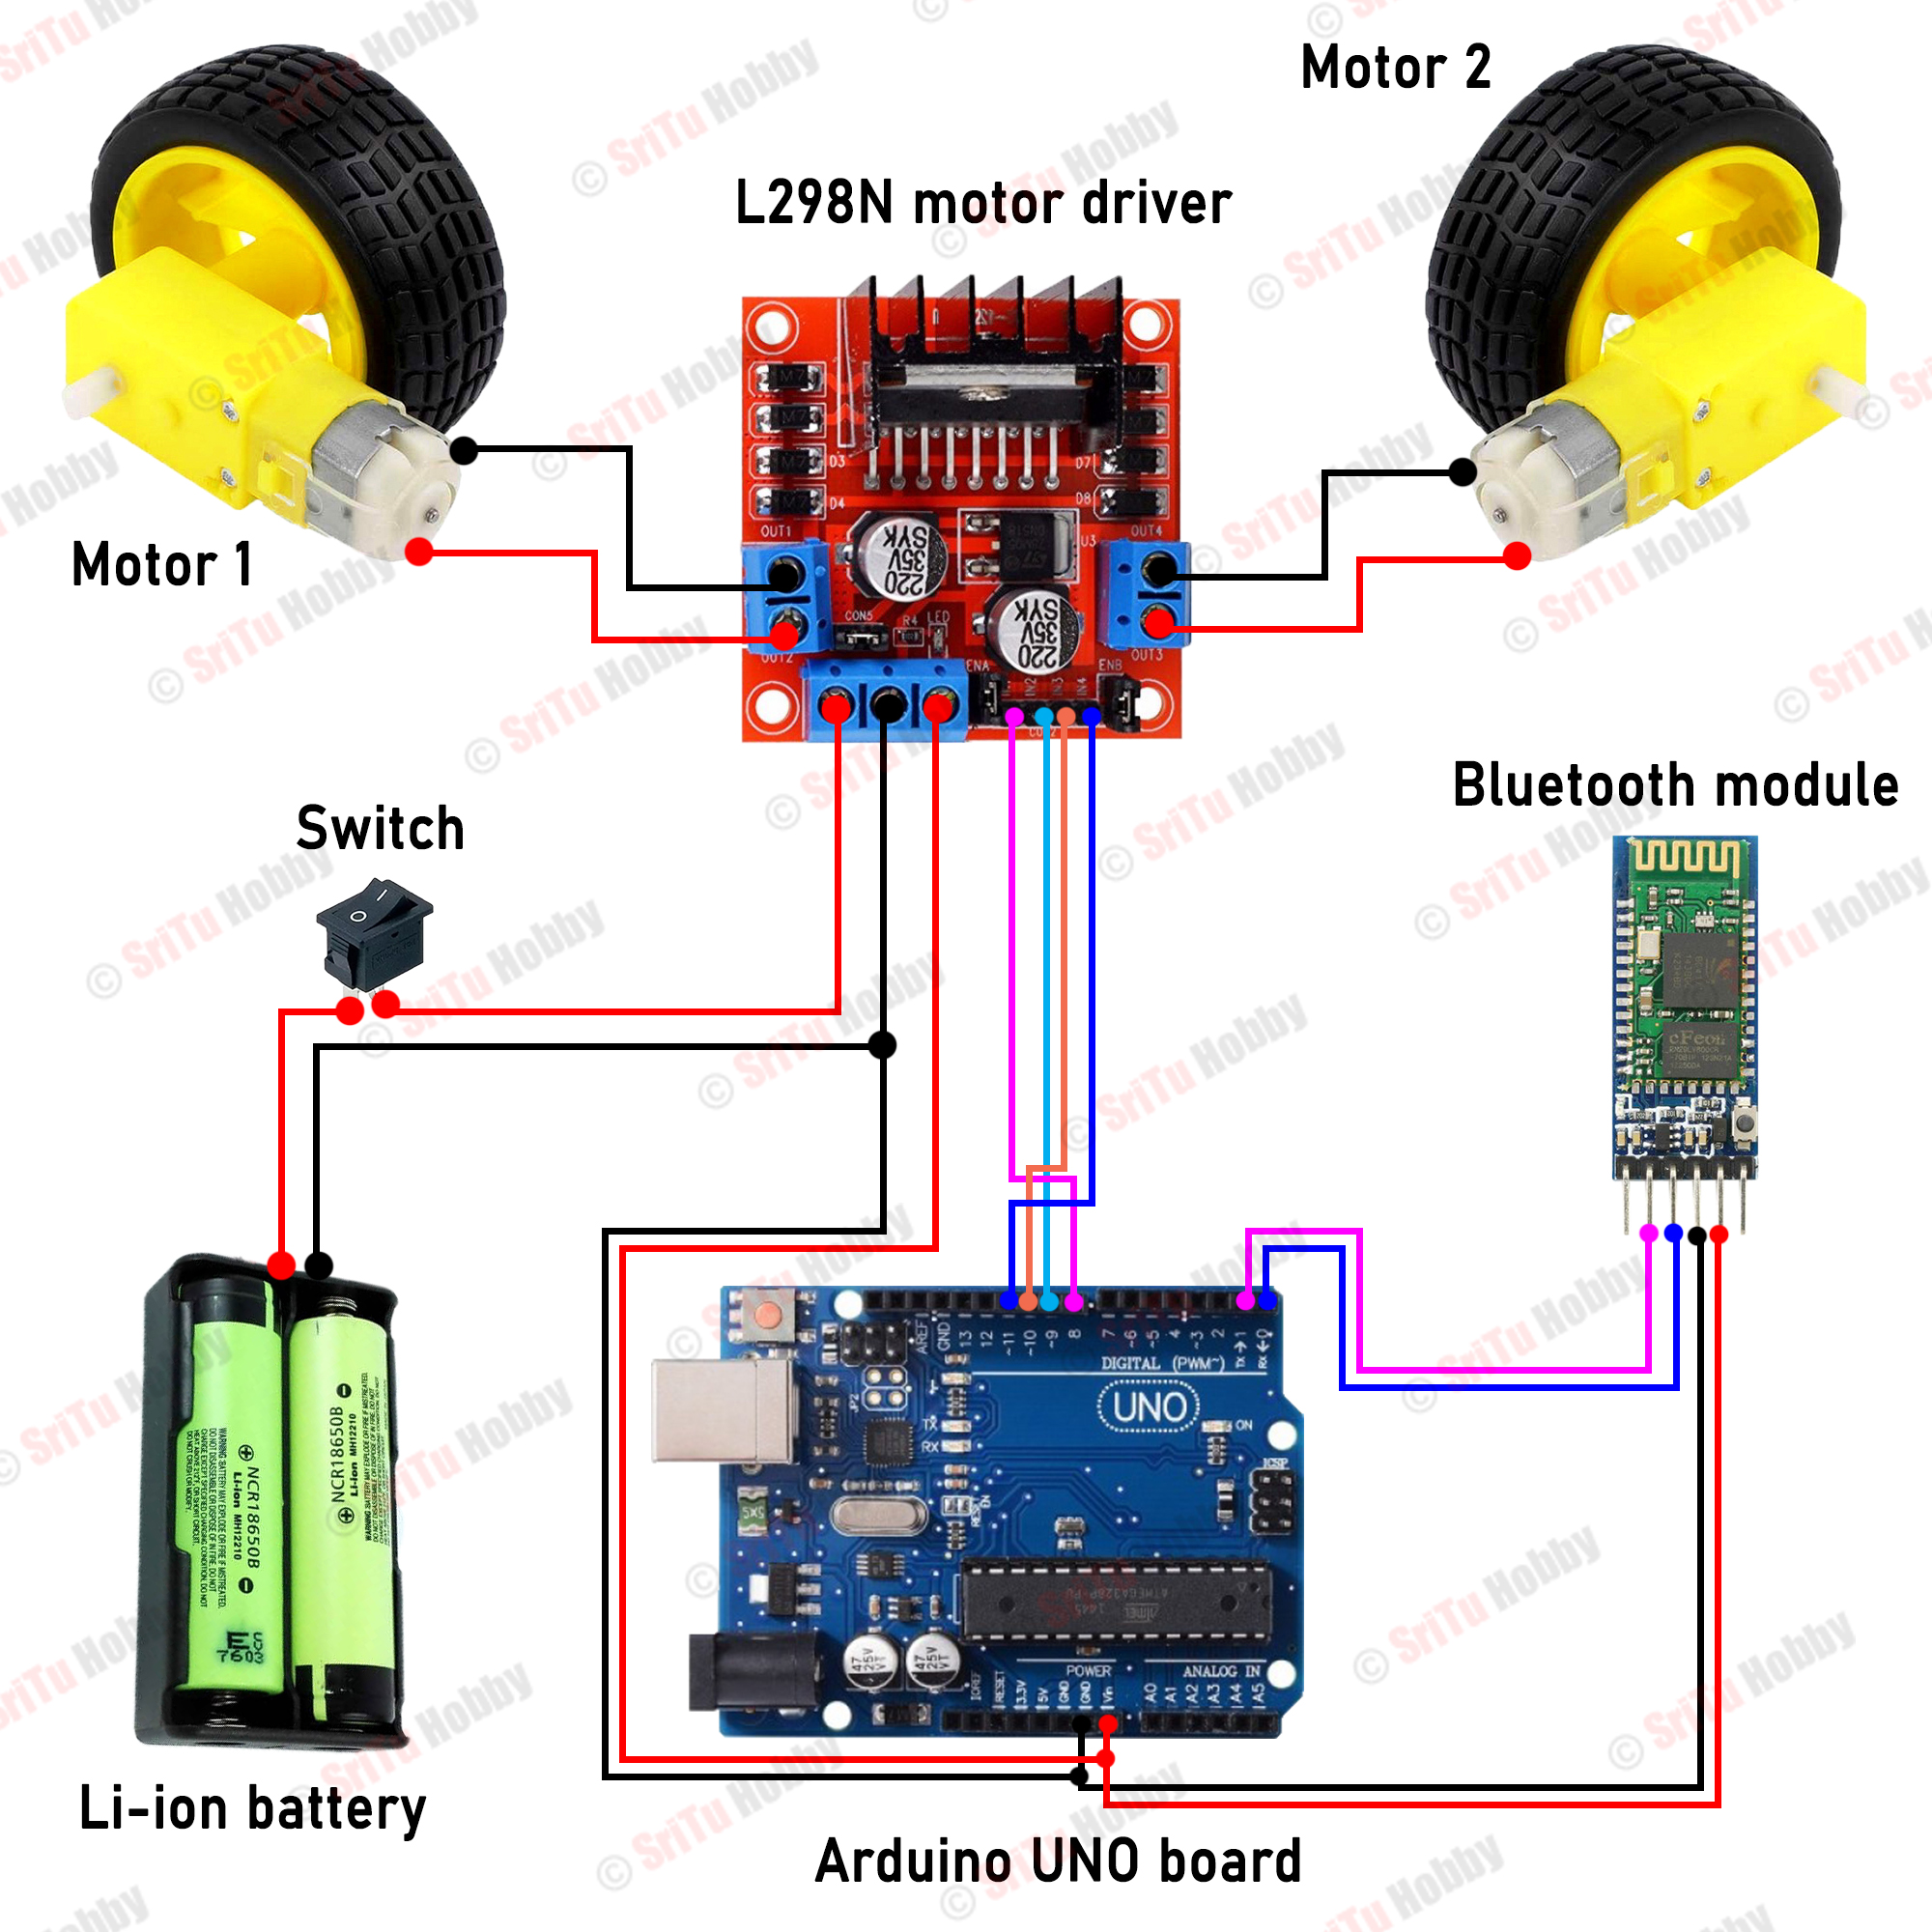
Step 3: Design the Circuit Diagram
After selecting the components, it’s time to design the circuit diagram for your Bluetooth-controlled circuit. You can use software like Fritzing or Eagle to create a schematic of your circuit layout. Make sure to carefully connect all components according to the datasheets and specifications to ensure proper functionality.
Step 4: Write the Code
Once you have your circuit diagram ready, it’s time to write the code for your Bluetooth-controlled circuit. You’ll need to program the microcontroller to communicate with the Bluetooth module and control the devices connected to your circuit. Depending on your project goals, you may need to use programming languages like C, C++, or Arduino IDE.
Step 5: Test and Debug
After writing the code, it’s crucial to test and debug your Bluetooth-controlled circuit. Make sure all components are functioning correctly and that the Bluetooth communication is reliable. Use tools like multimeters, oscilloscopes, and logic analyzers to diagnose and fix any issues in your circuit.
Step 6: Build and Deploy
Once you’ve tested and debugged your Bluetooth-controlled circuit, it’s time to build and deploy your project. You can use a breadboard or PCB to assemble your circuit and solder the components together. Make sure to follow best practices for circuit assembly and wiring to ensure a reliable and functional final product.
Conclusion
Designing a Bluetooth-controlled circuit can be a challenging but rewarding task. By following the steps outlined in this article, you can create your own wireless and remote-controlled devices with ease. Remember to define your project goals, choose the right components, design the circuit diagram, write the code, test and debug, and finally build and deploy your Bluetooth-controlled circuit. With patience and attention to detail, you can bring your electronics projects to life and explore the exciting world of Bluetooth technology.
Was this helpful?
0 / 0