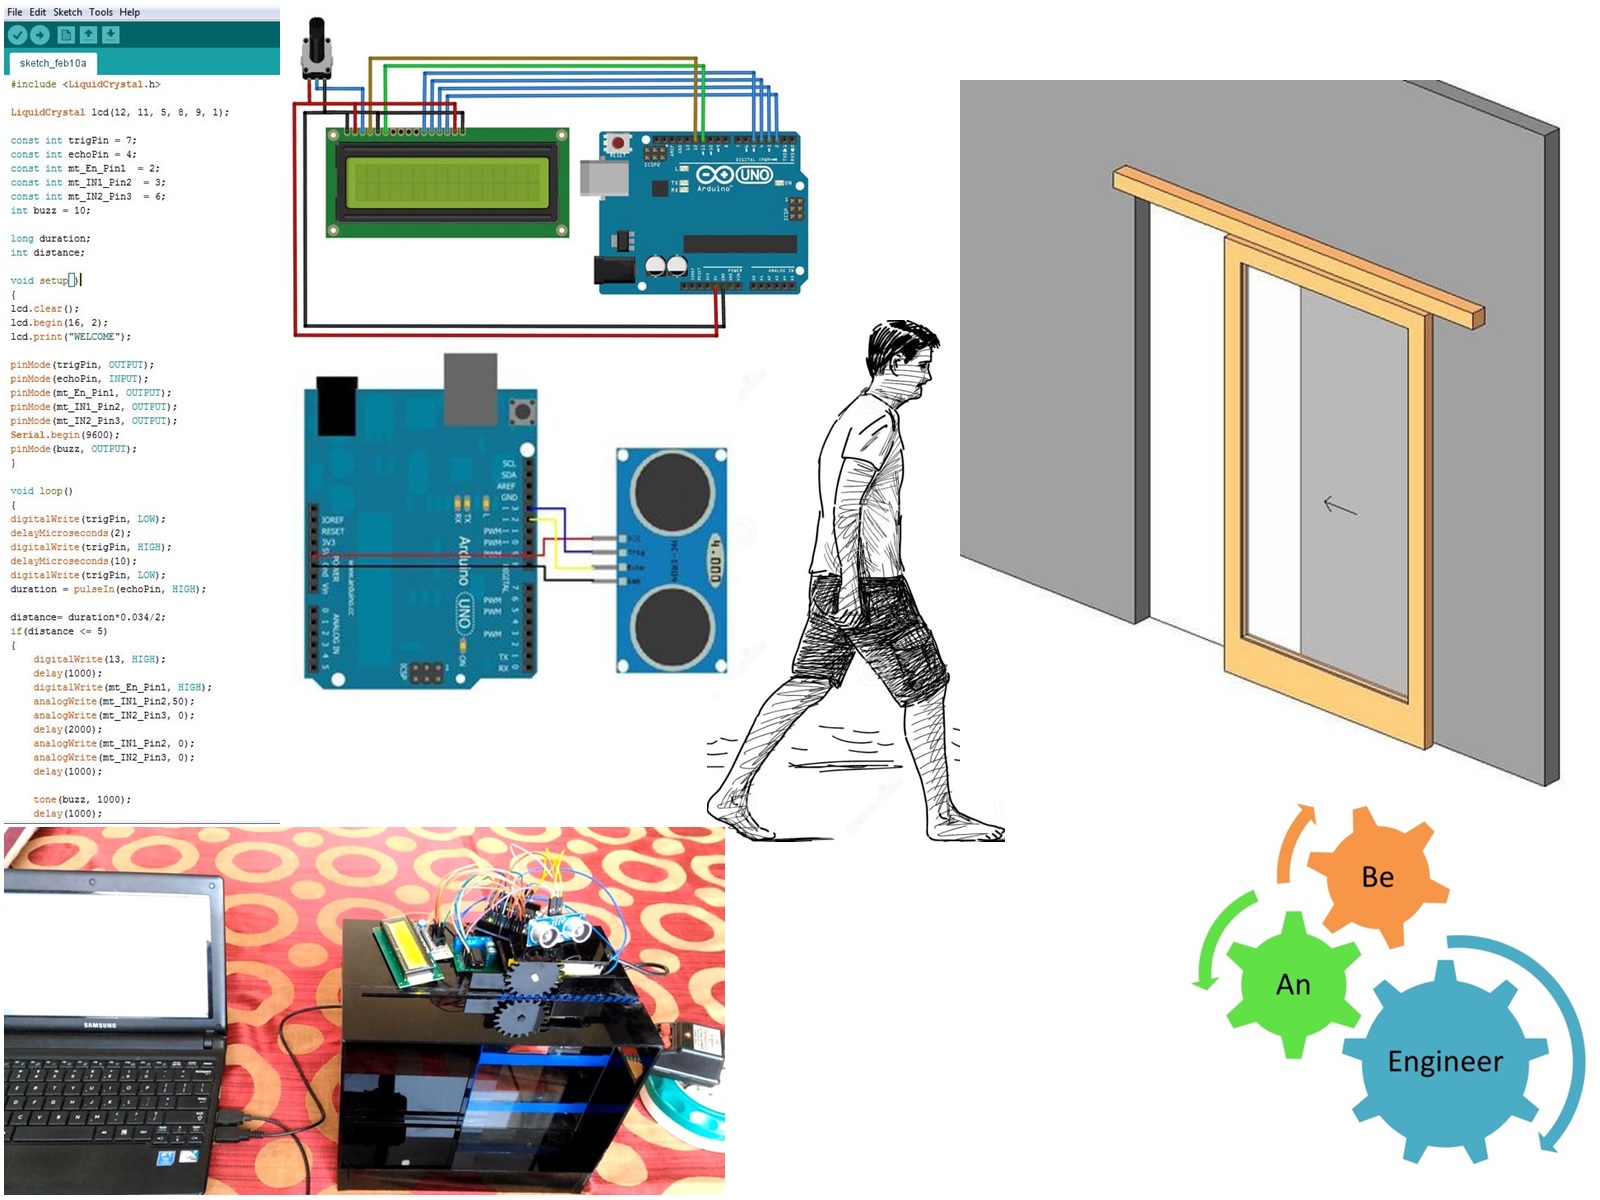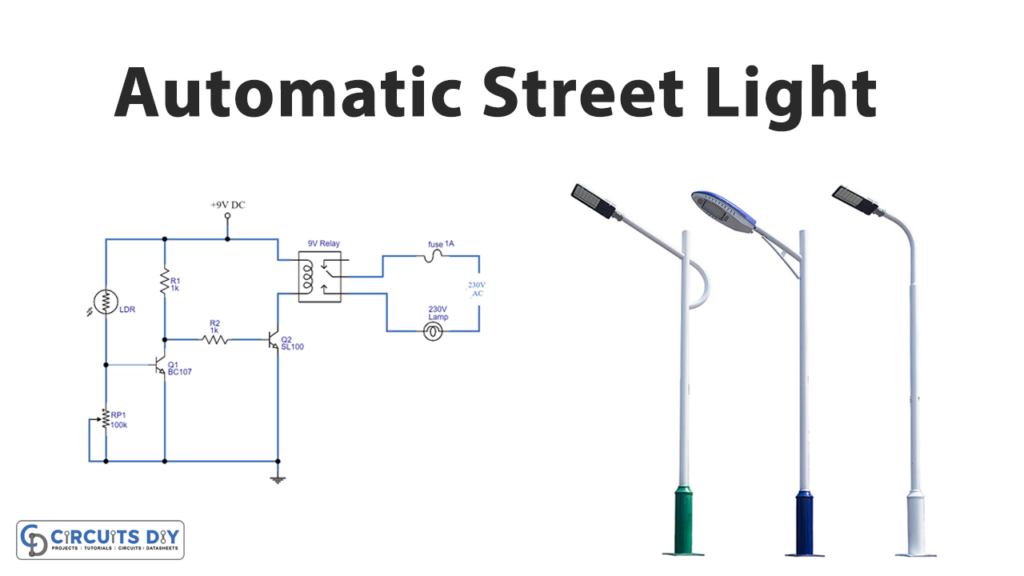
How to Design an Automatic Street Light Circuit
Street lighting is an essential aspect of urban infrastructure, providing safety and security to pedestrians and motorists. However, traditional street lights are not energy-efficient and can contribute to light pollution. Designing an automatic street light circuit can help address these issues by utilizing sensors and timers to adjust lighting levels based on ambient light conditions.
In this article, we will guide you through the process of designing an automatic street light circuit from start to finish. By following these steps, you can create a sustainable and cost-effective lighting solution for your community.
Step 1: Gather Materials
- Microcontroller (e.g., Arduino)
- LDR (Light Dependent Resistor)
- Relay
- LEDs
- Resistors
- Capacitors
- Transistors
- Diodes
- Sensors
Before you begin designing your automatic street light circuit, make sure you have all the necessary materials on hand. These components will be essential for creating a functional and reliable system.
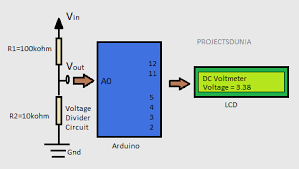
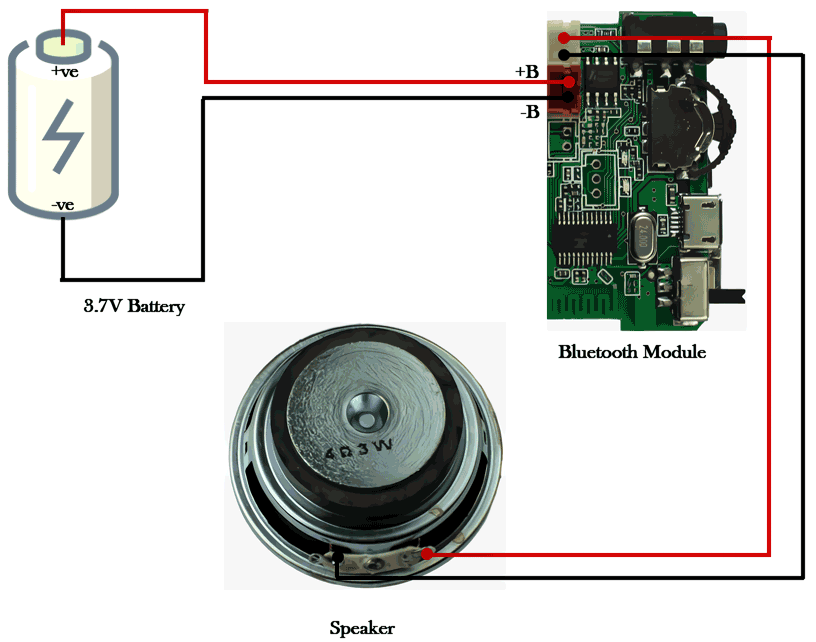
Step 2: Design the Circuit
Start by creating a schematic diagram of your automatic street light circuit. This diagram should outline how each component connects to the microcontroller and power supply. Make sure to pay attention to the placement of sensors and LEDs to ensure proper functionality.
Consider using a relay to control the power supply to the LEDs, as this will allow you to switch them on and off based on sensor readings. You can also incorporate timers and dimmers to further customize the lighting levels based on ambient light conditions.
Step 3: Program the Microcontroller
Once you have designed the circuit, it’s time to program the microcontroller to control the street light system. Use an IDE (Integrated Development Environment) such as Arduino IDE to write and upload the necessary code to the microcontroller.
Make sure to include commands that read sensor data and adjust lighting levels accordingly. You can also add features such as motion detection or remote control to enhance the functionality of your automatic street light circuit.
Step 4: Test and Troubleshoot
Before deploying your automatic street light circuit, it’s important to thoroughly test the system to ensure that everything is working as intended. Check for any wiring issues, sensor malfunctions, or programming errors that could affect the performance of the circuit.
If you encounter any issues during testing, troubleshoot the circuit by checking connections, sensor readings, and code logic. Make any necessary adjustments and retest the system until it is functioning correctly.
Step 5: Deploy the Circuit
Once you have successfully tested and troubleshooted your automatic street light circuit, it’s time to deploy it in the desired location. Mount the circuit in a weatherproof enclosure and connect it to the power supply and LEDs.
Make sure to conduct a final check to ensure that the circuit is operating correctly and that the lighting levels are adjusting according to ambient light conditions. Monitor the system regularly to ensure that it continues to function as expected.
Conclusion
Designing an automatic street light circuit can be a rewarding and impactful project that benefits your community and the environment. By following the steps outlined in this article, you can create a sustainable lighting solution that enhances safety and reduces energy consumption.
Remember to gather all necessary materials, design the circuit carefully, program the microcontroller effectively, test and troubleshoot the system, and deploy it in the desired location. With dedication and attention to detail, you can create an automatic street light circuit that makes a positive difference in your community.
How to Design an Automatic Street Light Circuit
Street lighting is an essential aspect of urban infrastructure, providing safety and security to pedestrians and motorists. However, traditional street lights are not energy-efficient and can contribute to light pollution. Designing an automatic street light circuit can help address these issues by utilizing sensors and timers to adjust lighting levels based on ambient light conditions.
In this article, we will guide you through the process of designing an automatic street light circuit from start to finish. By following these steps, you can create a sustainable and cost-effective lighting solution for your community.
Step 1: Gather Materials
- Microcontroller (e.g., Arduino)
- LDR (Light Dependent Resistor)
- Relay
- LEDs
- Resistors
- Capacitors
- Transistors
- Diodes
- Sensors
Before you begin designing your automatic street light circuit, make sure you have all the necessary materials on hand. These components will be essential for creating a functional and reliable system.
Step 2: Design the Circuit
Start by creating a schematic diagram of your automatic street light circuit. This diagram should outline how each component connects to the microcontroller and power supply. Make sure to pay attention to the placement of sensors and LEDs to ensure proper functionality.
Consider using a relay to control the power supply to the LEDs, as this will allow you to switch them on and off based on sensor readings. You can also incorporate timers and dimmers to further customize the lighting levels based on ambient light conditions.
Step 3: Program the Microcontroller
Once you have designed the circuit, it’s time to program the microcontroller to control the street light system. Use an IDE (Integrated Development Environment) such as Arduino IDE to write and upload the necessary code to the microcontroller.
Make sure to include commands that read sensor data and adjust lighting levels accordingly. You can also add features such as motion detection or remote control to enhance the functionality of your automatic street light circuit.
Step 4: Test and Troubleshoot
Before deploying your automatic street light circuit, it’s important to thoroughly test the system to ensure that everything is working as intended. Check for any wiring issues, sensor malfunctions, or programming errors that could affect the performance of the circuit.
If you encounter any issues during testing, troubleshoot the circuit by checking connections, sensor readings, and code logic. Make any necessary adjustments and retest the system until it is functioning correctly.
Step 5: Deploy the Circuit
Once you have successfully tested and troubleshooted your automatic street light circuit, it’s time to deploy it in the desired location. Mount the circuit in a weatherproof enclosure and connect it to the power supply and LEDs.
Make sure to conduct a final check to ensure that the circuit is operating correctly and that the lighting levels are adjusting according to ambient light conditions. Monitor the system regularly to ensure that it continues to function as expected.
Conclusion
Designing an automatic street light circuit can be a rewarding and impactful project that benefits your community and the environment. By following the steps outlined in this article, you can create a sustainable lighting solution that enhances safety and reduces energy consumption.
Remember to gather all necessary materials, design the circuit carefully, program the microcontroller effectively, test and troubleshoot the system, and deploy it in the desired location. With dedication and attention to detail, you can create an automatic street light circuit that makes a positive difference in your community.