How to Create a DIY Rain Alarm Circuit
Are you tired of getting caught in the rain without an umbrella? Do you want to be alerted when it starts to rain so you can take cover? In this article, we will show you how to create a simple do-it-yourself (DIY) rain alarm circuit that will notify you when it starts to rain. This project is easy to build and requires minimal materials, making it perfect for beginners or those looking for a fun and practical electronics project.
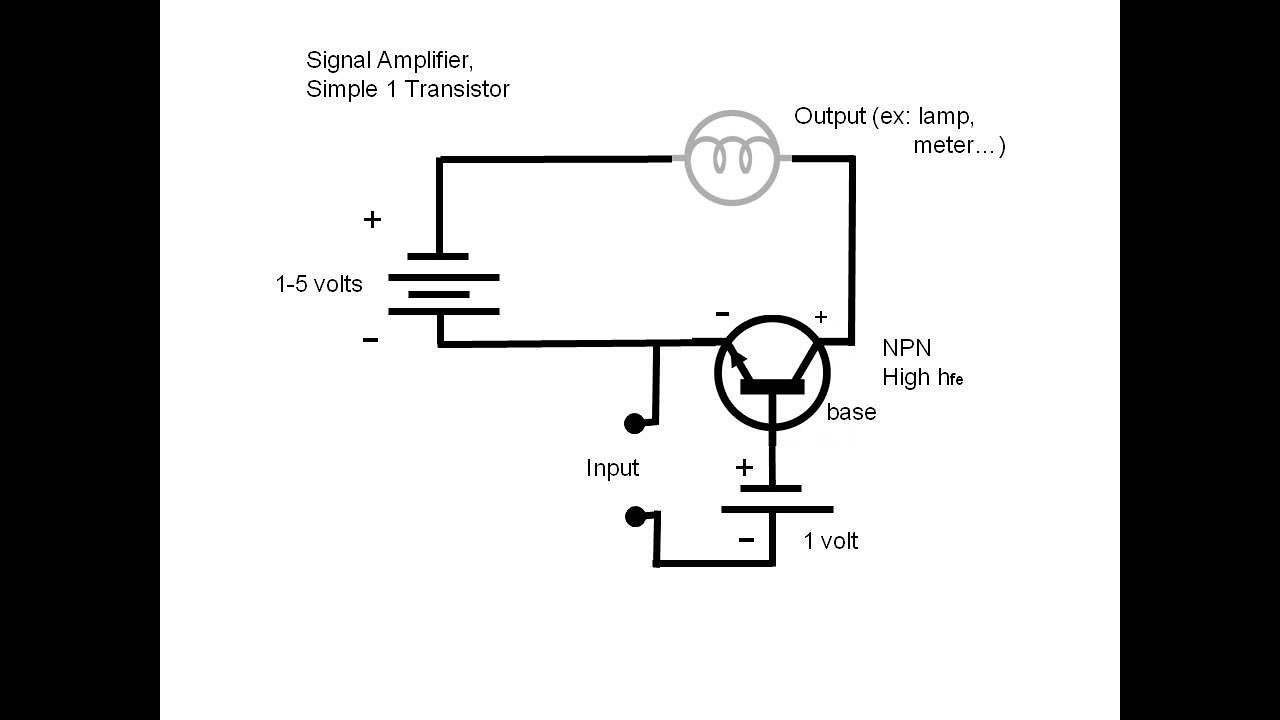
Before we get started, let’s take a look at how a rain alarm circuit works. Essentially, the circuit uses a rain sensor to detect when water is present. When the sensor detects moisture, it triggers an alarm, alerting you that it is raining. This technology can be useful for a variety of applications, such as protecting electronics from water damage or simply providing an early warning system for outdoor activities.
Now that you understand the basics, let’s dive into the step-by-step process of creating your own DIY rain alarm circuit.
Materials You Will Need
- Rain sensor module
- Arduino board
- Breadboard
- Jumper wires
- Buzzer or LED
- Resistor (220 ohms)
- USB cable
Step 1: Set Up Your Components
First, connect your Arduino board to the breadboard using jumper wires. Then, connect the rain sensor module to the breadboard as well. Make sure to follow the wiring diagram provided with your rain sensor module to ensure proper connections.
Step 2: Program Your Arduino Board
Next, upload the following code to your Arduino board:
void setup() {
  pinMode(2, INPUT);
  pinMode(3, OUTPUT);
}

void loop() {
  int rainSensor = digitalRead(2);

  if (rainSensor == HIGH) {
    digitalWrite(3, HIGH);
  } else {
    digitalWrite(3, LOW);
  }
}
This code sets up pin 2 of the Arduino board as an input for the rain sensor and pin 3 as an output for the buzzer or LED. When the rain sensor detects moisture, the buzzer or LED will be activated, alerting you that it is raining.
Step 3: Test Your Circuit
Once you have uploaded the code to your Arduino board, test your circuit by pouring a small amount of water on the rain sensor. If everything is set up correctly, the buzzer or LED should go off, indicating that the circuit is working properly.
Step 4: Mount Your Circuit
Finally, mount your circuit in a location where it will be exposed to the elements. This could be outside your window, on your porch, or in your garden. Make sure to secure the components to prevent them from getting damaged by wind or rain.
And there you have it – your very own DIY rain alarm circuit! With just a few simple components and a little bit of coding, you can create a practical device that will keep you dry during those unexpected rain showers.
Have fun building and experimenting with your new rain alarm circuit. Stay dry and happy tinkering!
How to Create a DIY Rain Alarm Circuit
Are you tired of getting caught in the rain without an umbrella? Do you want to be alerted when it starts to rain so you can take cover? In this article, we will show you how to create a simple do-it-yourself (DIY) rain alarm circuit that will notify you when it starts to rain. This project is easy to build and requires minimal materials, making it perfect for beginners or those looking for a fun and practical electronics project.
Before we get started, let’s take a look at how a rain alarm circuit works. Essentially, the circuit uses a rain sensor to detect when water is present. When the sensor detects moisture, it triggers an alarm, alerting you that it is raining. This technology can be useful for a variety of applications, such as protecting electronics from water damage or simply providing an early warning system for outdoor activities.
Now that you understand the basics, let’s dive into the step-by-step process of creating your own DIY rain alarm circuit.
Materials You Will Need
- Rain sensor module
- Arduino board
- Breadboard
- Jumper wires
- Buzzer or LED
- Resistor (220 ohms)
- USB cable
Step 1: Set Up Your Components
First, connect your Arduino board to the breadboard using jumper wires. Then, connect the rain sensor module to the breadboard as well. Make sure to follow the wiring diagram provided with your rain sensor module to ensure proper connections.
Step 2: Program Your Arduino Board
Next, upload the following code to your Arduino board:
void setup() {
  pinMode(2, INPUT);
  pinMode(3, OUTPUT);
}

void loop() {
  int rainSensor = digitalRead(2);

  if (rainSensor == HIGH) {
    digitalWrite(3, HIGH);
  } else {
    digitalWrite(3, LOW);
  }
}
This code sets up pin 2 of the Arduino board as an input for the rain sensor and pin 3 as an output for the buzzer or LED. When the rain sensor detects moisture, the buzzer or LED will be activated, alerting you that it is raining.
Step 3: Test Your Circuit
Once you have uploaded the code to your Arduino board, test your circuit by pouring a small amount of water on the rain sensor. If everything is set up correctly, the buzzer or LED should go off, indicating that the circuit is working properly.
Step 4: Mount Your Circuit
Finally, mount your circuit in a location where it will be exposed to the elements. This could be outside your window, on your porch, or in your garden. Make sure to secure the components to prevent them from getting damaged by wind or rain.
And there you have it – your very own DIY rain alarm circuit! With just a few simple components and a little bit of coding, you can create a practical device that will keep you dry during those unexpected rain showers.
Have fun building and experimenting with your new rain alarm circuit. Stay dry and happy tinkering!