How to Build a DIY LED Matrix Display
LED matrix displays are a fun and versatile way to add a touch of customization to your space. Whether you want to display messages, create cool animations, or just add a unique element to your home decor, building your own LED matrix display is a great way to get creative. In this article, we’ll show you how to build a DIY LED matrix display from scratch. So grab your tools and let’s get started!
Materials You’ll Need:
- LEDs (quantity depends on how big you want your display)
- Perforated circuit board
- Jumper wires
- Arduino Uno (or any other microcontroller)
- Power supply
- Soldering iron and solder
- Header pins
- Matrix driver IC (such as MAX7219 or HT1632C)
- PCB for the matrix driver
- Enclosure (optional)
- Tools: wire cutters, pliers, screwdriver, etc.
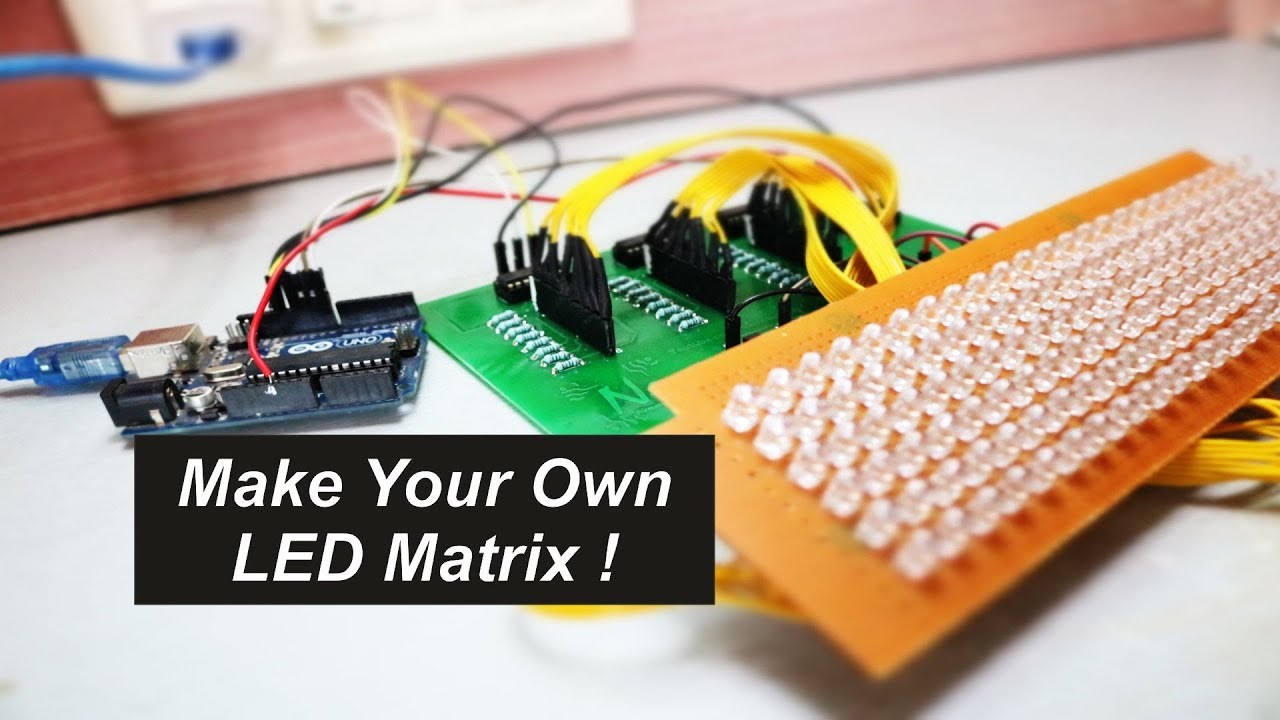
Step 1: Prepare the LED Matrix
Start by laying out your LEDs on the perforated circuit board in a matrix formation. You can arrange them in any pattern you like, but a common configuration is an 8×8 grid for a total of 64 LEDs. Make sure to leave some space between each LED for soldering.
Once you’re happy with the layout, solder the LEDs onto the board, making sure to connect the positive leg of each LED to the negative leg of the next one. This will create a series connection that allows you to control each LED individually.
Step 2: Connect the Matrix to the Arduino
Next, you’ll need to connect the LED matrix to your Arduino Uno. Solder header pins to the matrix driver PCB, then connect the jumper wires from the matrix driver to the Arduino according to the manufacturer’s instructions. This will allow the Arduino to communicate with the matrix and control the individual LEDs.
Step 3: Write the Code
Now it’s time to write some code to make your LED display come to life. There are plenty of libraries and tutorials available online to help you get started with programming LED matrix displays. You can create animations, scrolling text, or even interactive games – the possibilities are endless!
Once you’ve written your code, upload it to the Arduino and watch as your LED matrix display lights up with your custom design.
Step 4: Enclosure (Optional)
If you want to protect your LED matrix display or give it a more polished look, consider building an enclosure for it. This can be as simple as a wooden frame or a 3D-printed case – the choice is up to you!
Once your enclosure is ready, place your LED matrix display inside and show off your creation to friends and family.
Conclusion
Building your own DIY LED matrix display is a rewarding and fun project that can add a personal touch to your space. With just a few materials and some creativity, you can create a custom display that will impress everyone who sees it. So what are you waiting for? Get started on your LED matrix display today!
Was this helpful?
0 / 0