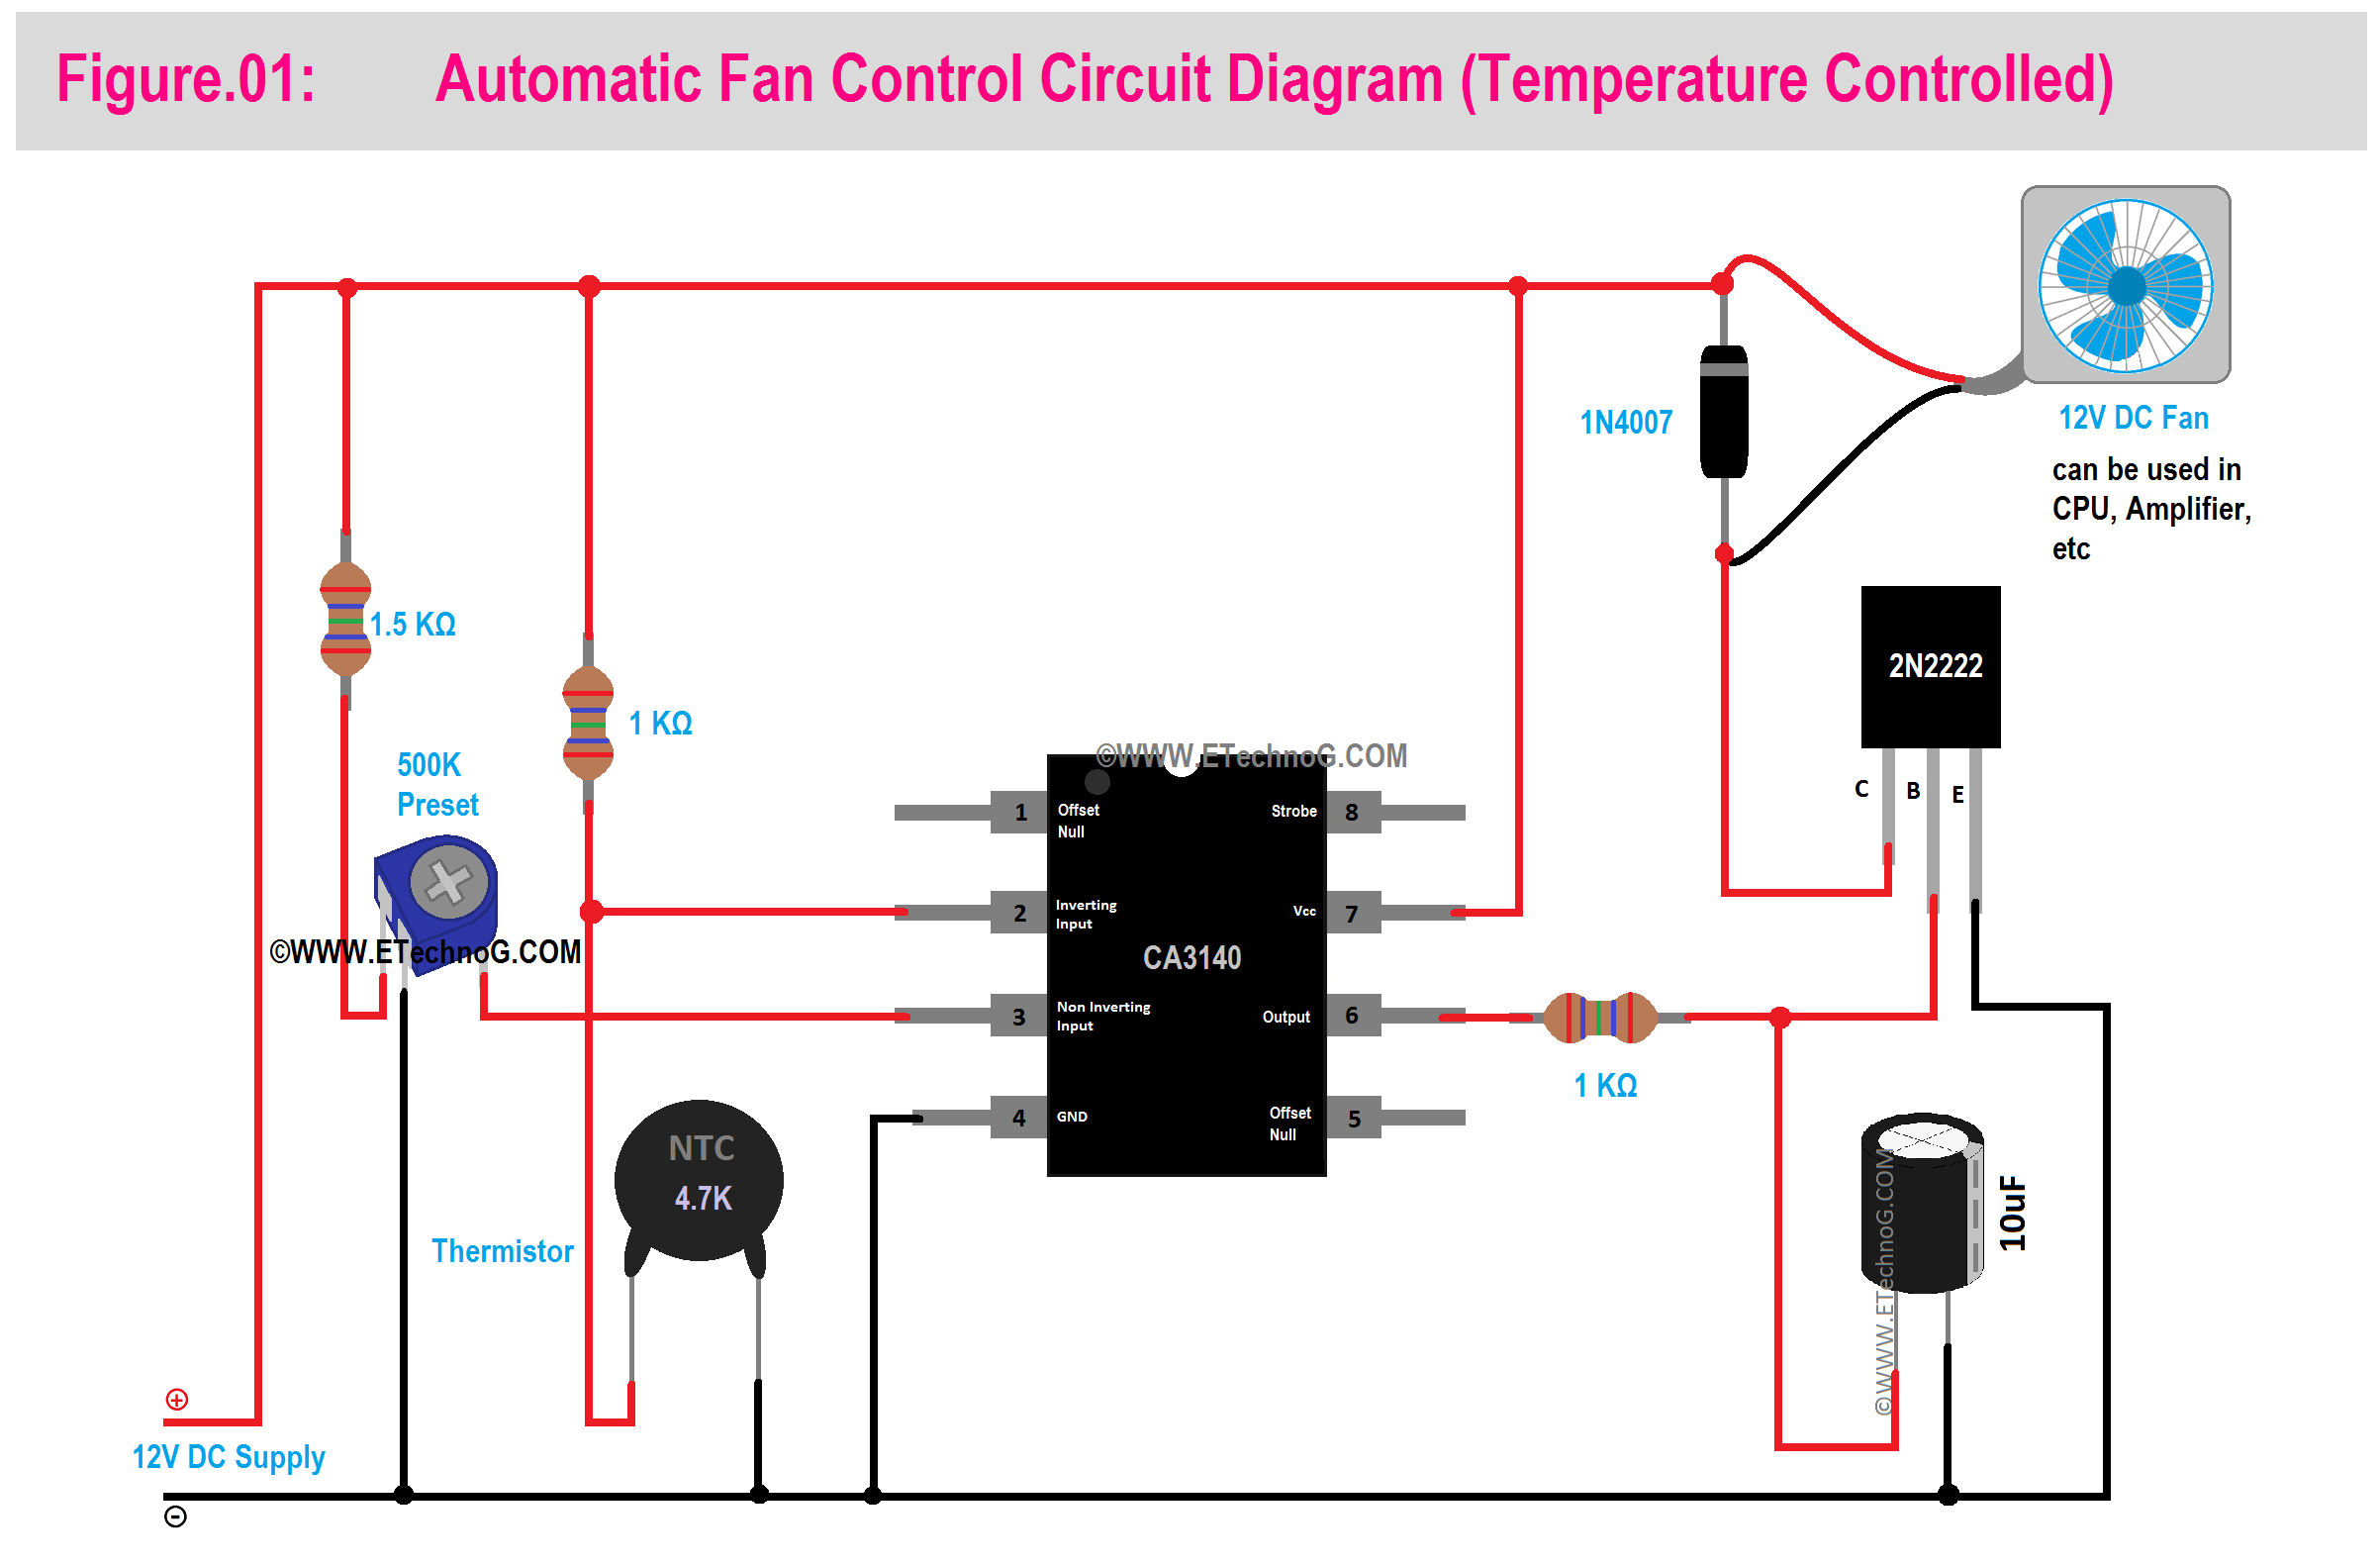
How to Design an Automatic Fan Controller?
Designing an automatic fan controller can be a fun and rewarding project for DIY enthusiasts. Not only does it allow you to automate the operation of your fan based on specific conditions, but it also gives you more control over the temperature and air circulation in your space. In this article, we will discuss the steps involved in designing an automatic fan controller from scratch.
Step 1: Determine Your Requirements
The first step in designing an automatic fan controller is to determine your specific requirements. Consider factors such as the size of the space, the desired temperature range, and the type of fan you will be using. This will help you narrow down the components you will need for your project.
Step 2: Gather Your Components
Once you have identified your requirements, it’s time to gather the components for your automatic fan controller. Some of the key components you will need include a temperature sensor, a microcontroller, a relay module, and a fan. You may also need additional components such as resistors, capacitors, and LEDs depending on your specific design.
Step 3: Assemble Your Circuit
Next, you will need to assemble the circuit for your automatic fan controller. Start by connecting the temperature sensor to the microcontroller, and then connect the relay module to the microcontroller. Make sure to follow the wiring diagram for your specific components to ensure proper connections.
Step 4: Program Your Microcontroller
Once you have assembled your circuit, it’s time to program your microcontroller. Write a program that reads the temperature sensor data and activates the relay module to turn on or off the fan based on the temperature readings. You can also include additional features such as speed control and timer functions in your program.
Step 5: Test and Calibrate Your Controller
After programming your microcontroller, it’s important to test and calibrate your automatic fan controller. Place the temperature sensor in different locations around your space to ensure accurate temperature readings. Adjust the settings in your program as needed to achieve the desired temperature and fan operation.
Step 6: Install Your Controller
Once you have tested and calibrated your automatic fan controller, it’s time to install it in your space. Mount the fan in an optimal location for air circulation, and place the temperature sensor in a location that accurately reflects the ambient temperature. Connect the controller to a power source and your fan, and your automatic fan controller is ready to use!
Conclusion
Designing an automatic fan controller is a rewarding project that allows you to customize the temperature and air circulation in your space. By following the steps outlined in this article, you can create a functional and efficient automatic fan controller that meets your specific requirements. So why wait? Start designing your automatic fan controller today!
Was this helpful?
0 / 0