How to Design a Power Inverter Circuit
Power inverters are essential devices that convert direct current (DC) into alternating current (AC), allowing you to power various electronic devices when you don’t have access to grid power. Designing a power inverter circuit can be a challenging yet rewarding process that requires a good understanding of electrical principles and components. In this guide, we will walk you through the steps to design a basic power inverter circuit.
Step 1: Determine Power Requirements
The first step in designing a power inverter circuit is to determine the power requirements of the devices you plan to power. This includes considering the wattage, voltage, and frequency requirements of the devices. Once you have a clear understanding of the power requirements, you can begin designing the circuit.
Step 2: Select the Components
Next, you will need to select the components for your power inverter circuit. This includes choosing the appropriate transistors, diodes, capacitors, and resistors based on the power requirements of your devices. It is essential to select high-quality components to ensure the efficiency and reliability of your power inverter circuit.
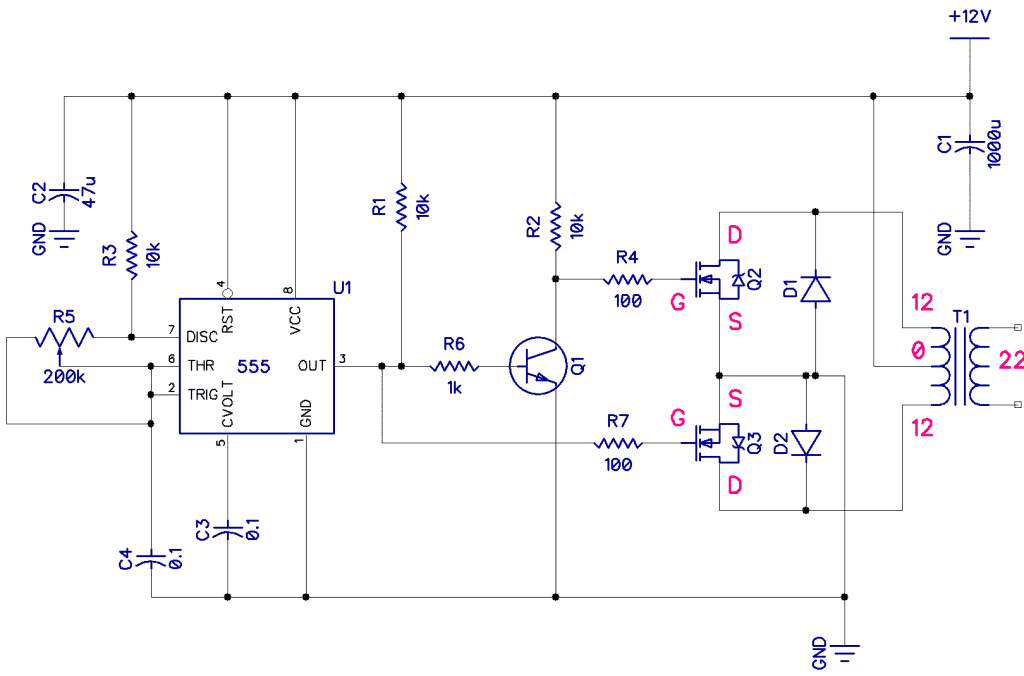
Step 3: Design the Circuit Diagram
Once you have selected the components, you can start designing the circuit diagram for your power inverter. This diagram will illustrate how the components are connected and how the DC input is converted into AC output. Pay close attention to the placement and connection of each component to ensure the proper functioning of the circuit.
Step 4: Build the Circuit Prototype
After designing the circuit diagram, it is time to build a prototype of your power inverter circuit. Use a breadboard to connect the components according to the circuit diagram. Test the circuit prototype to ensure that it functions as intended and make any necessary adjustments.
Step 5: Test and Optimize the Circuit
Once you have built the circuit prototype, it is essential to test and optimize the circuit for efficiency and performance. Use a multimeter to measure the voltage, current, and frequency output of the power inverter. Make any necessary adjustments to improve the performance of the circuit.
Step 6: Finalize the Design
After testing and optimizing the circuit, you can finalize the design of your power inverter circuit. Document the circuit diagram, component list, and any modifications made during the testing phase. Consider creating a PCB layout for the final design for a more compact and professional-looking power inverter circuit.
Conclusion
Designing a power inverter circuit requires careful planning, component selection, and testing to ensure the efficiency and reliability of the circuit. By following the steps outlined in this guide, you can create a custom power inverter circuit that meets your specific power requirements. Remember to prioritize safety and quality when designing and building your power inverter circuit.
Was this helpful?
0 / 0