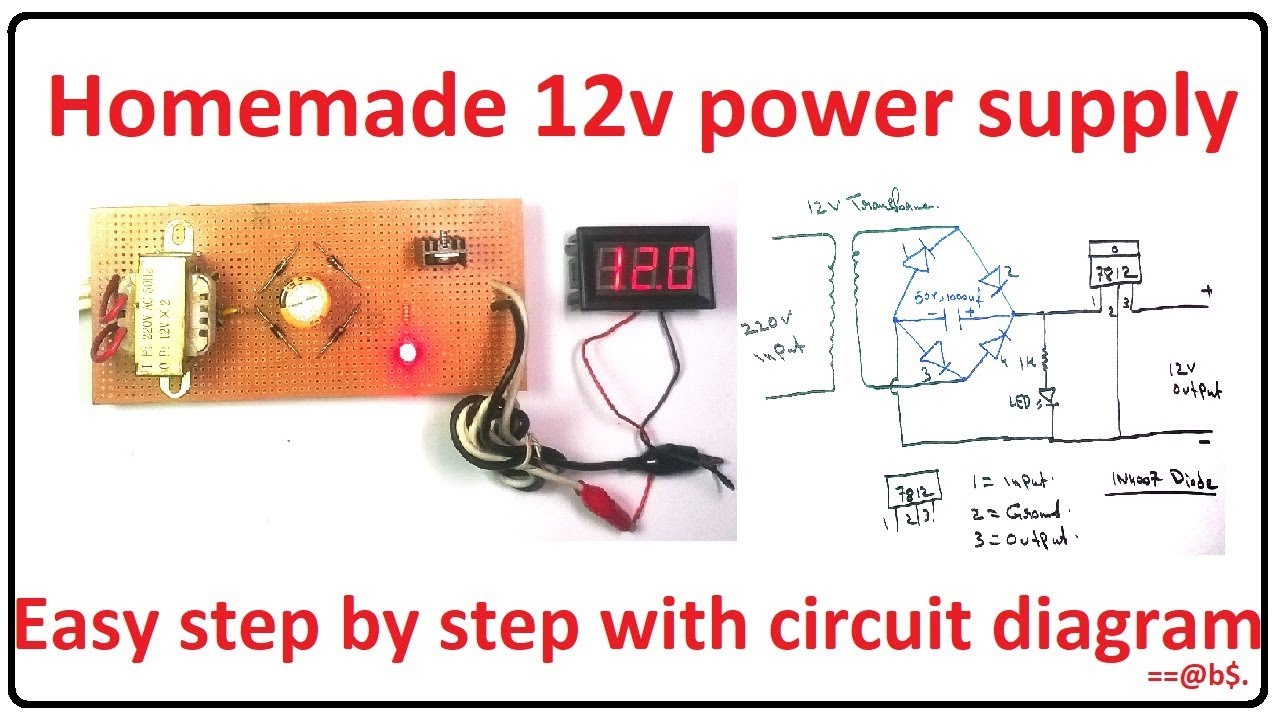
How to Make a DIY Power Supply Circuit
Are you looking to build your own power supply circuit from scratch? Maybe you want to power a small electronics project or simply have a backup power source for your devices. Whatever the reason, creating a DIY power supply circuit can be a fun and rewarding project. In this article, we will guide you through the process step by step so you can build your own power supply circuit with ease.
Step 1: Gather Your Materials
Before you start building your DIY power supply circuit, you will need to gather all the necessary materials. Here is a list of items you will need:
- Breadboard
- LM317 Adjustable Voltage Regulator
- Capacitors (0.1uf and 1uf)
- Diode (1N4001)
- Resistors
- LED (optional)
- Battery Clip
- 9V Battery
- Wires
- Soldering Iron
- Solder
Once you have all the materials ready, you can move on to the next step.
Step 2: Connect the Circuit
Start by placing the LM317 voltage regulator on the breadboard. Connect the pins of the LM317 as follows: pin 1 (adjust) to the positive rail, pin 2 (output) to the negative rail, and pin 3 (input) to the negative rail through a 220-ohm resistor. Connect pin 2 (output) to the positive rail through a 10uf capacitor. Connect the cathode of the 1N4001 diode to the positive rail and the anode to the output pin of the LM317. Connect the positive terminal of the battery clip to the input pin of the LM317 and the negative terminal to the negative rail.
Optional: You can also add an LED to indicate when the circuit is powered on. Connect the longer leg of the LED to the output pin of the LM317 and the shorter leg to the negative rail through a 220-ohm resistor.
Step 3: Test the Circuit
Before using your DIY power supply circuit, make sure to test it to ensure it is working correctly. Connect a multimeter to the output of the circuit and adjust the LM317 regulator to your desired output voltage. You can use the formula Vout = 1.25 * (1 + R2/R1) to calculate the output voltage. Once you have set the output voltage, disconnect the multimeter and test the circuit with your electronic devices.
Step 4: Finalize Your DIY Power Supply Circuit
Once you have confirmed that your DIY power supply circuit is working correctly, you can finalize it. You can solder the components onto a protoboard for a more permanent setup or leave them on the breadboard for easy modifications. You can also add a power switch or enclosure to protect the circuit and make it more user-friendly.
Congratulations! You have successfully created your own DIY power supply circuit. Now you can power your electronic projects or devices with your homemade power supply. Enjoy your new creation and happy building!
Was this helpful?
0 / 0