How to Make a Simple Voltage Regulator
Are you tired of dealing with fluctuating voltages that can damage your electronic devices? Do you want to ensure a steady and regulated power supply for your circuits? Look no further! In this article, we will guide you through the process of making a simple voltage regulator from scratch. With just a few basic components, you can create a reliable regulator that will keep your circuits safe and sound.
What is a Voltage Regulator?
Before we dive into the tutorial, let’s first understand what a voltage regulator is. A voltage regulator is a circuit that maintains a constant output voltage regardless of changes in input voltage or load conditions. It is an essential component in many electronic devices to ensure a stable power supply.
Components Required
- LM317 Voltage Regulator IC
- 2 x Capacitors (1uF and 0.1uF)
- Resistors (220 ohm and 240 ohm)
- Heat sink
- Breadboard
- Jumper wires
- DC Power Supply
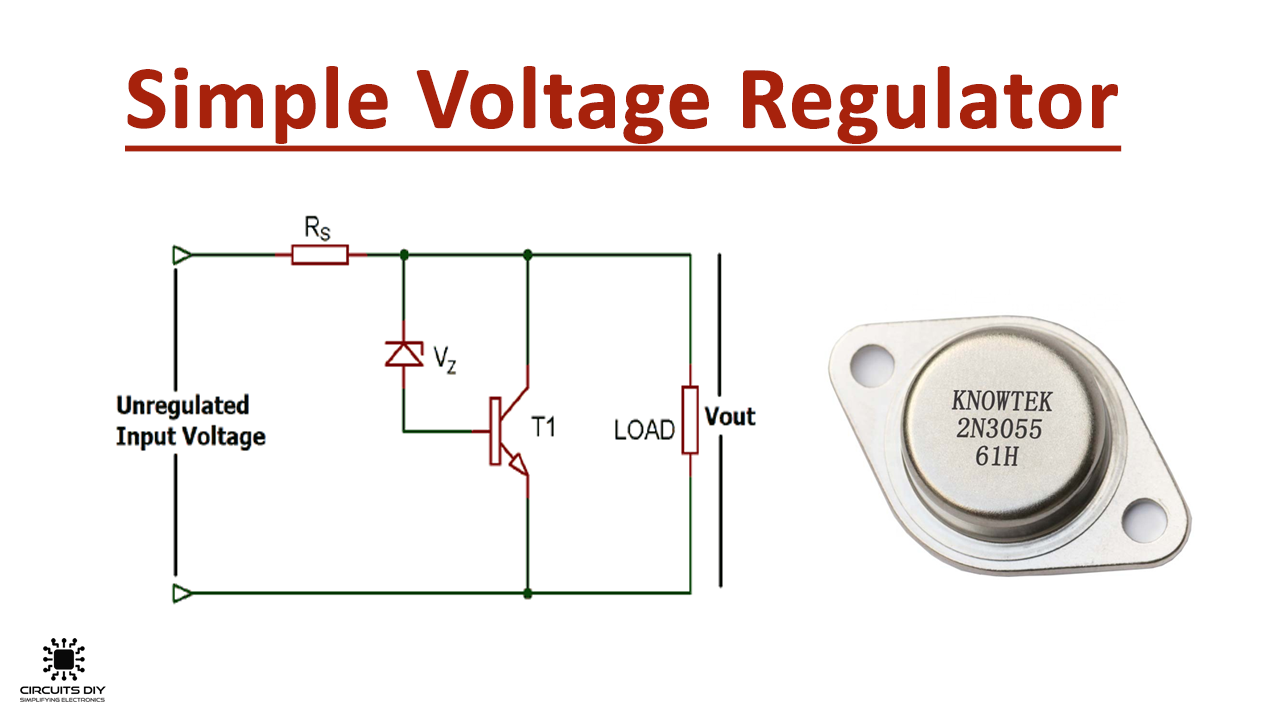
Circuit Diagram
Now that you have gathered all the necessary components, it’s time to set up the circuit. Follow the diagram below to create your simple voltage regulator:

How it Works
The LM317 voltage regulator is a versatile device that can be configured to provide a fixed output voltage by adjusting the resistor values. In our circuit, the values of the resistors R1 and R2 determine the output voltage according to the formula Vout = 1.25*(1 + R2/R1). The capacitors are used to filter out any noise or fluctuations in the input voltage.
Assembling the Circuit
Begin by placing the LM317 IC on the breadboard and connect the input, output, and adjust pins as per the diagram. Add the capacitors and resistors in their respective positions. Make sure to attach a heat sink to the LM317 to prevent overheating. Lastly, connect the circuit to the DC power supply, and you’re ready to go!
Testing the Voltage Regulator
Before connecting any electronic devices, it’s crucial to test the voltage regulator to ensure it’s working correctly. Use a multimeter to measure the output voltage and adjust the values of R1 and R2 if needed to achieve the desired output voltage. Once you’re satisfied with the results, you can safely connect your circuits to the regulated power supply.
Conclusion
Congratulations! You have successfully created a simple voltage regulator that will provide stable power for your electronic projects. Feel free to experiment with different resistor values to obtain various output voltages. Remember, a well-regulated power supply is the key to ensuring the longevity of your circuits and devices. Happy tinkering!
Was this helpful?
0 / 0